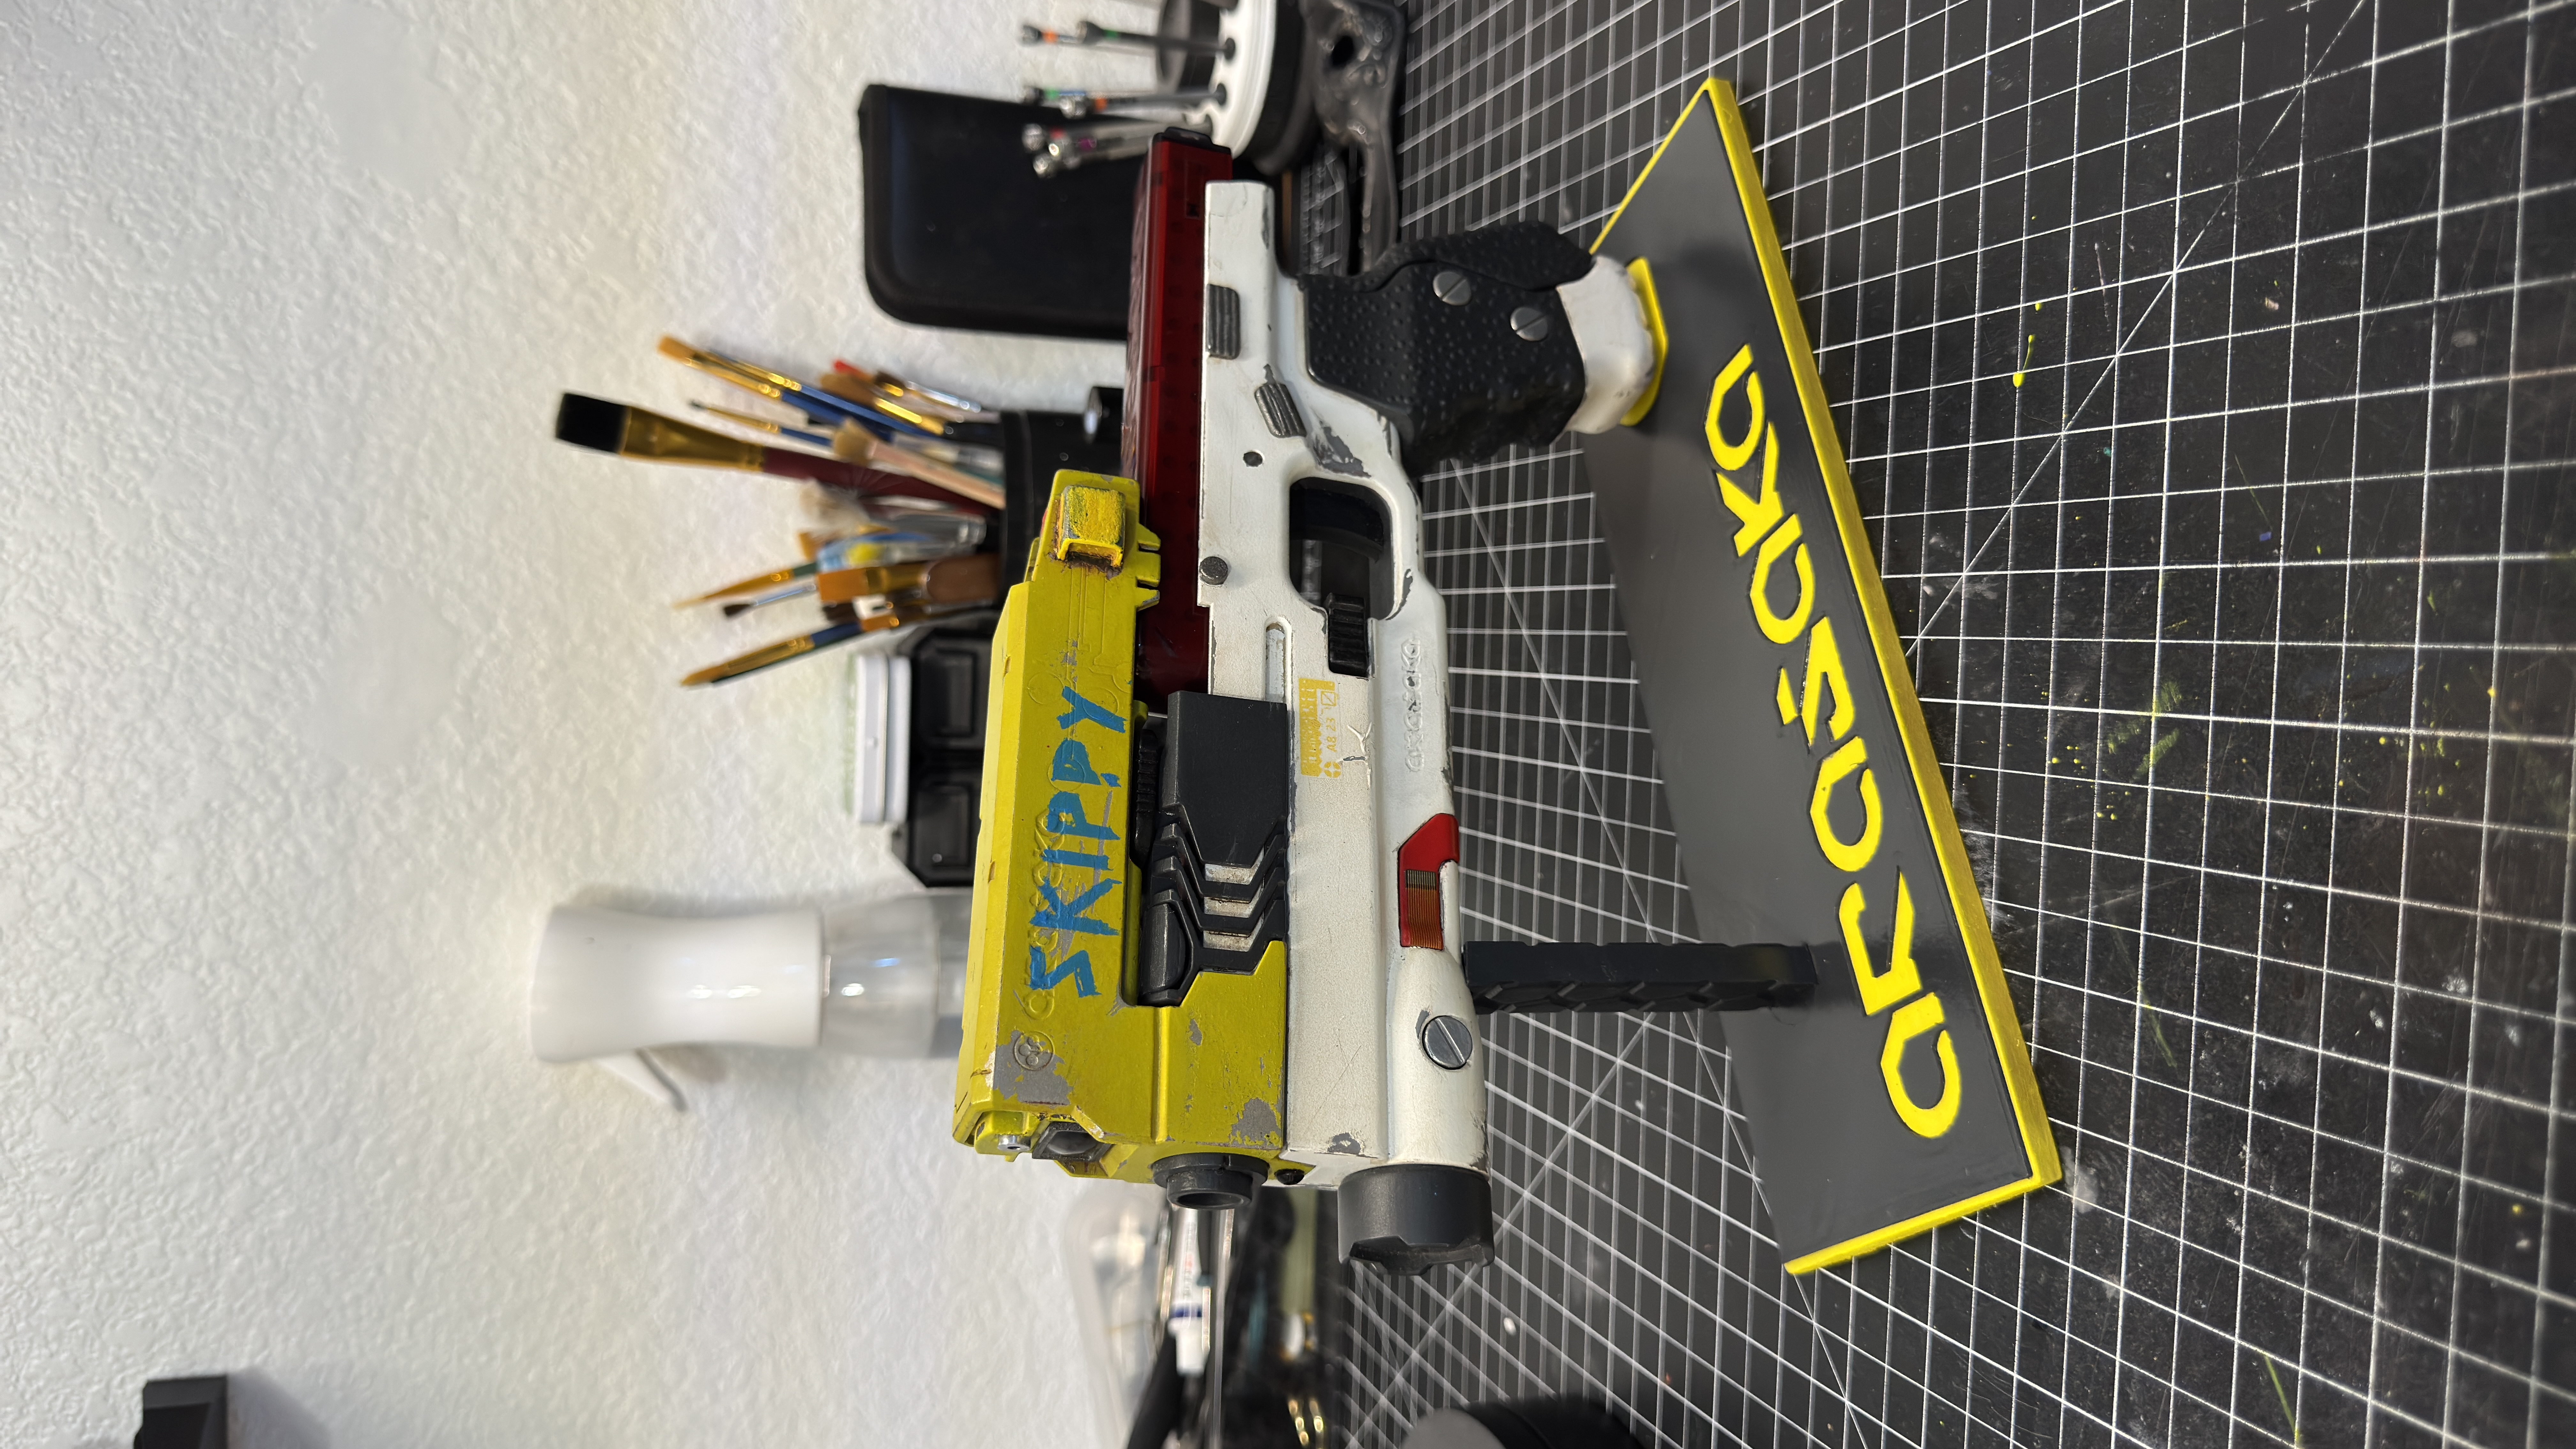
Skippy Replica
Building Skippy: My Screen Accurate HJKE 11 Yukimura Replica from Cyberpunk 2077
There are builds that go exactly according to plan. This definitely was not one of them.
I've wanted to build Skippy for a long time. Out of all the weapons in Cyberpunk 2077, this one has always stood out to me. It isn't just the design. It's the personality. Anyone who's played the game knows exactly why this gun became so iconic.
This project was also a little different than most because I got the chance to work directly with M1LITECH, the designer behind the files. They reached out and provided me with the model specifically so I could create a full build series around it. Throughout the project we went back and forth quite a bit, talking about little details, improvements, and ideas. It was awesome getting to work with the person who actually designed the files because it meant I could keep pushing the build closer and closer to the real thing.
Like pretty much every prop I make, my goal wasn't just to print it, paint it, and throw it on a shelf. I wanted it to look like it came straight out of Night City.
The Files
If you want to build your own Skippy, you can grab the exact files I used from M1LITECH on Cults3D. They are incredibly well-designed and highly detailed.
File Link:
https://cults3d.com/en/3d-model/game/hjke-11-yukimura-skippy-cyberpunk-2077
Printing the Parts
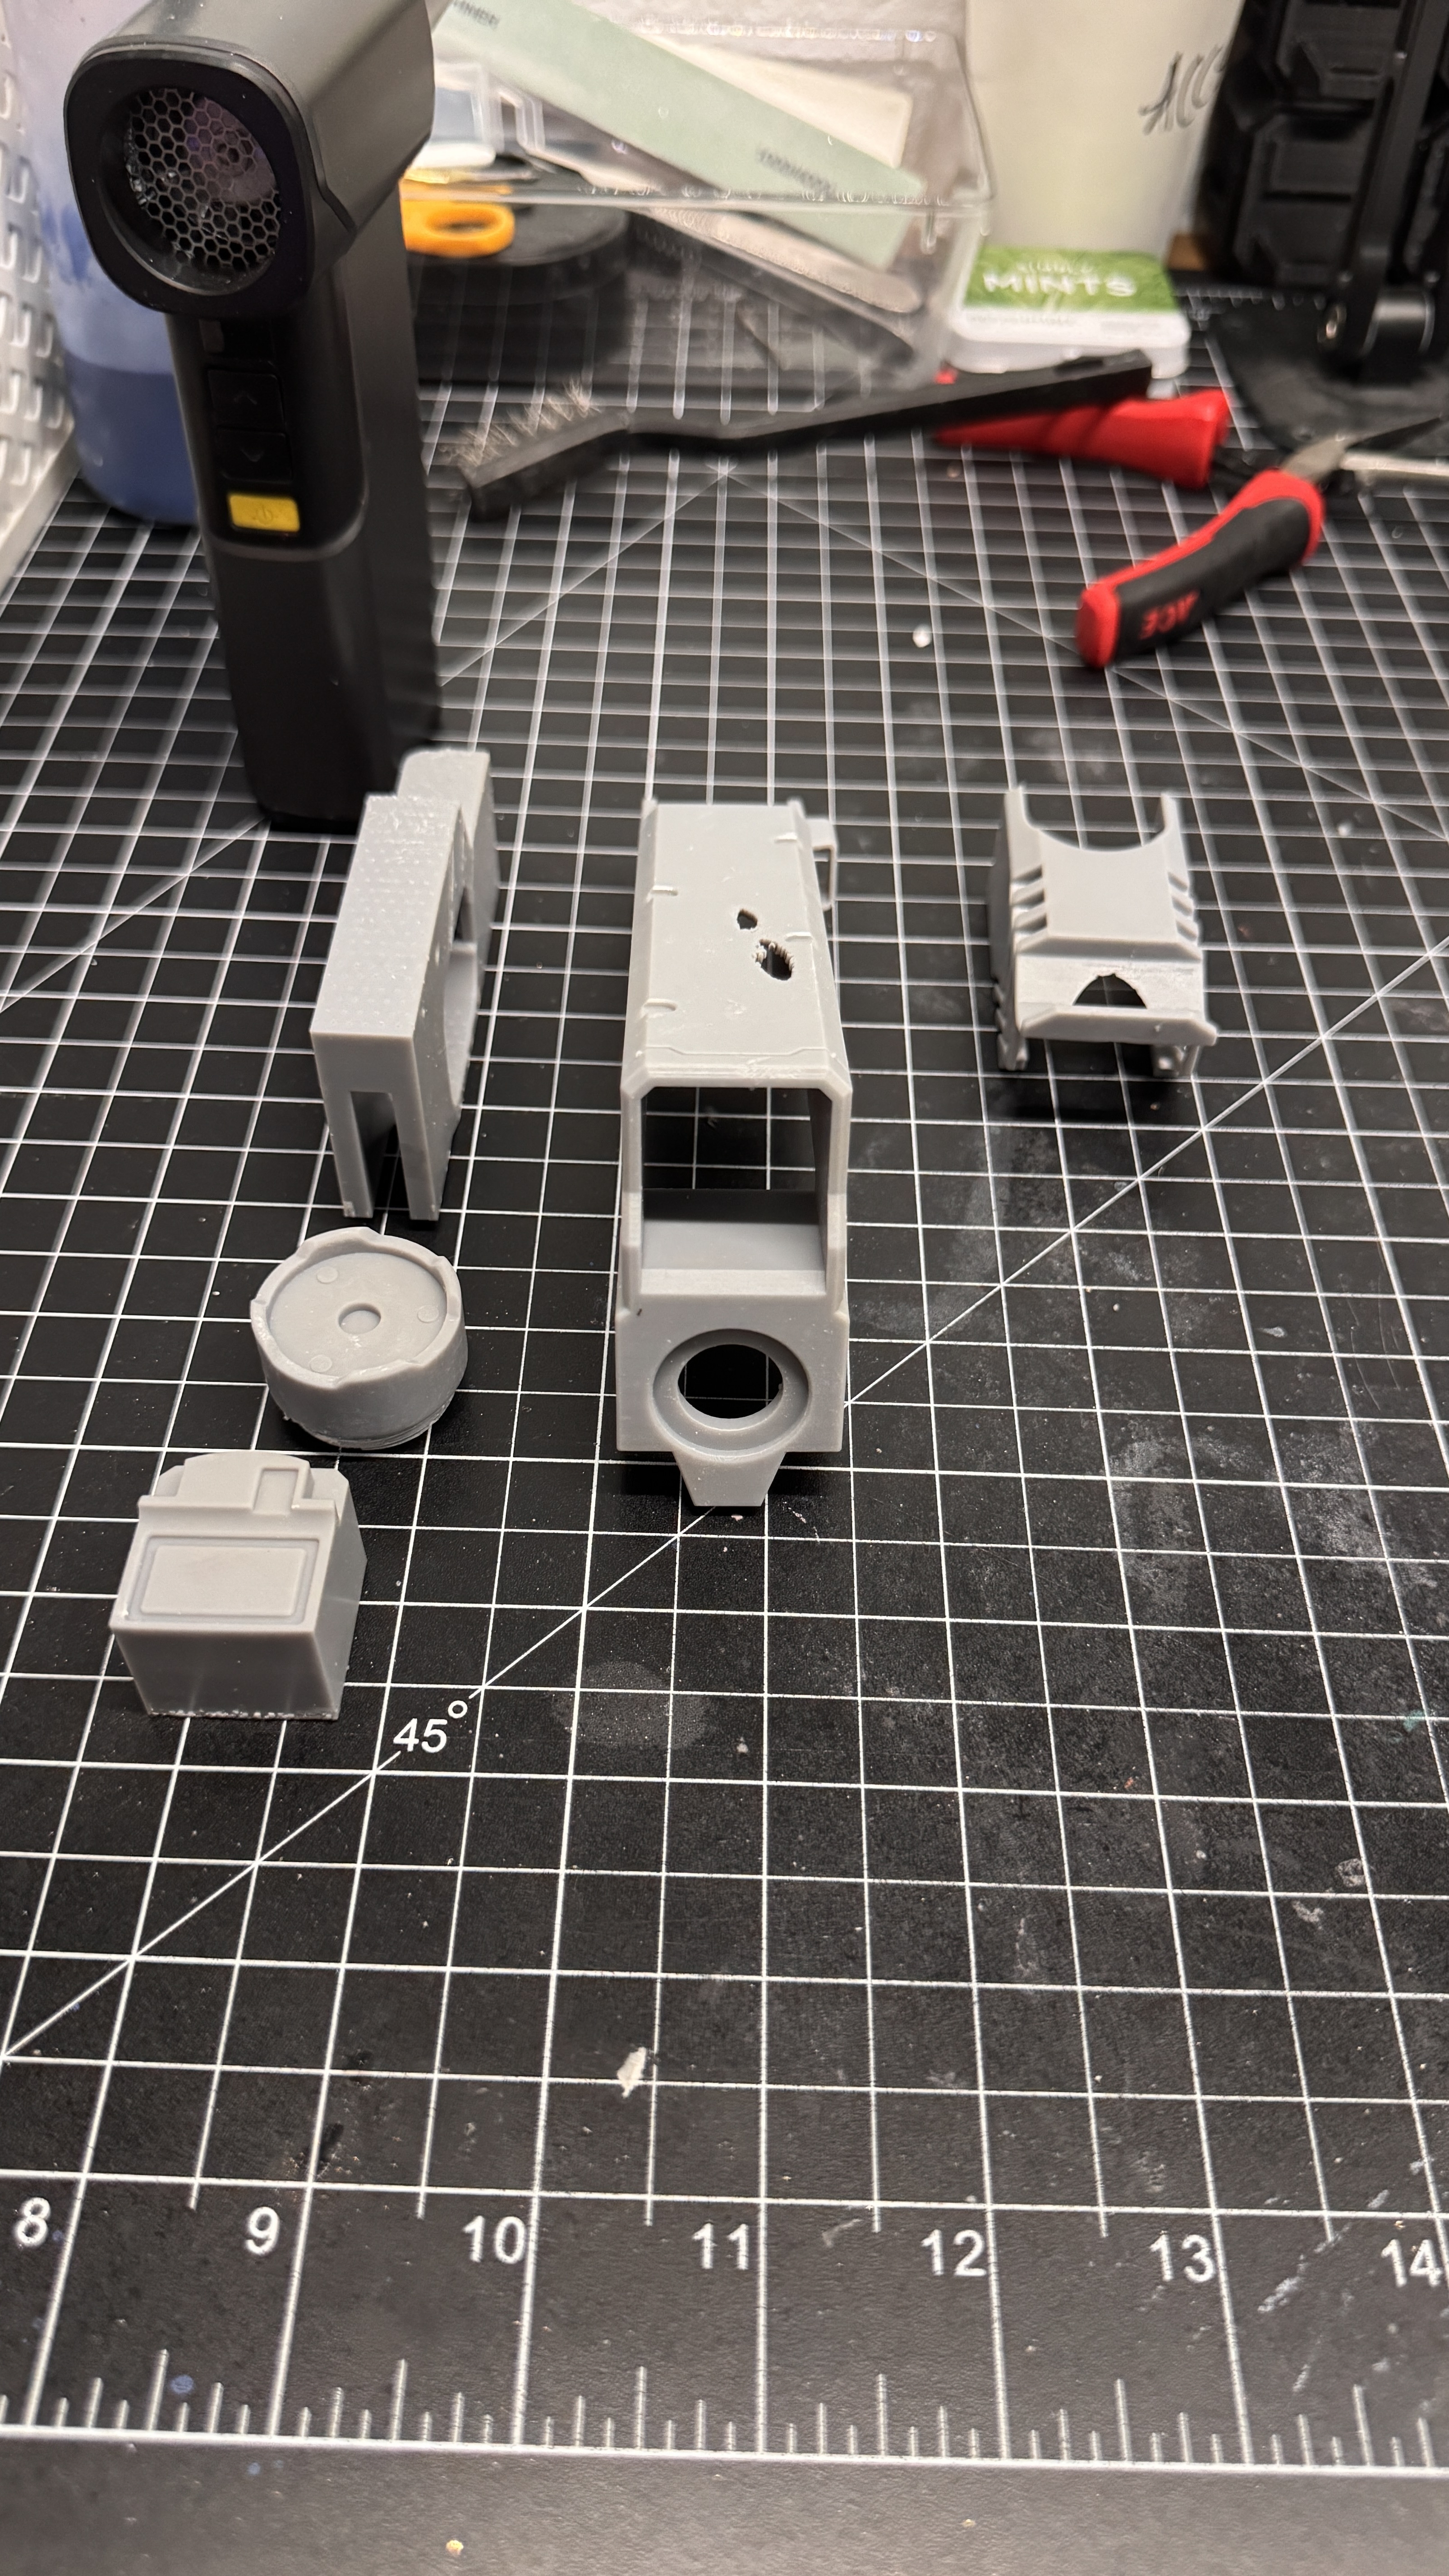
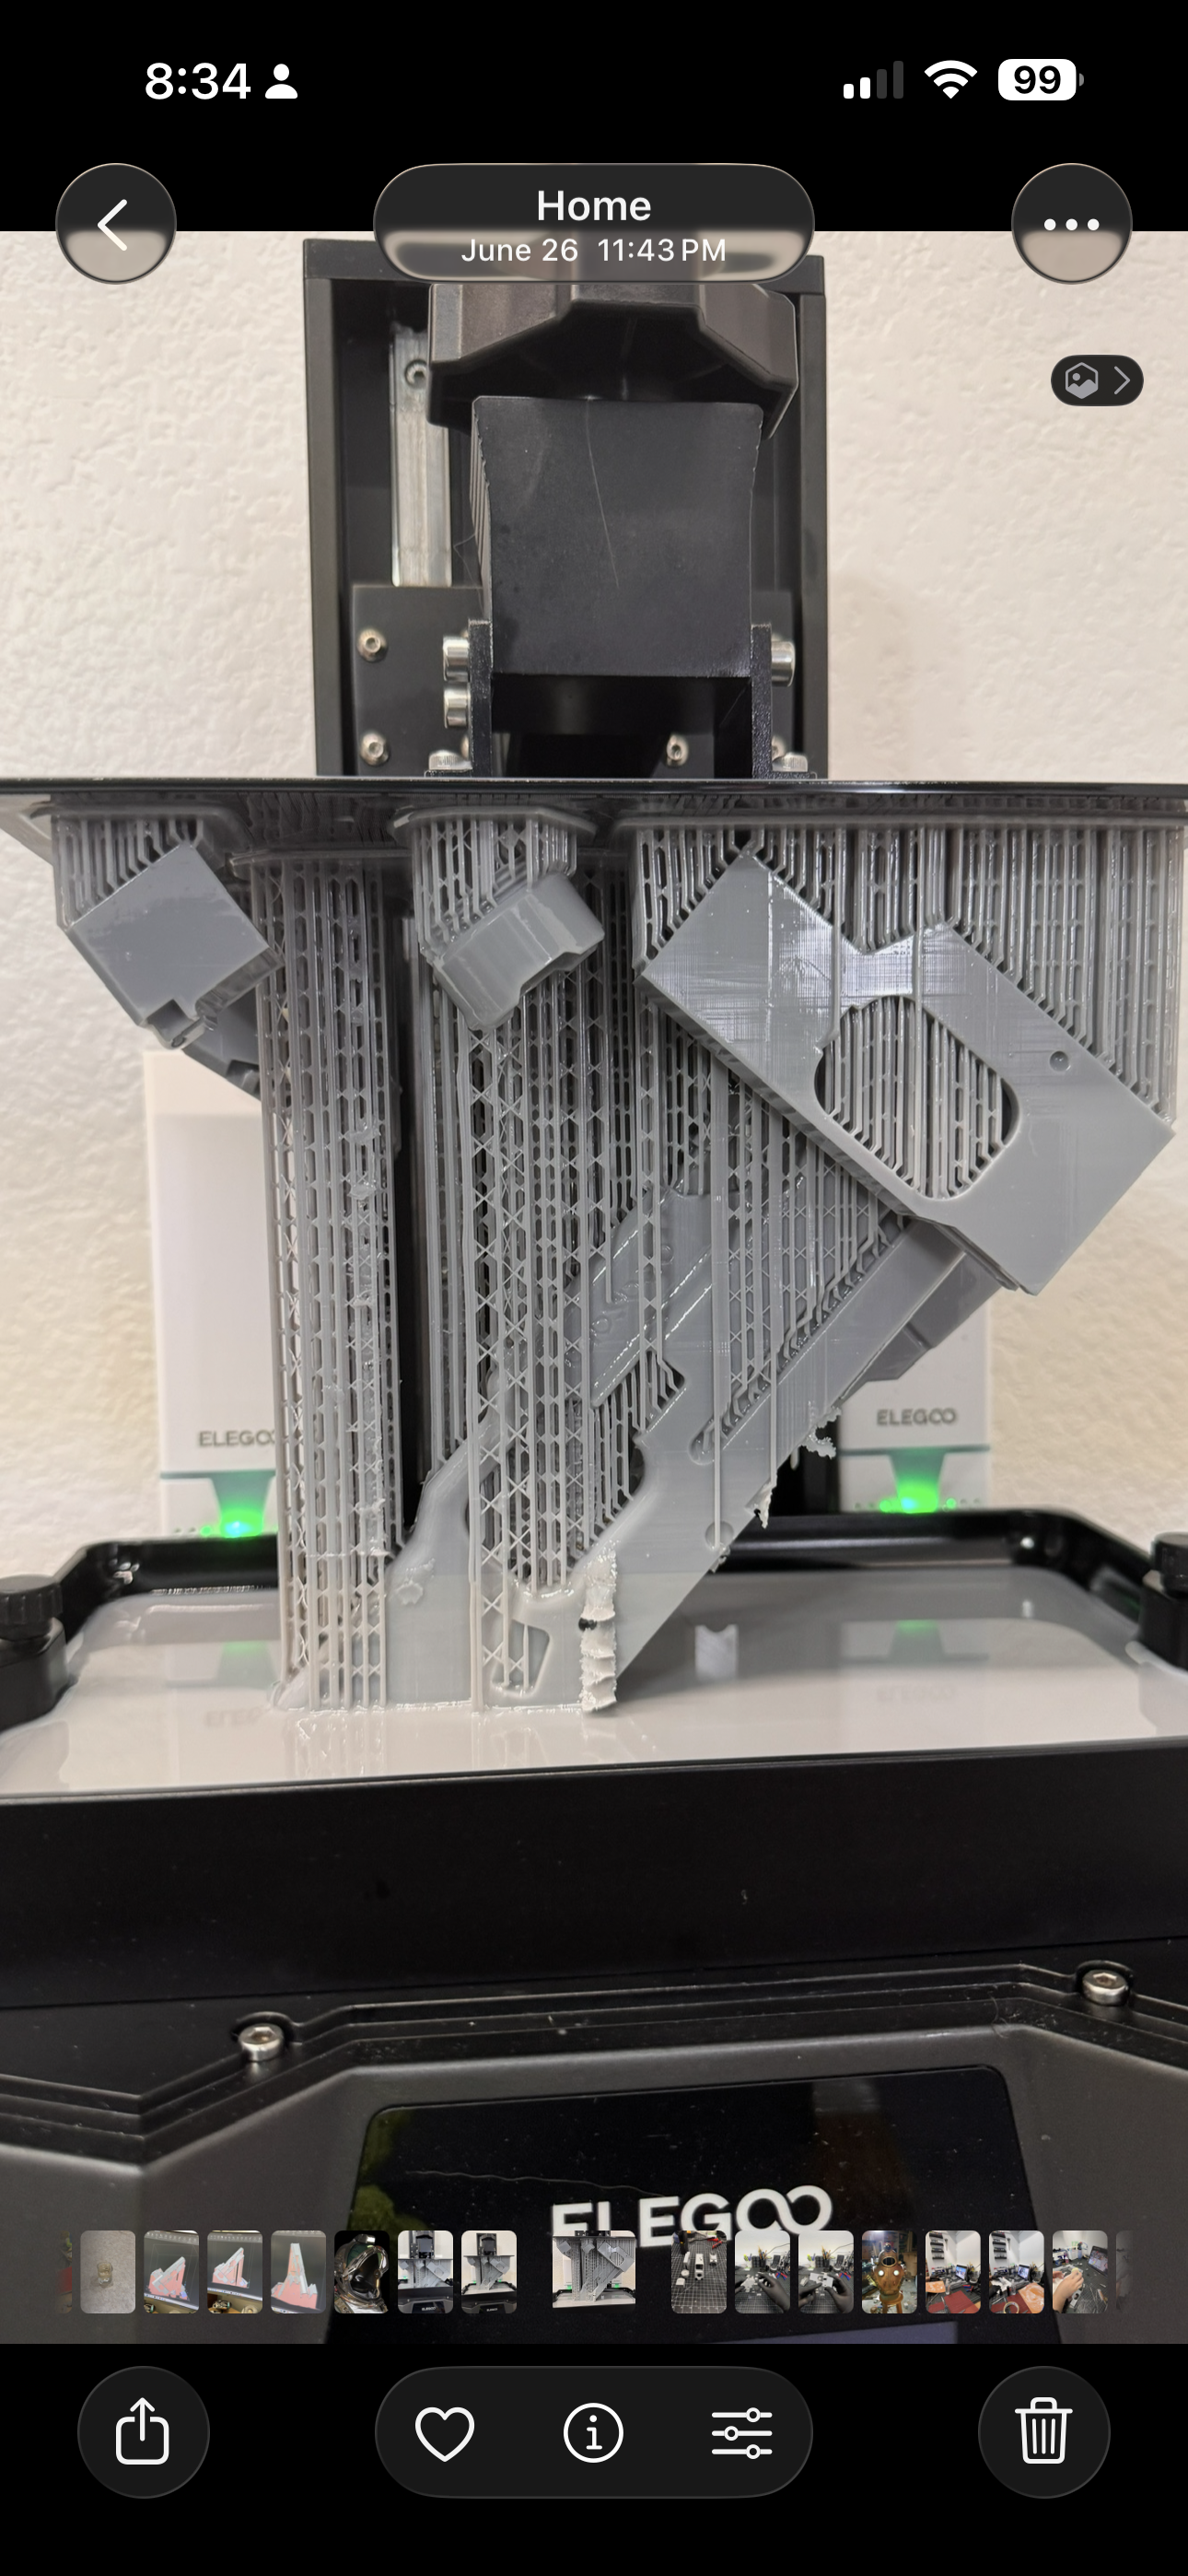
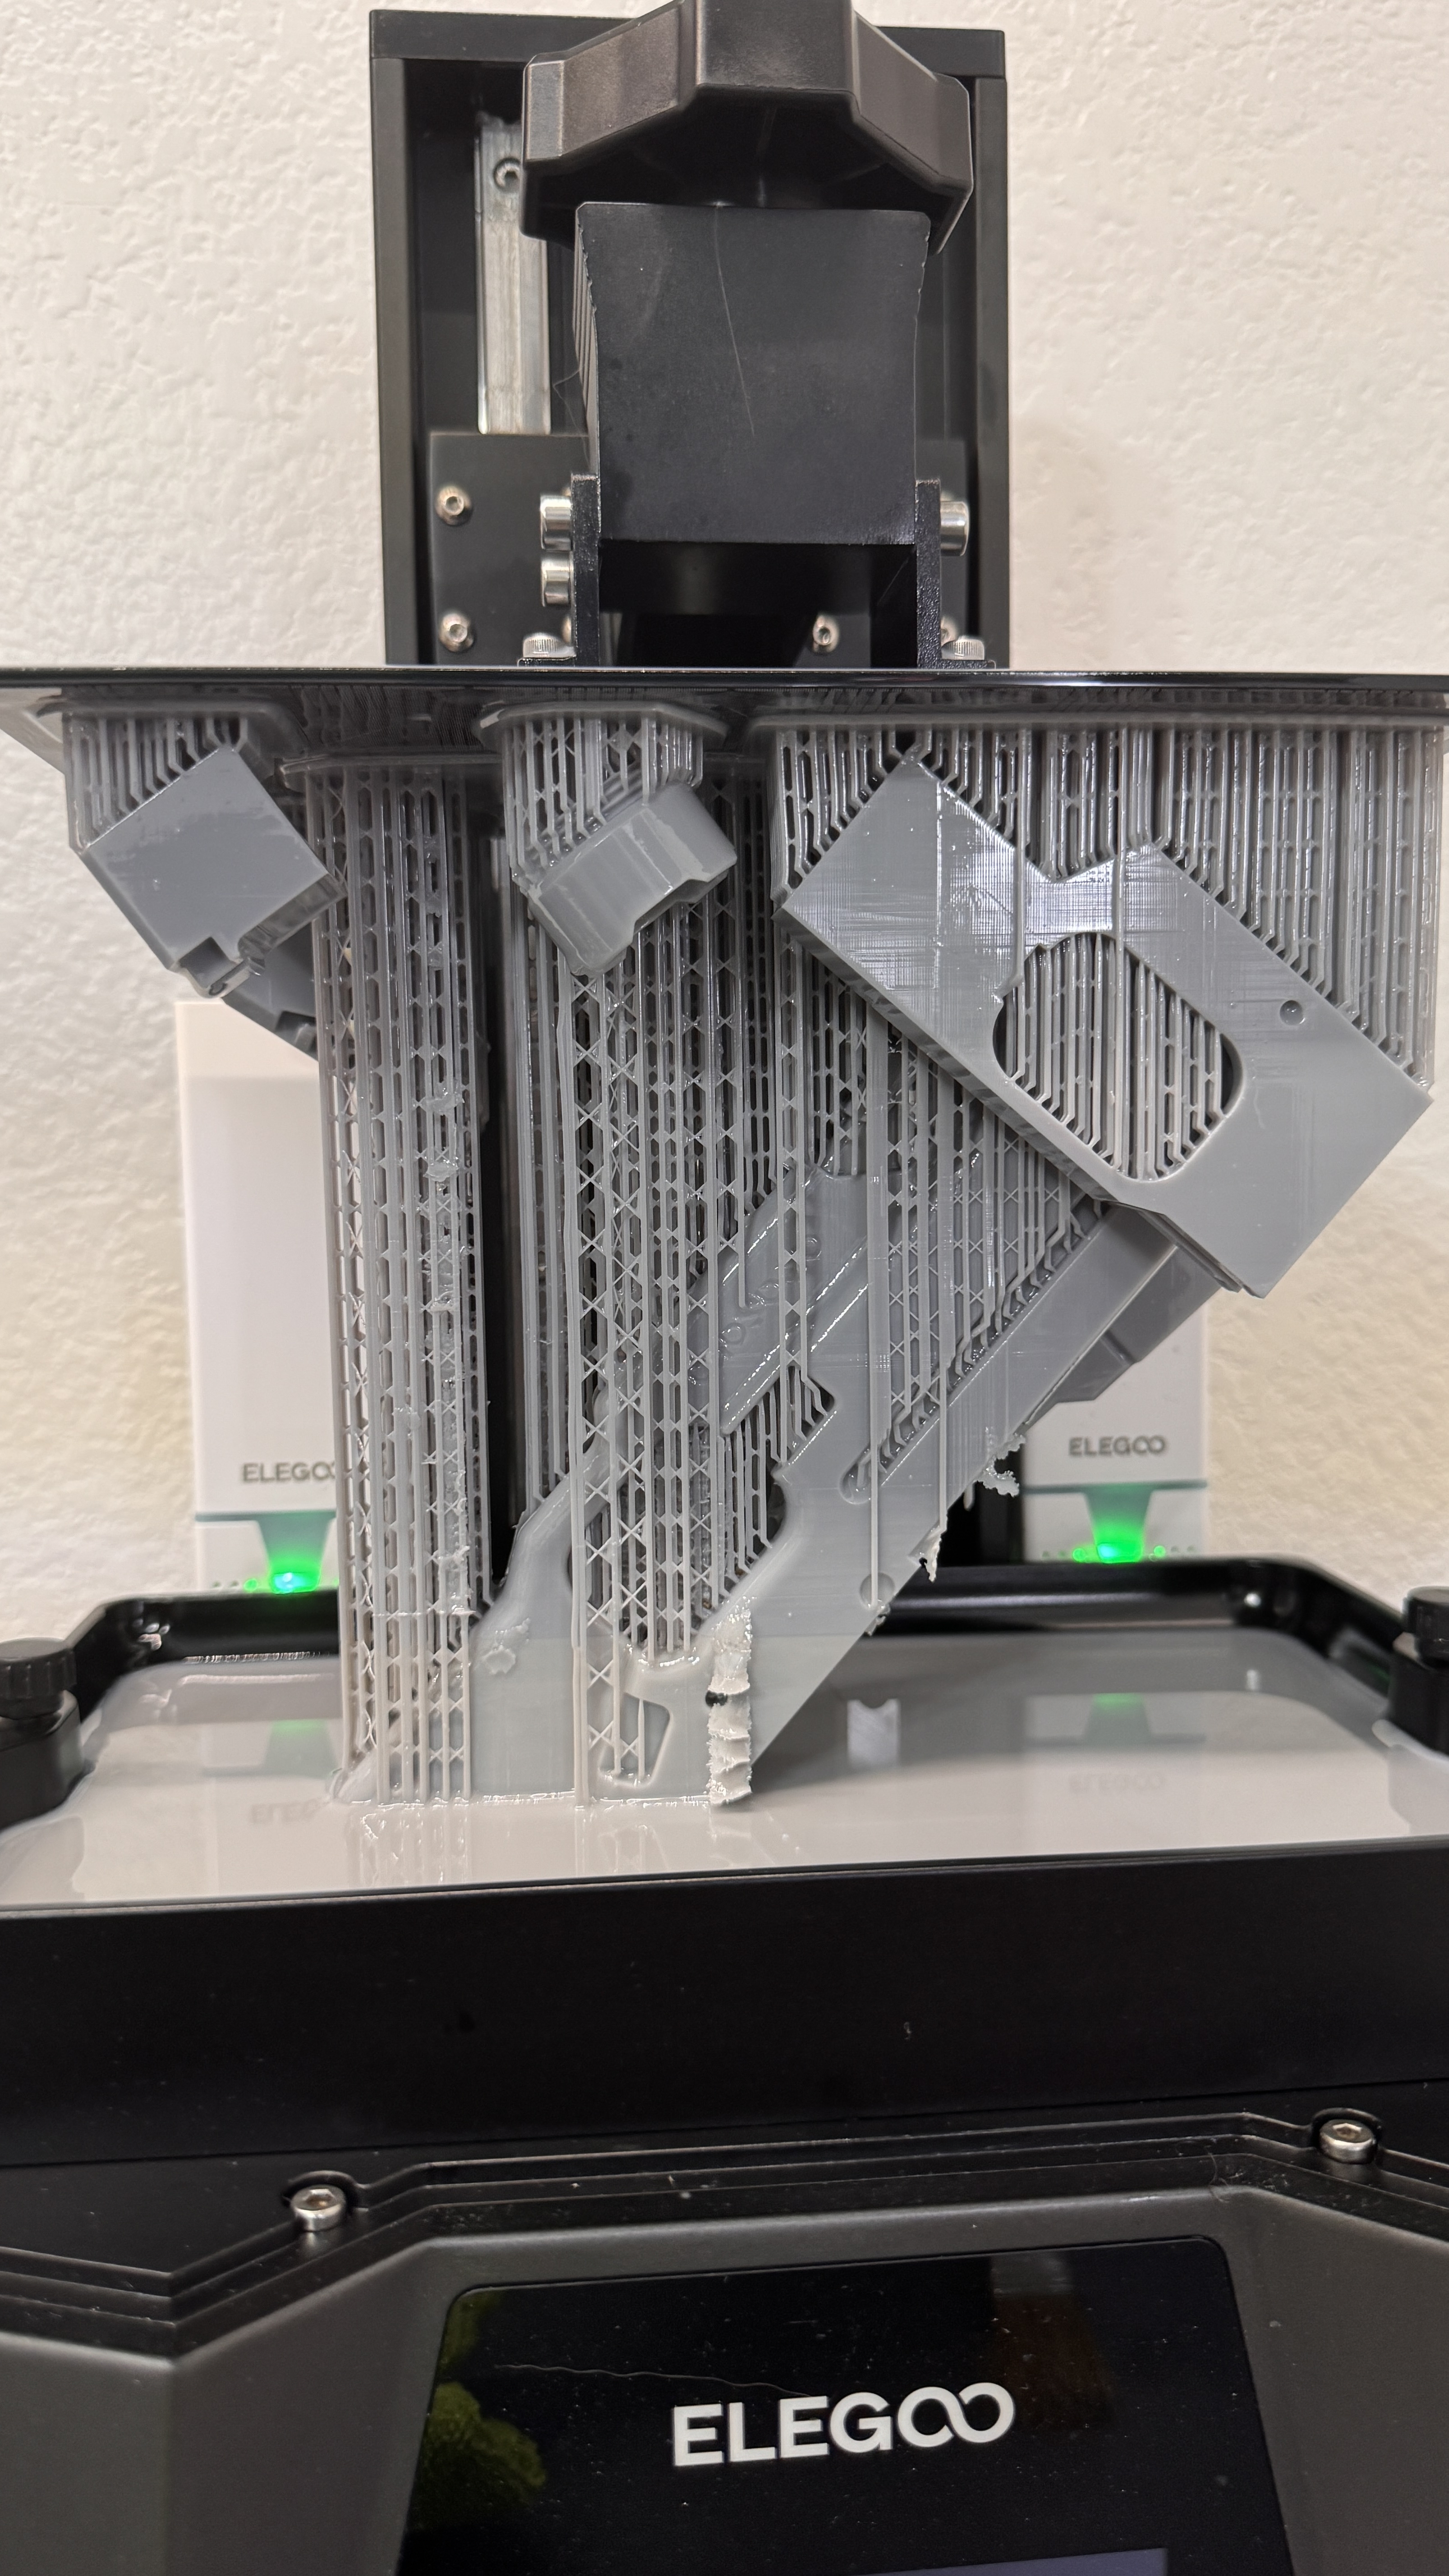
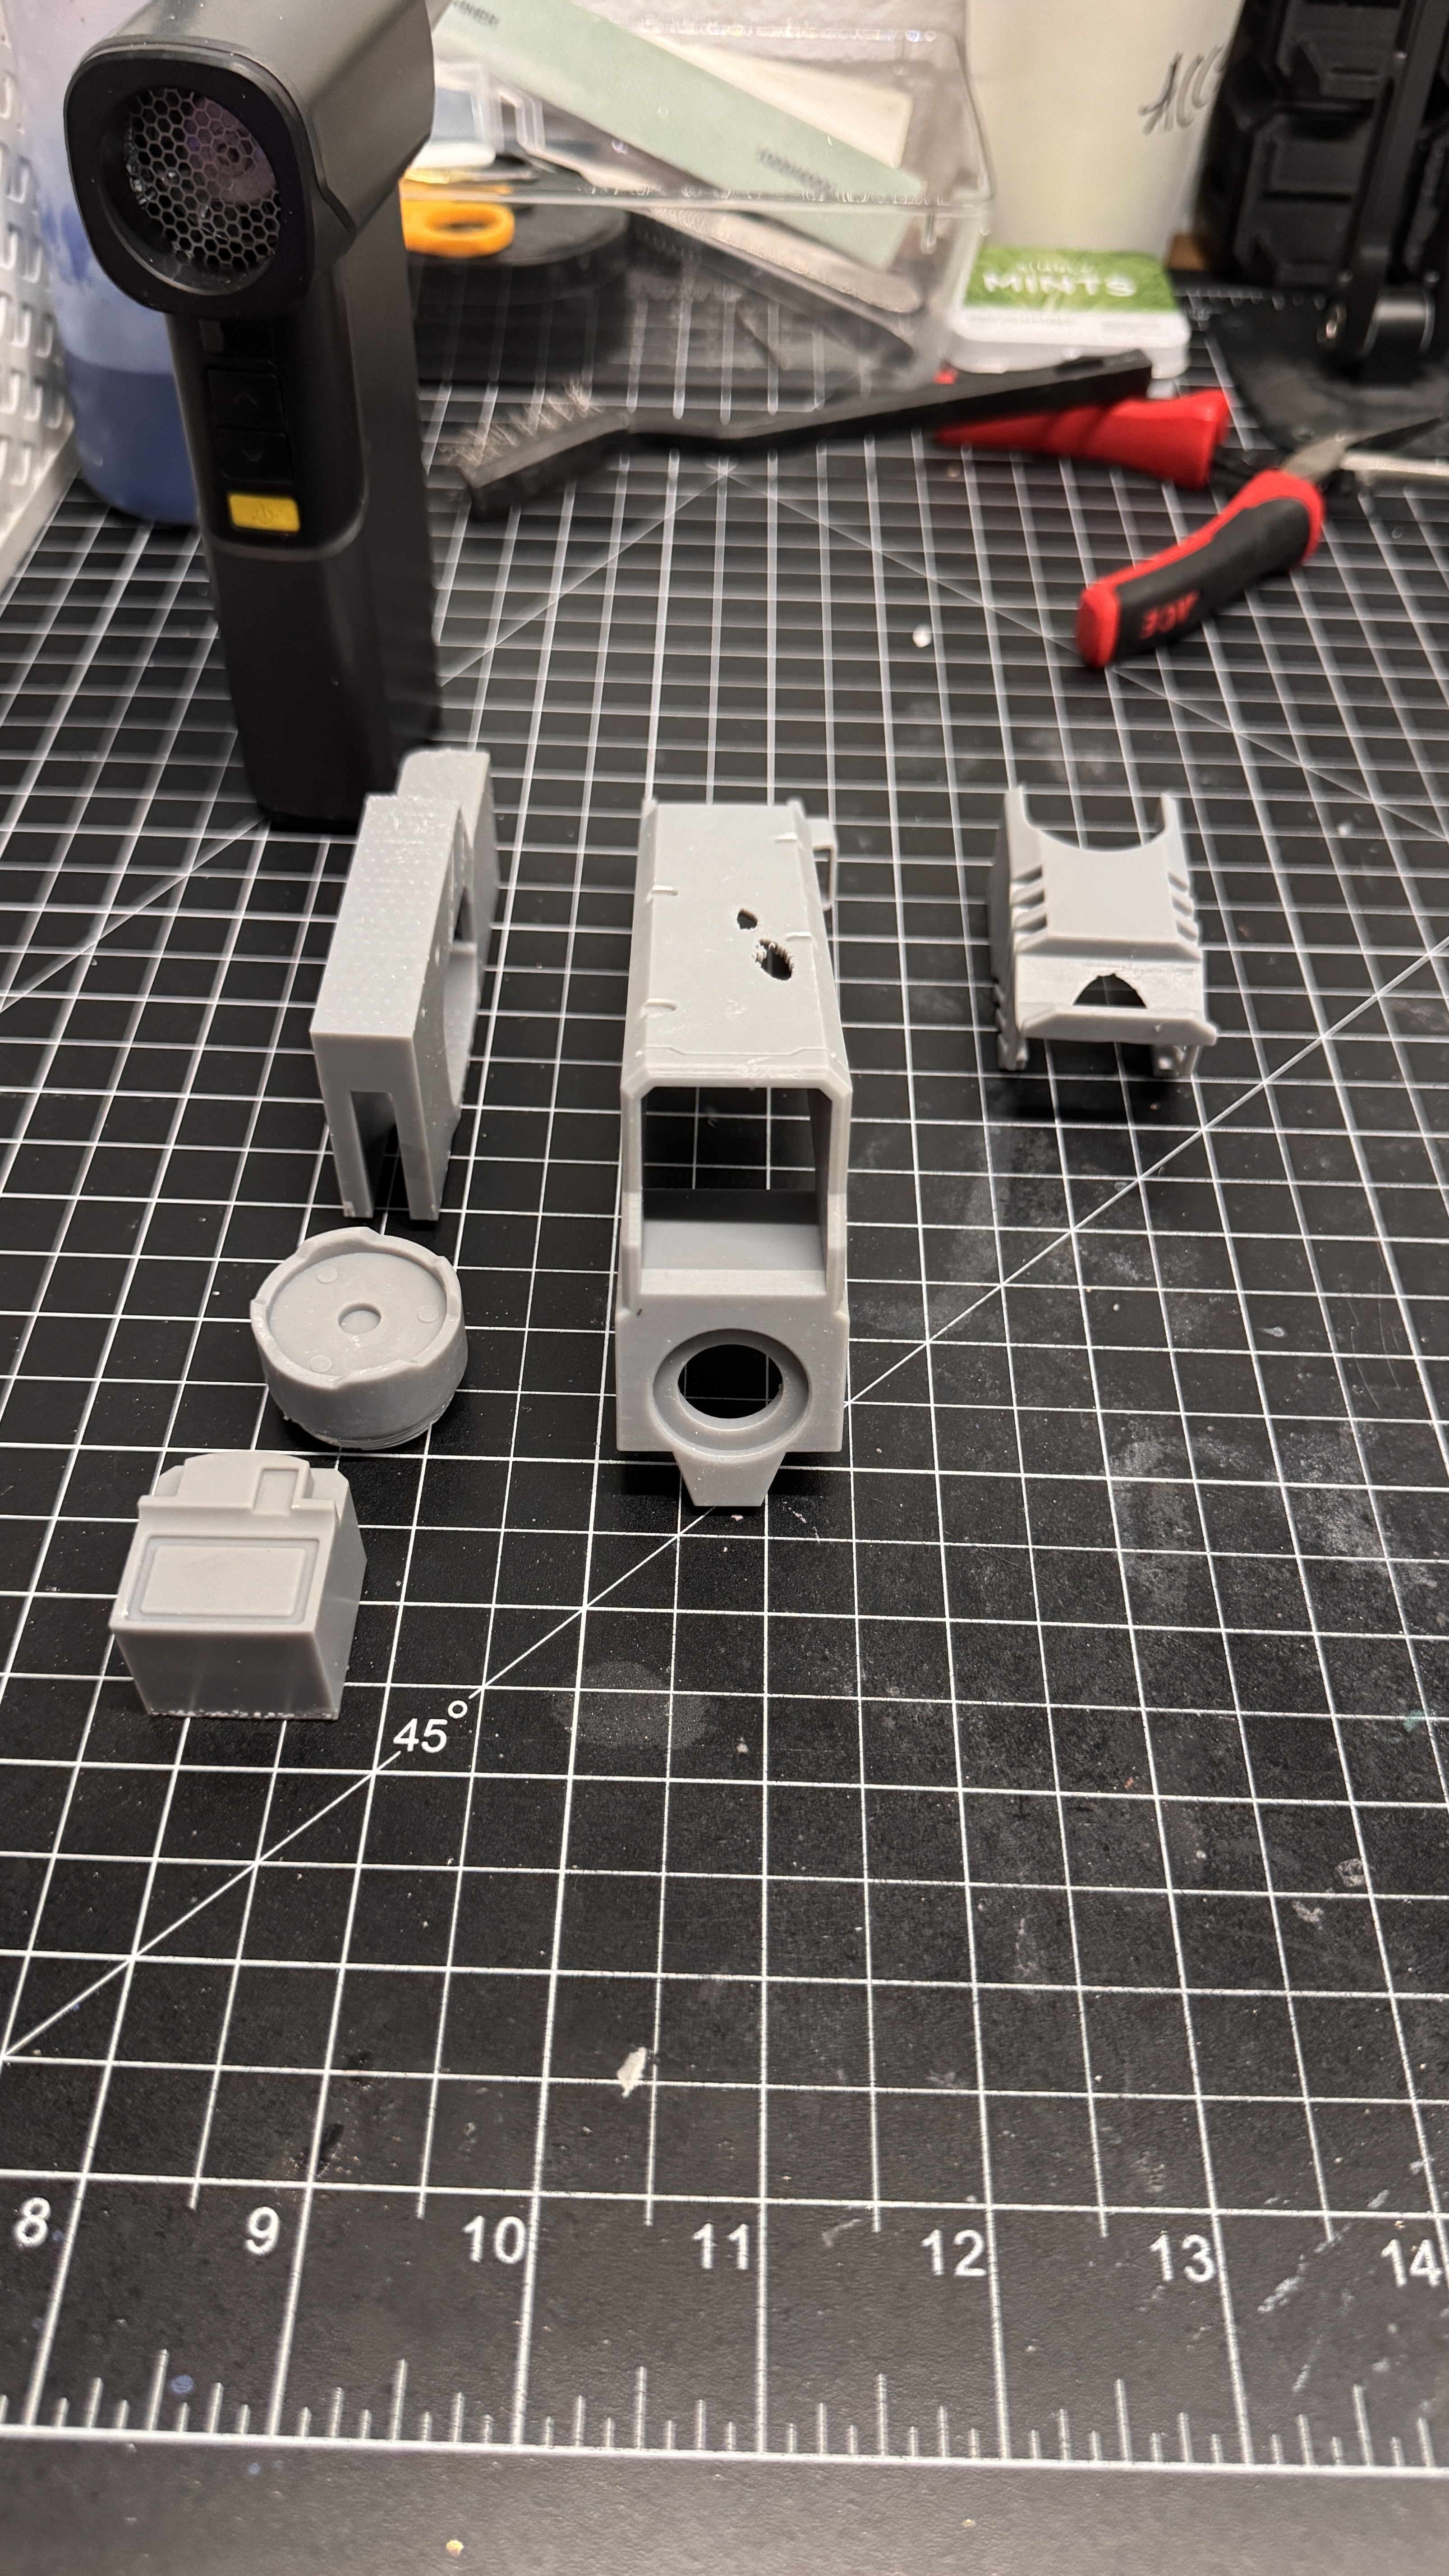
The entire replica was printed on my Elegoo Saturn 3 Ultra using Standard Gray Resin.
This is one of those projects where resin printing really shines. Every tiny panel line, chamfer, screw recess, and little mechanical detail came out incredibly sharp. That's one of the biggest reasons I still prefer resin for display pieces like this. The amount of cleanup you save later because of the print quality is worth it.
Well...most of the time. Like every resin printer, mine decided it wanted to remind me who's in charge.
A few of the larger parts had some print defects. Nothing catastrophic, but enough that I knew they'd stick out once paint went on. You can spend hours painting something, but if you ignore the prep work, those little flaws will be the first thing your eye notices.
Instead of reaching for body filler, I repaired everything using UV resin. I'd brush resin into the low spots, cure it with a UV light, sand it smooth, then repeat until the repair completely disappeared. Since you're repairing resin with resin, it sands exactly like the original print instead of having different hardness like body filler sometimes does.
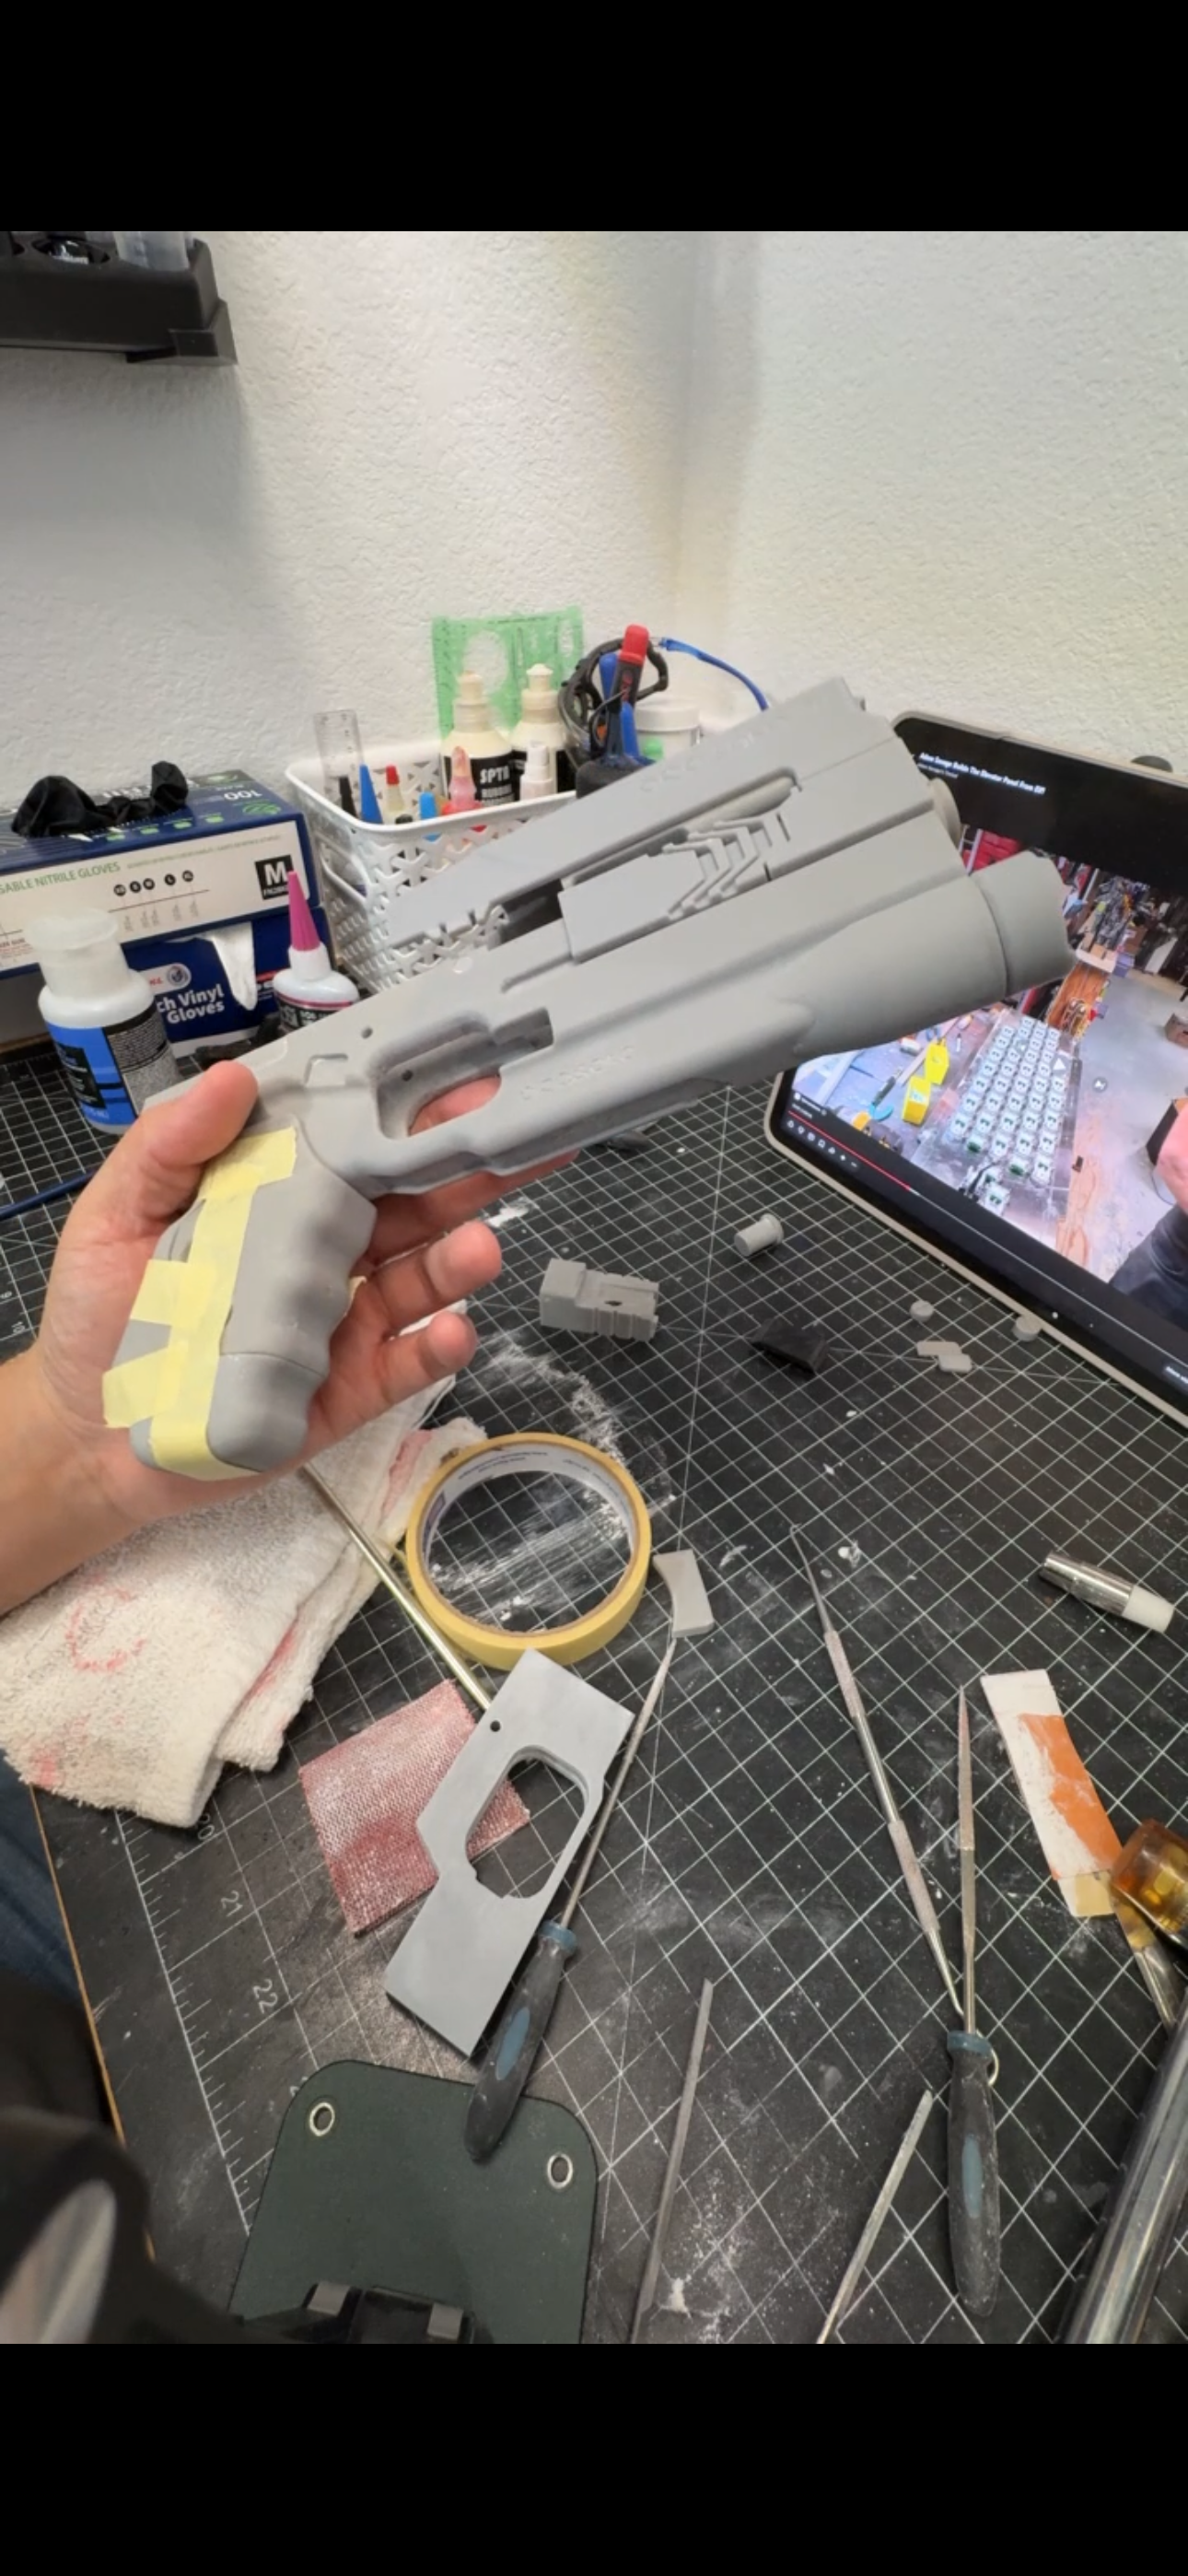
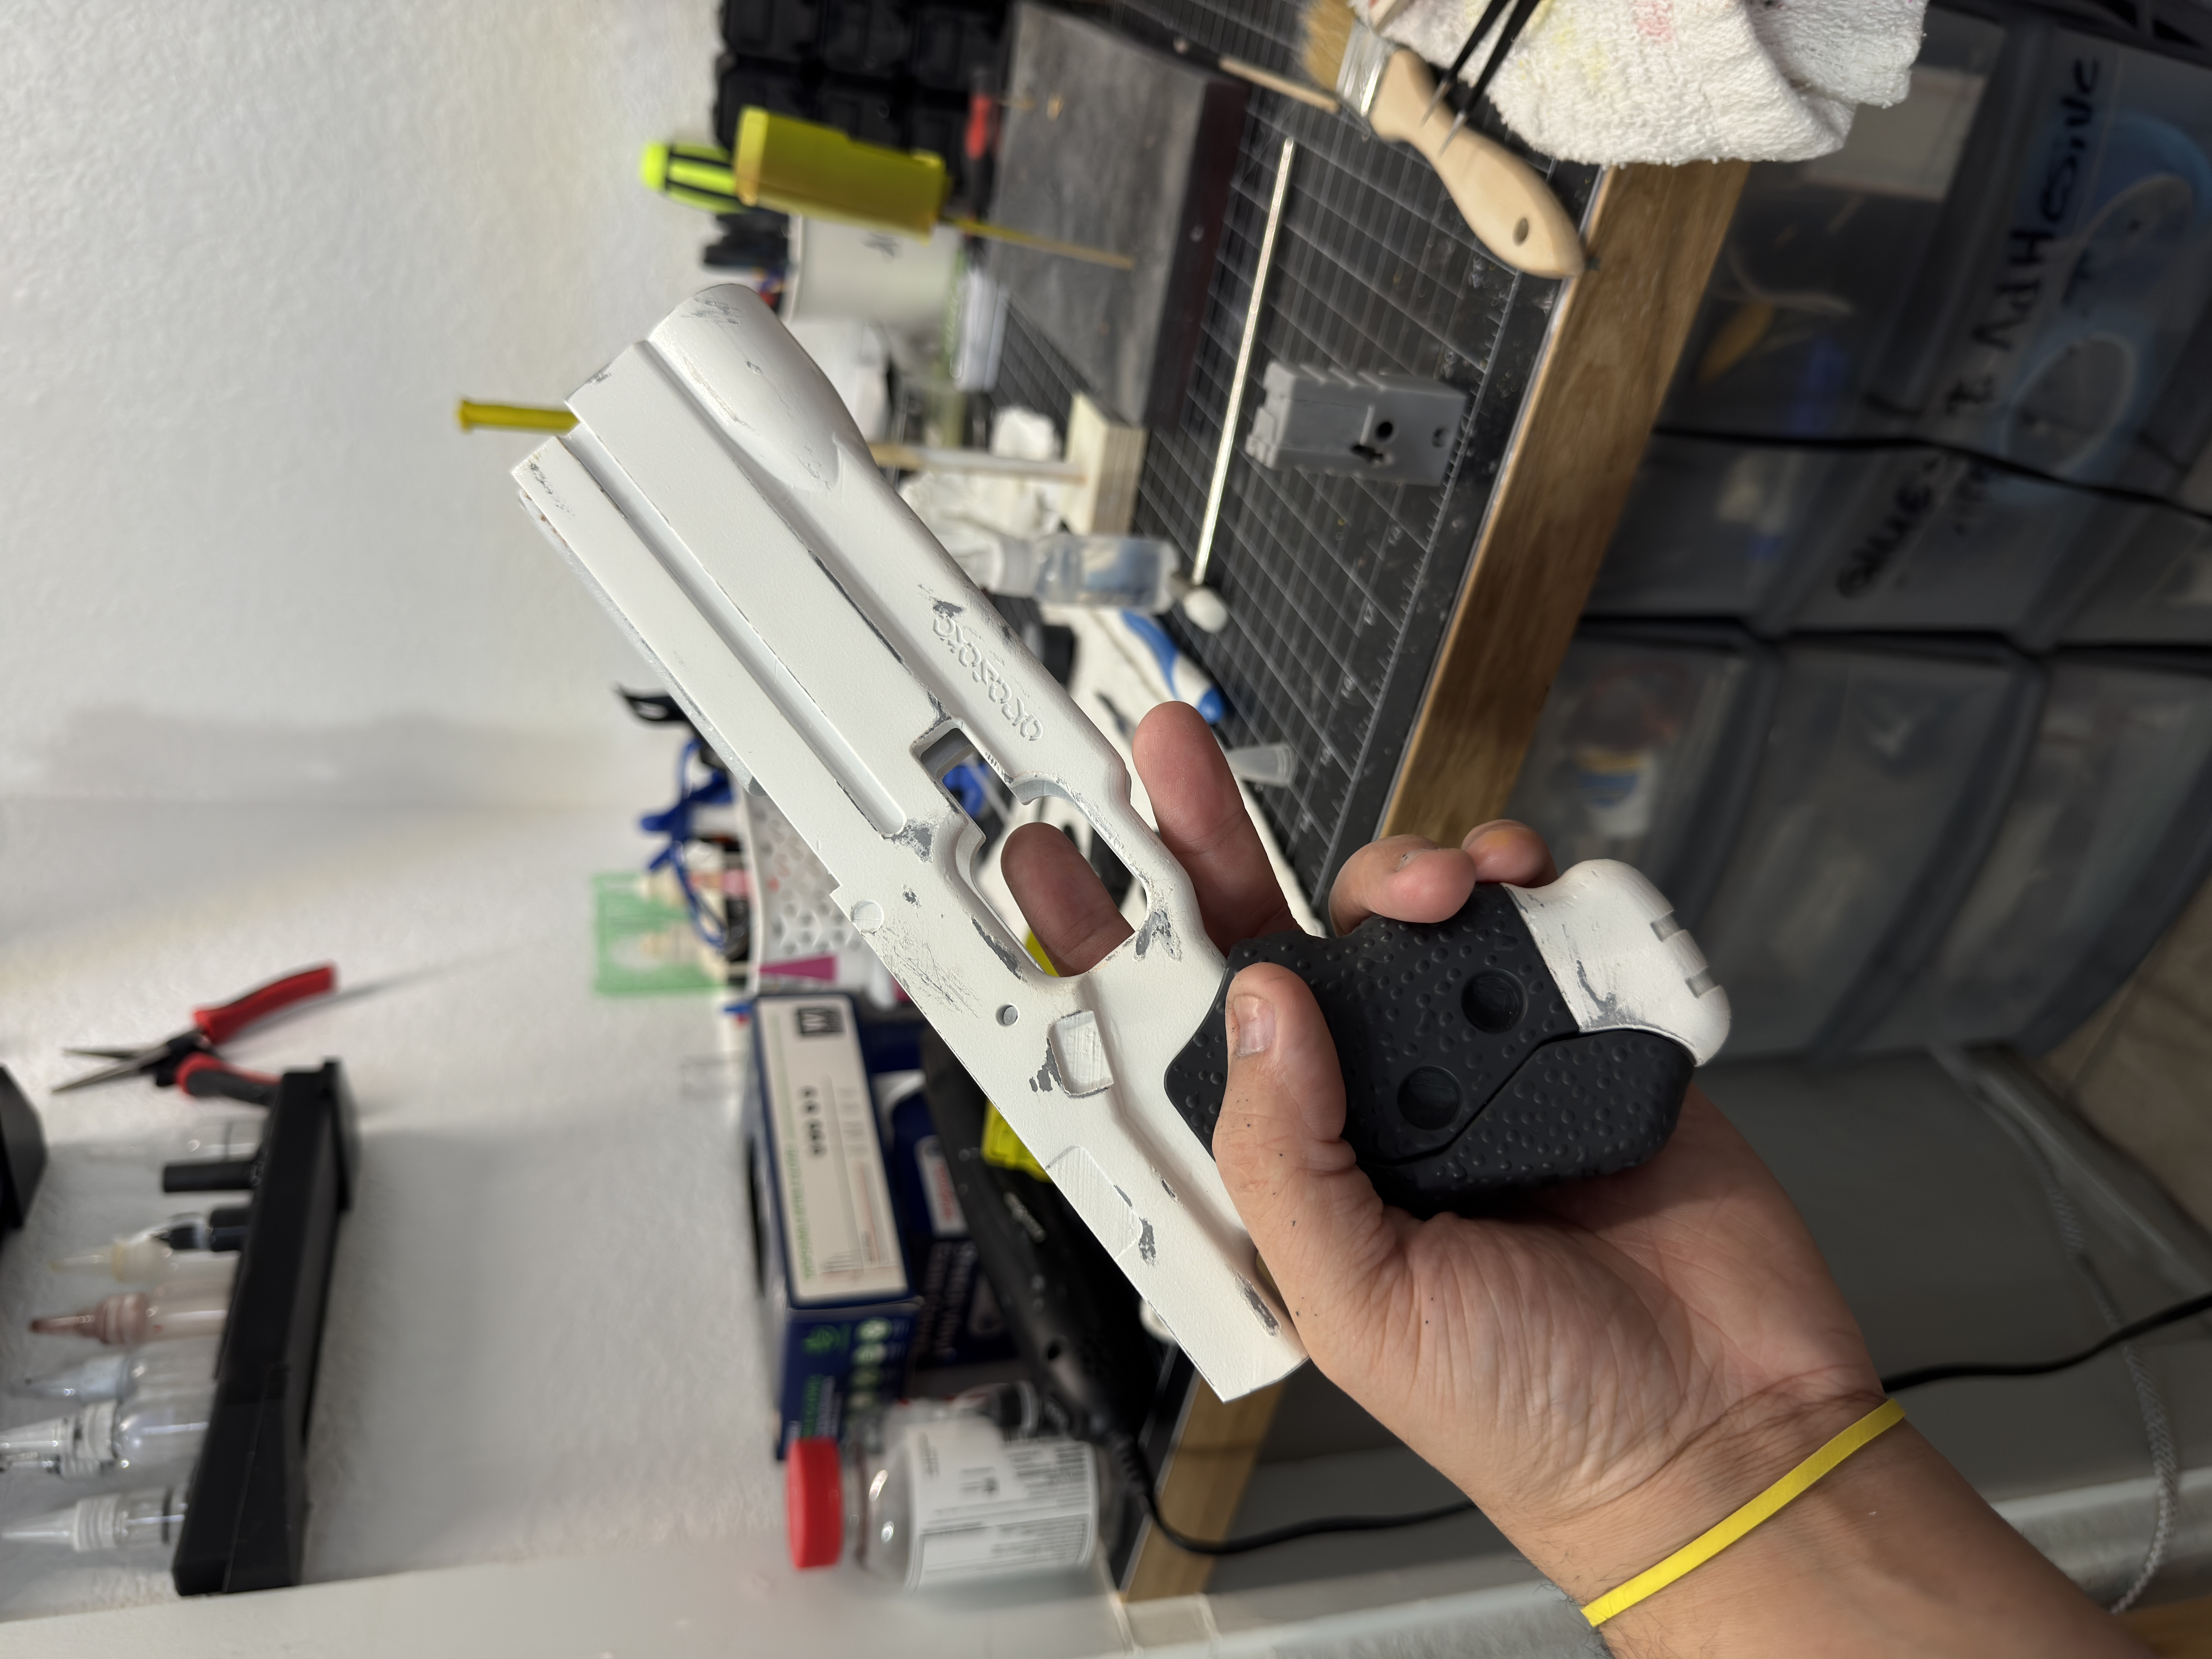
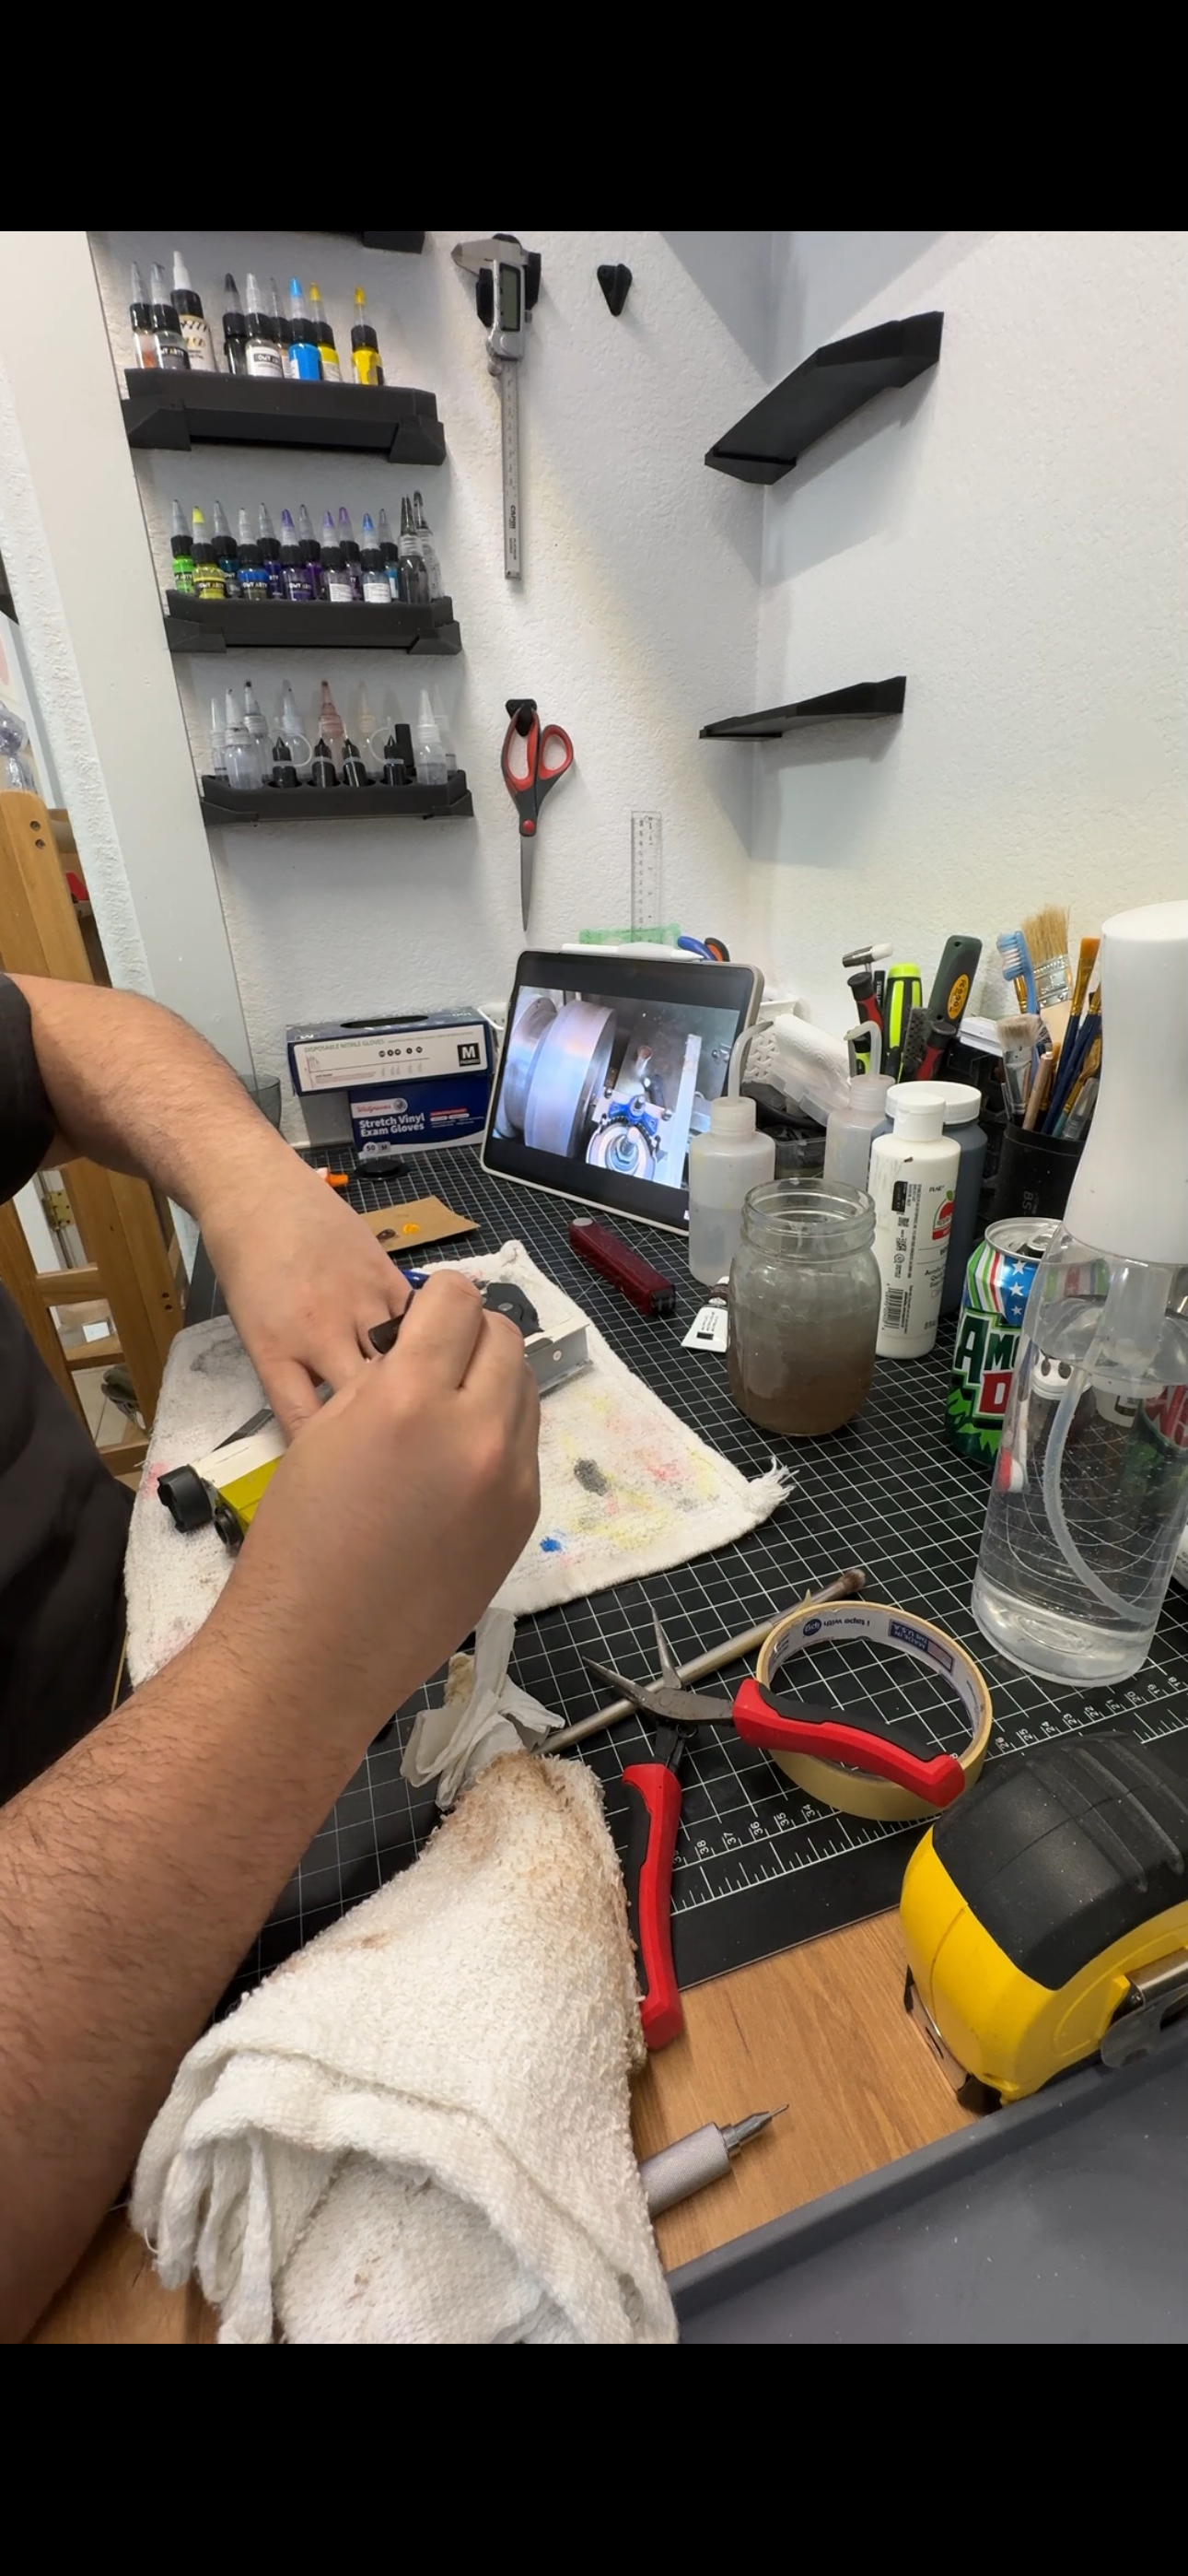
After all the repairs were finished, I spent what honestly felt like forever sanding every single part. Support marks. Layer transitions. Print seams. Tiny imperfections. Everything got sanded until it felt like a manufactured part instead of something that came off a printer.
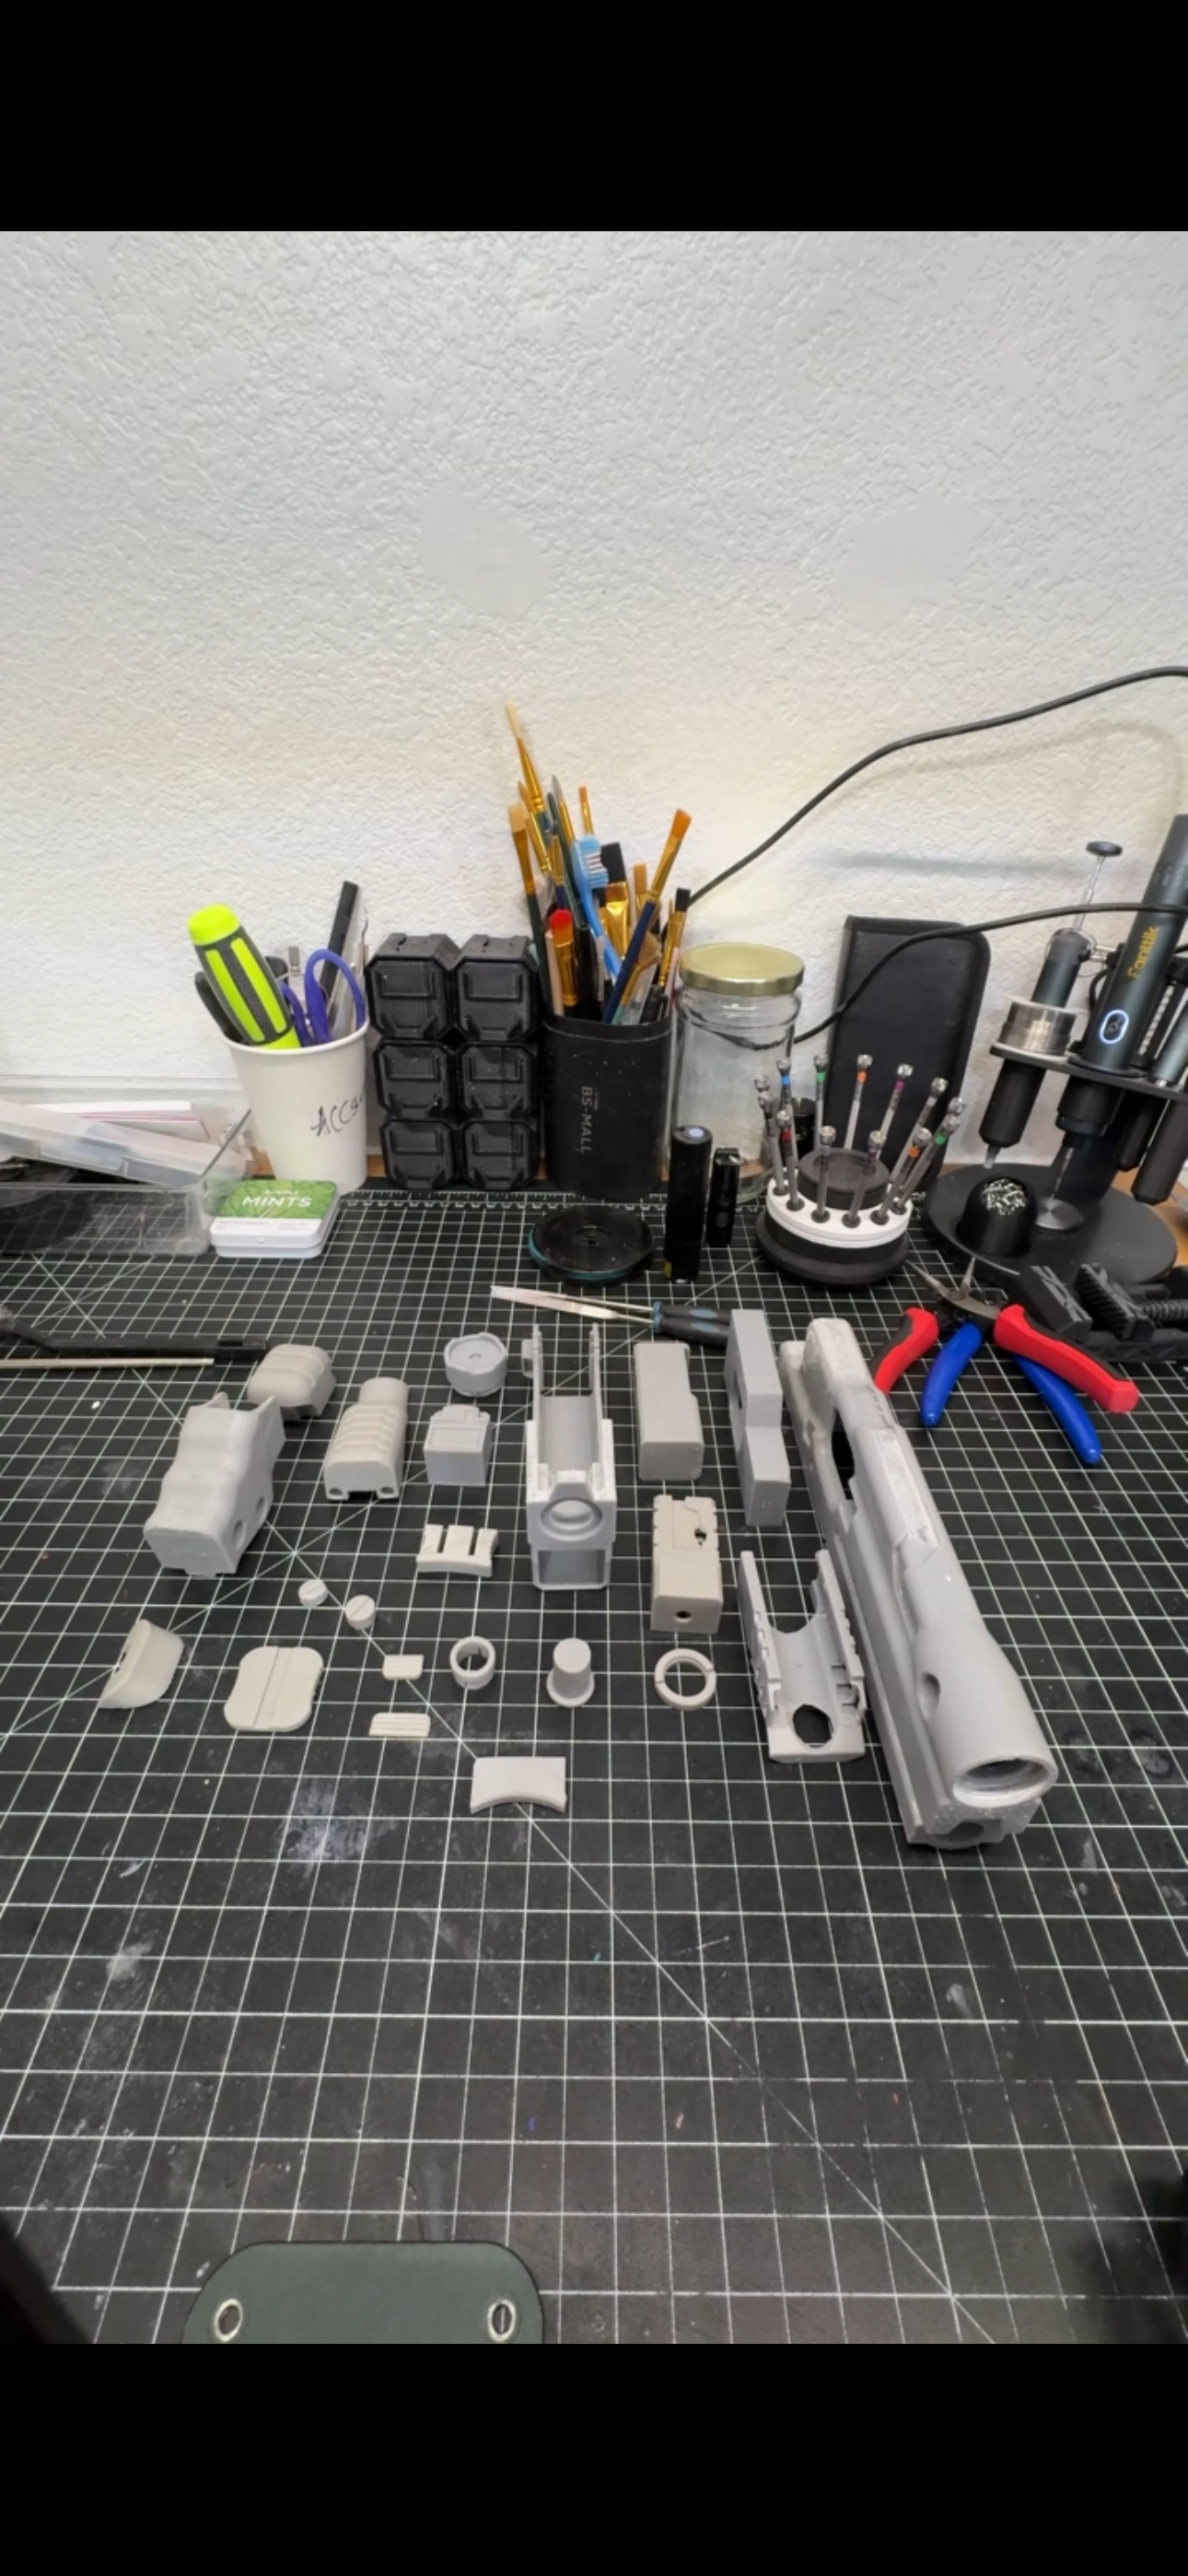
Once I was happy with the finish, I dry fit the entire gun before gluing anything together. I always do this because I'd rather find a problem now than after paint. It also gave me a chance to really look at the model and decide what I wanted to change.
Adding a Functional Display
As I was holding the dry assembled gun, I kept staring at the little display on the side. It looked good. But I couldn't stop thinking how much cooler it'd be if it actually lit up.
So naturally I made my own life harder.
I started collecting official reference photos of the game assets along with a ton of screenshots from inside the game. After studying the references for a while, I decided I was going to build a working faux display instead of just using a printed insert.
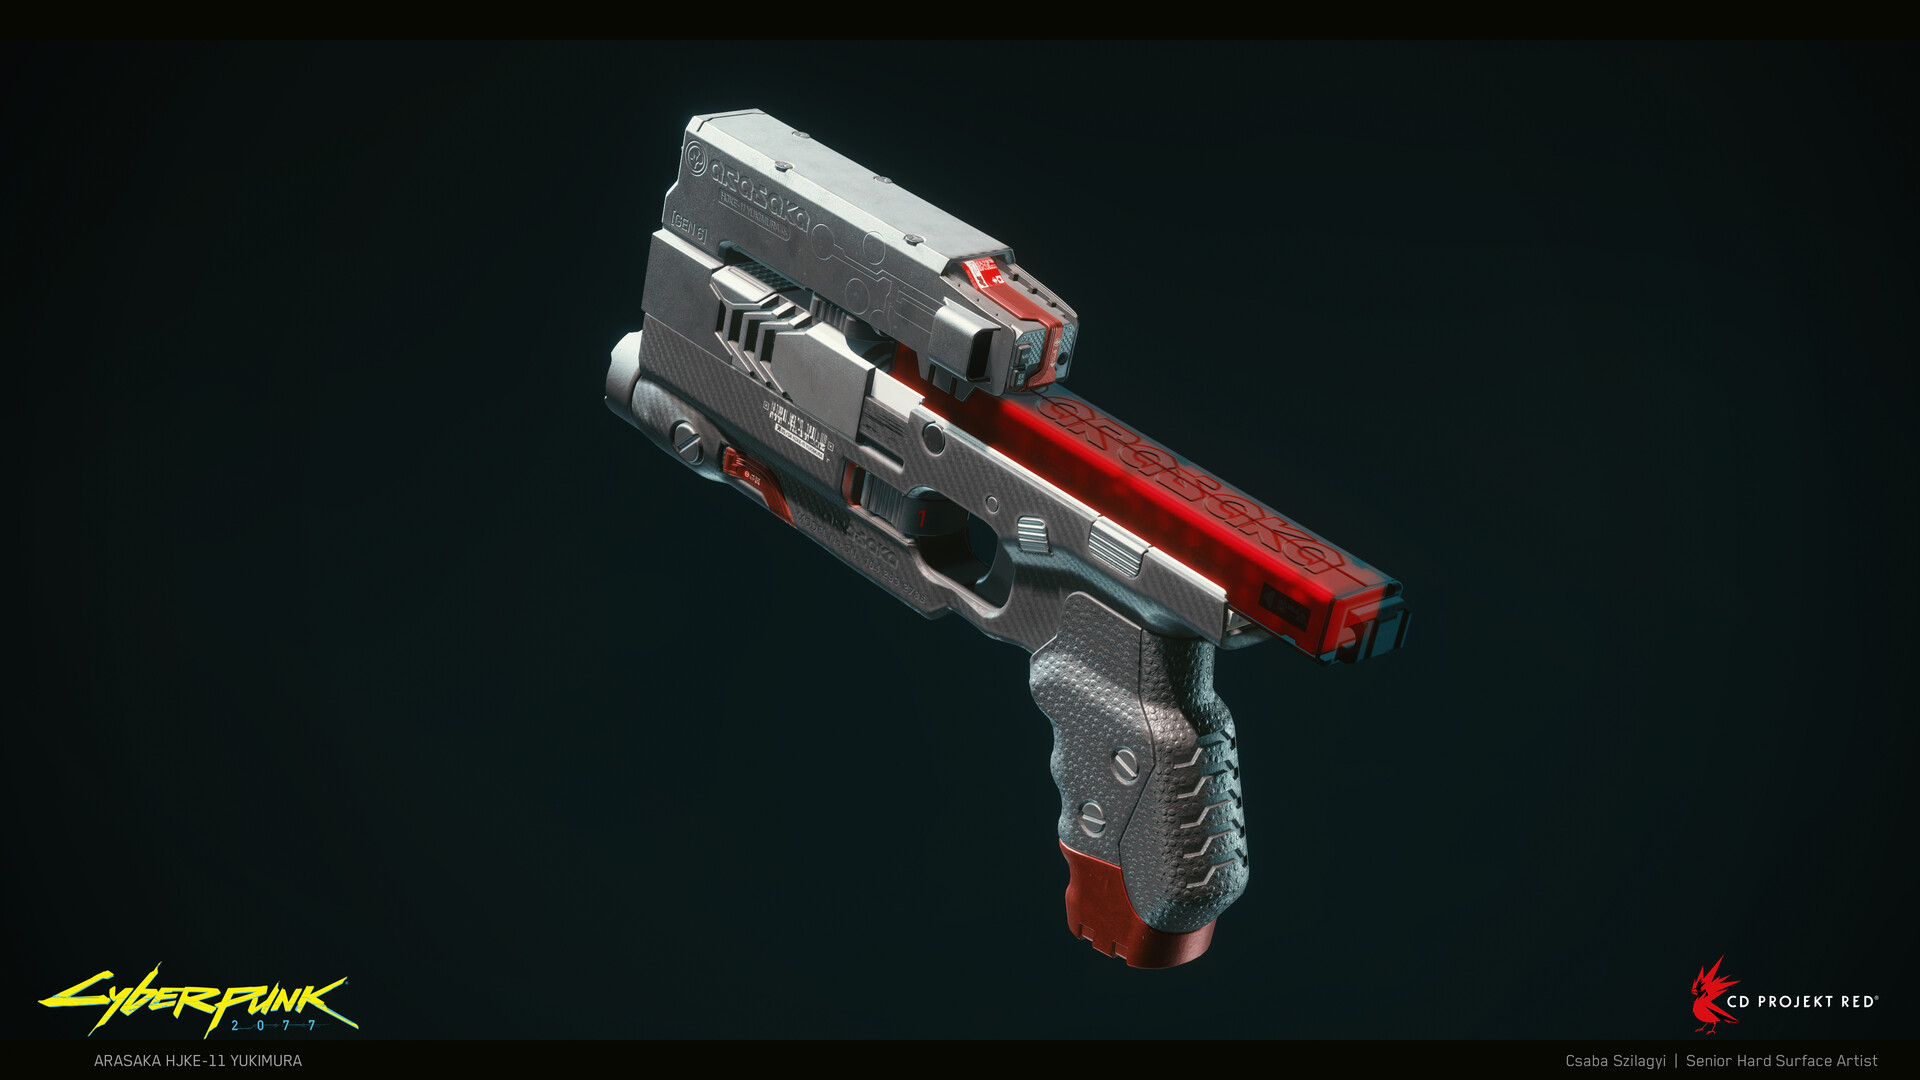
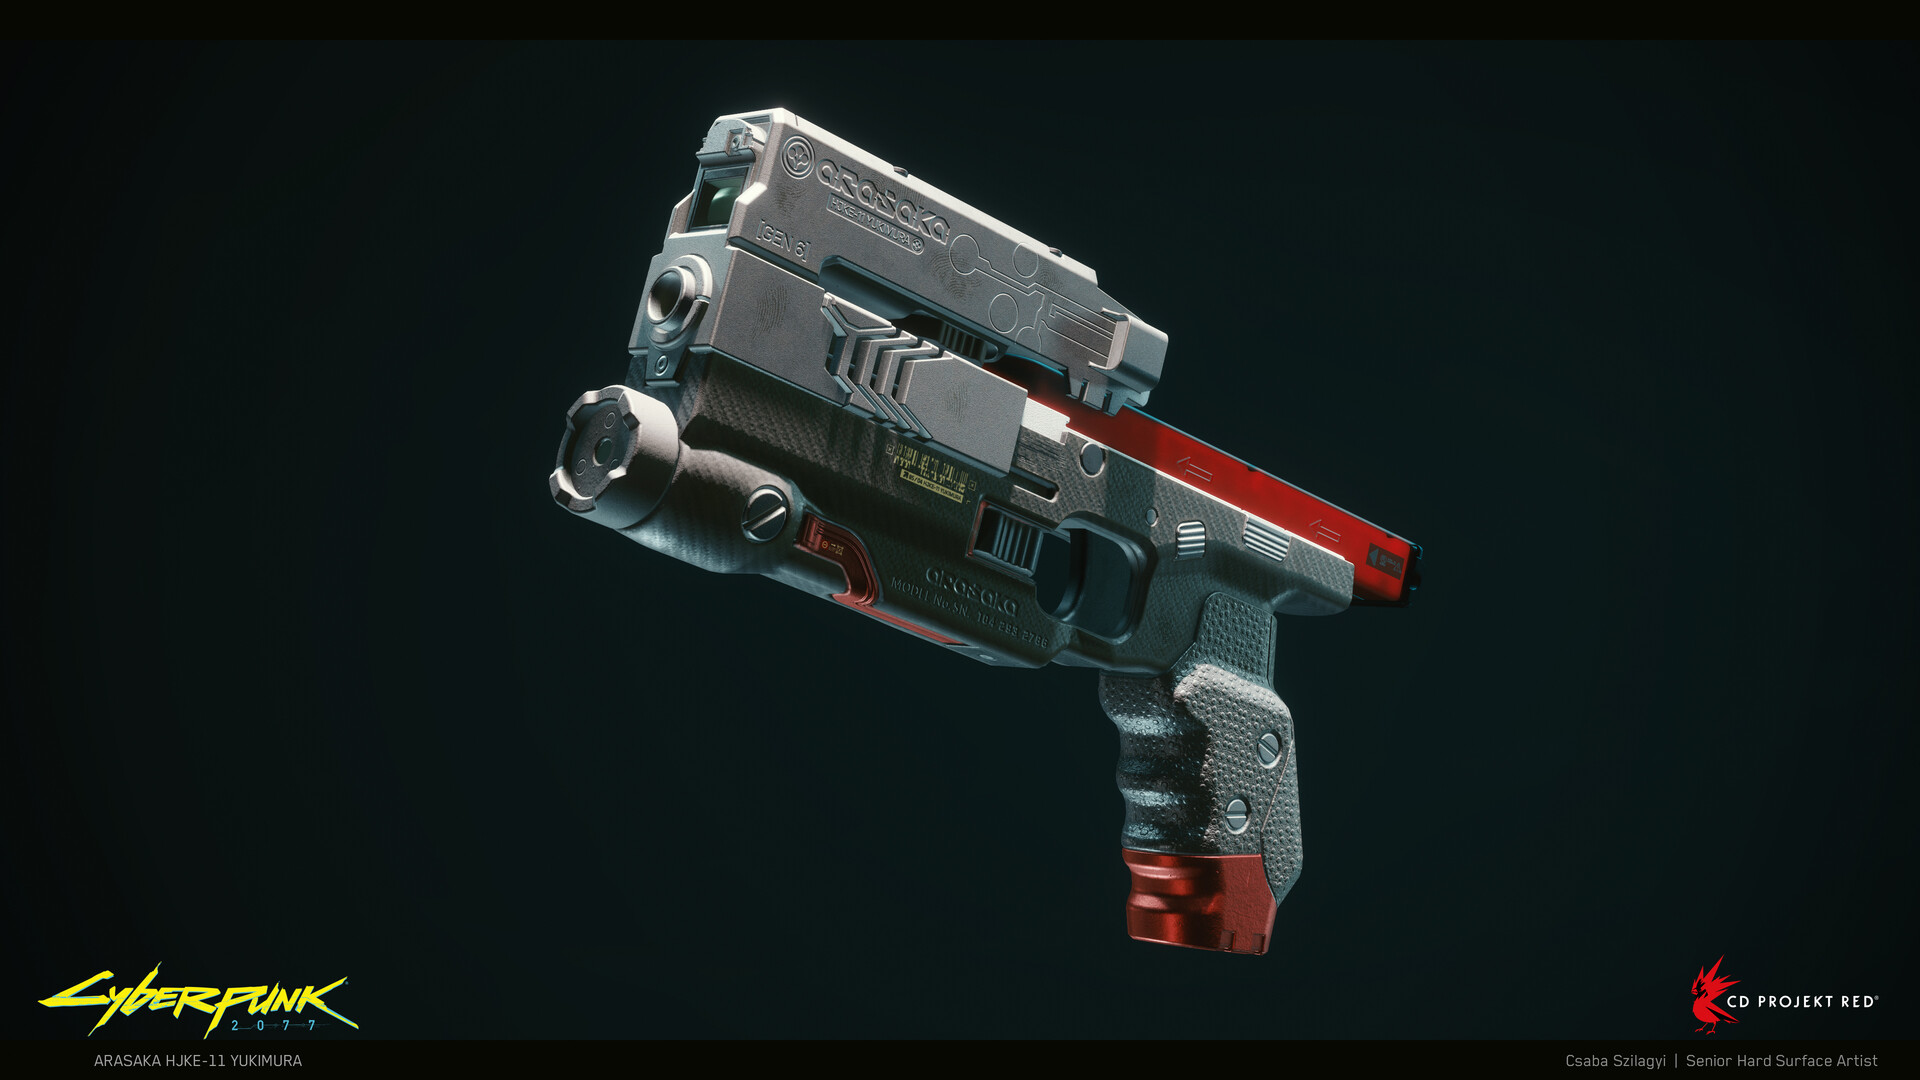
The only problem was space. There basically isn't any.
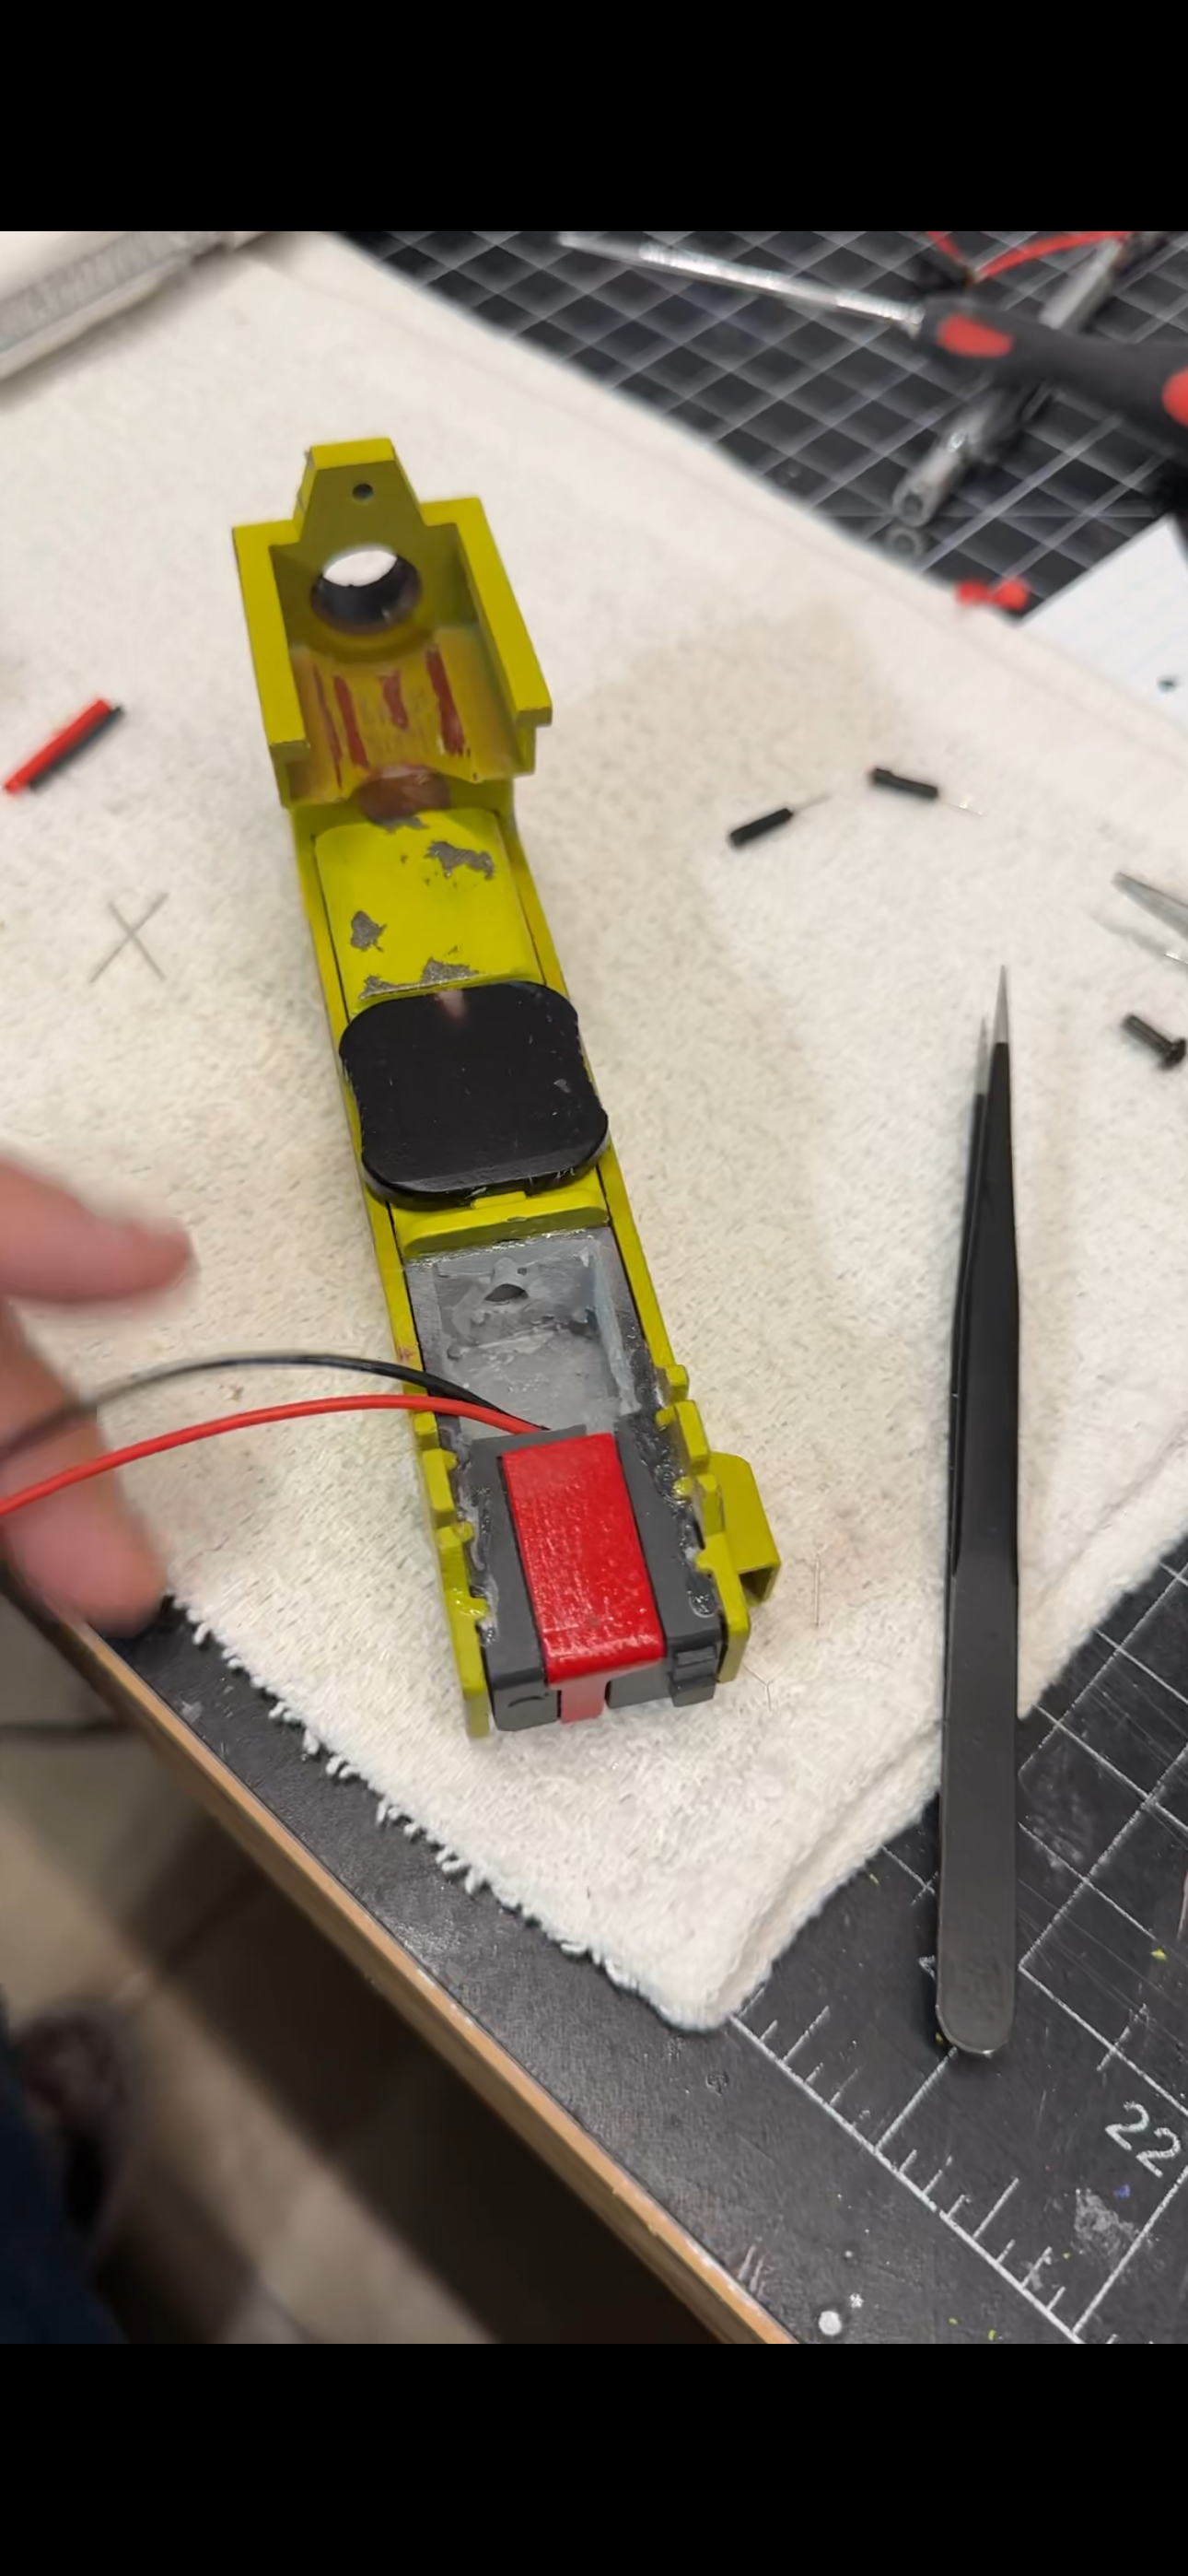
The upper receiver has almost no extra room inside it, so I carefully hollowed out sections of the print until I had just enough room to hide the electronics without changing the outside appearance.
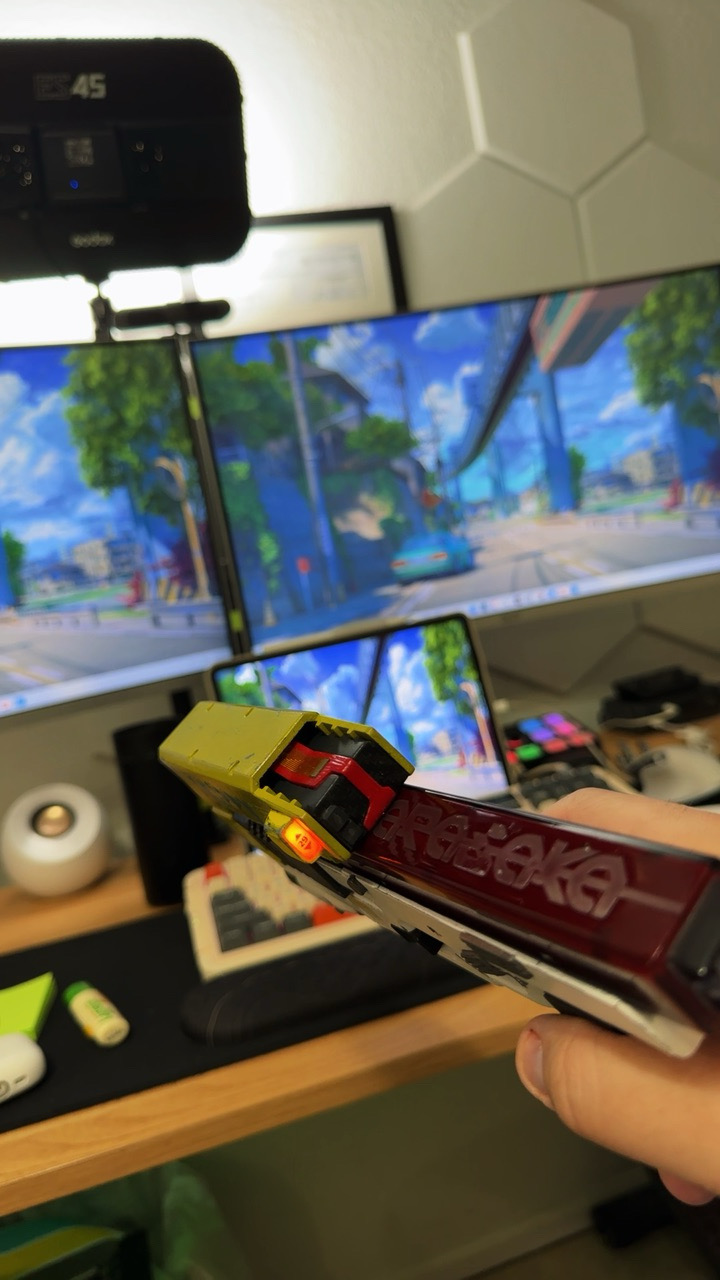
The lighting setup itself is actually pretty simple. I used a 3mm orange LED, three LR44 button batteries, and a tiny switch. The difficult part wasn't wiring it. The difficult part was finding somewhere to put everything.
Since nothing off the shelf would fit, I designed and printed my own battery holder specifically for this build. After what felt like a hundred test fits, I finally managed to squeeze everything inside the receiver. Flipping that switch for the first time and seeing the display light up made all the extra work completely worth it.
Fixing the Grip
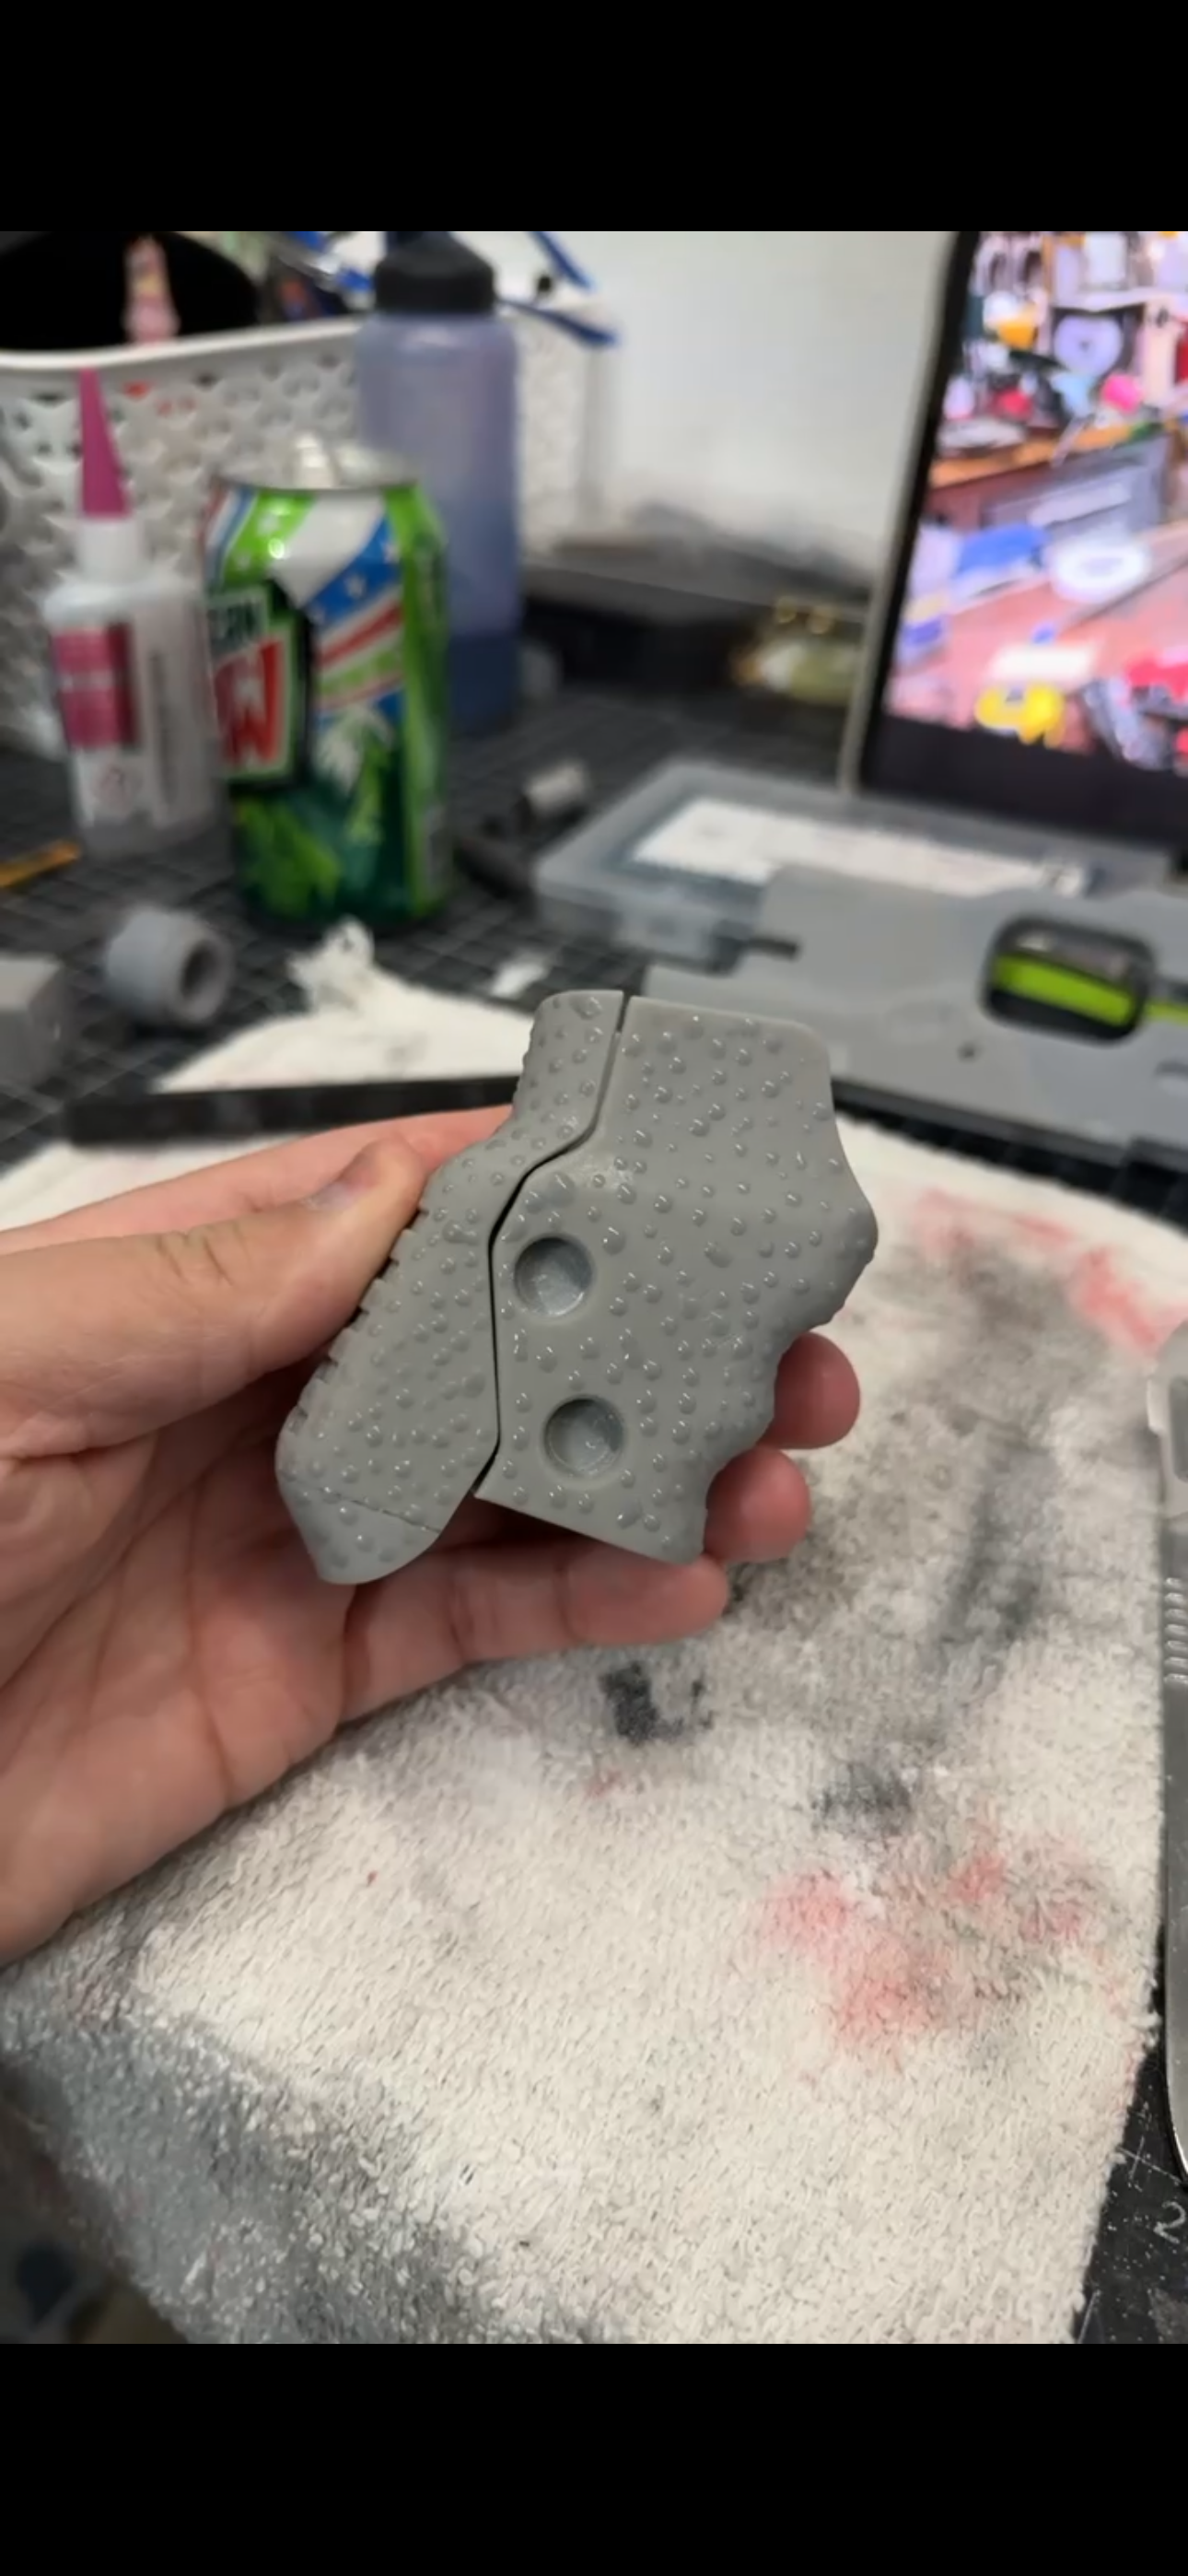
While comparing the print to my references, I noticed something else. The grip was too smooth.
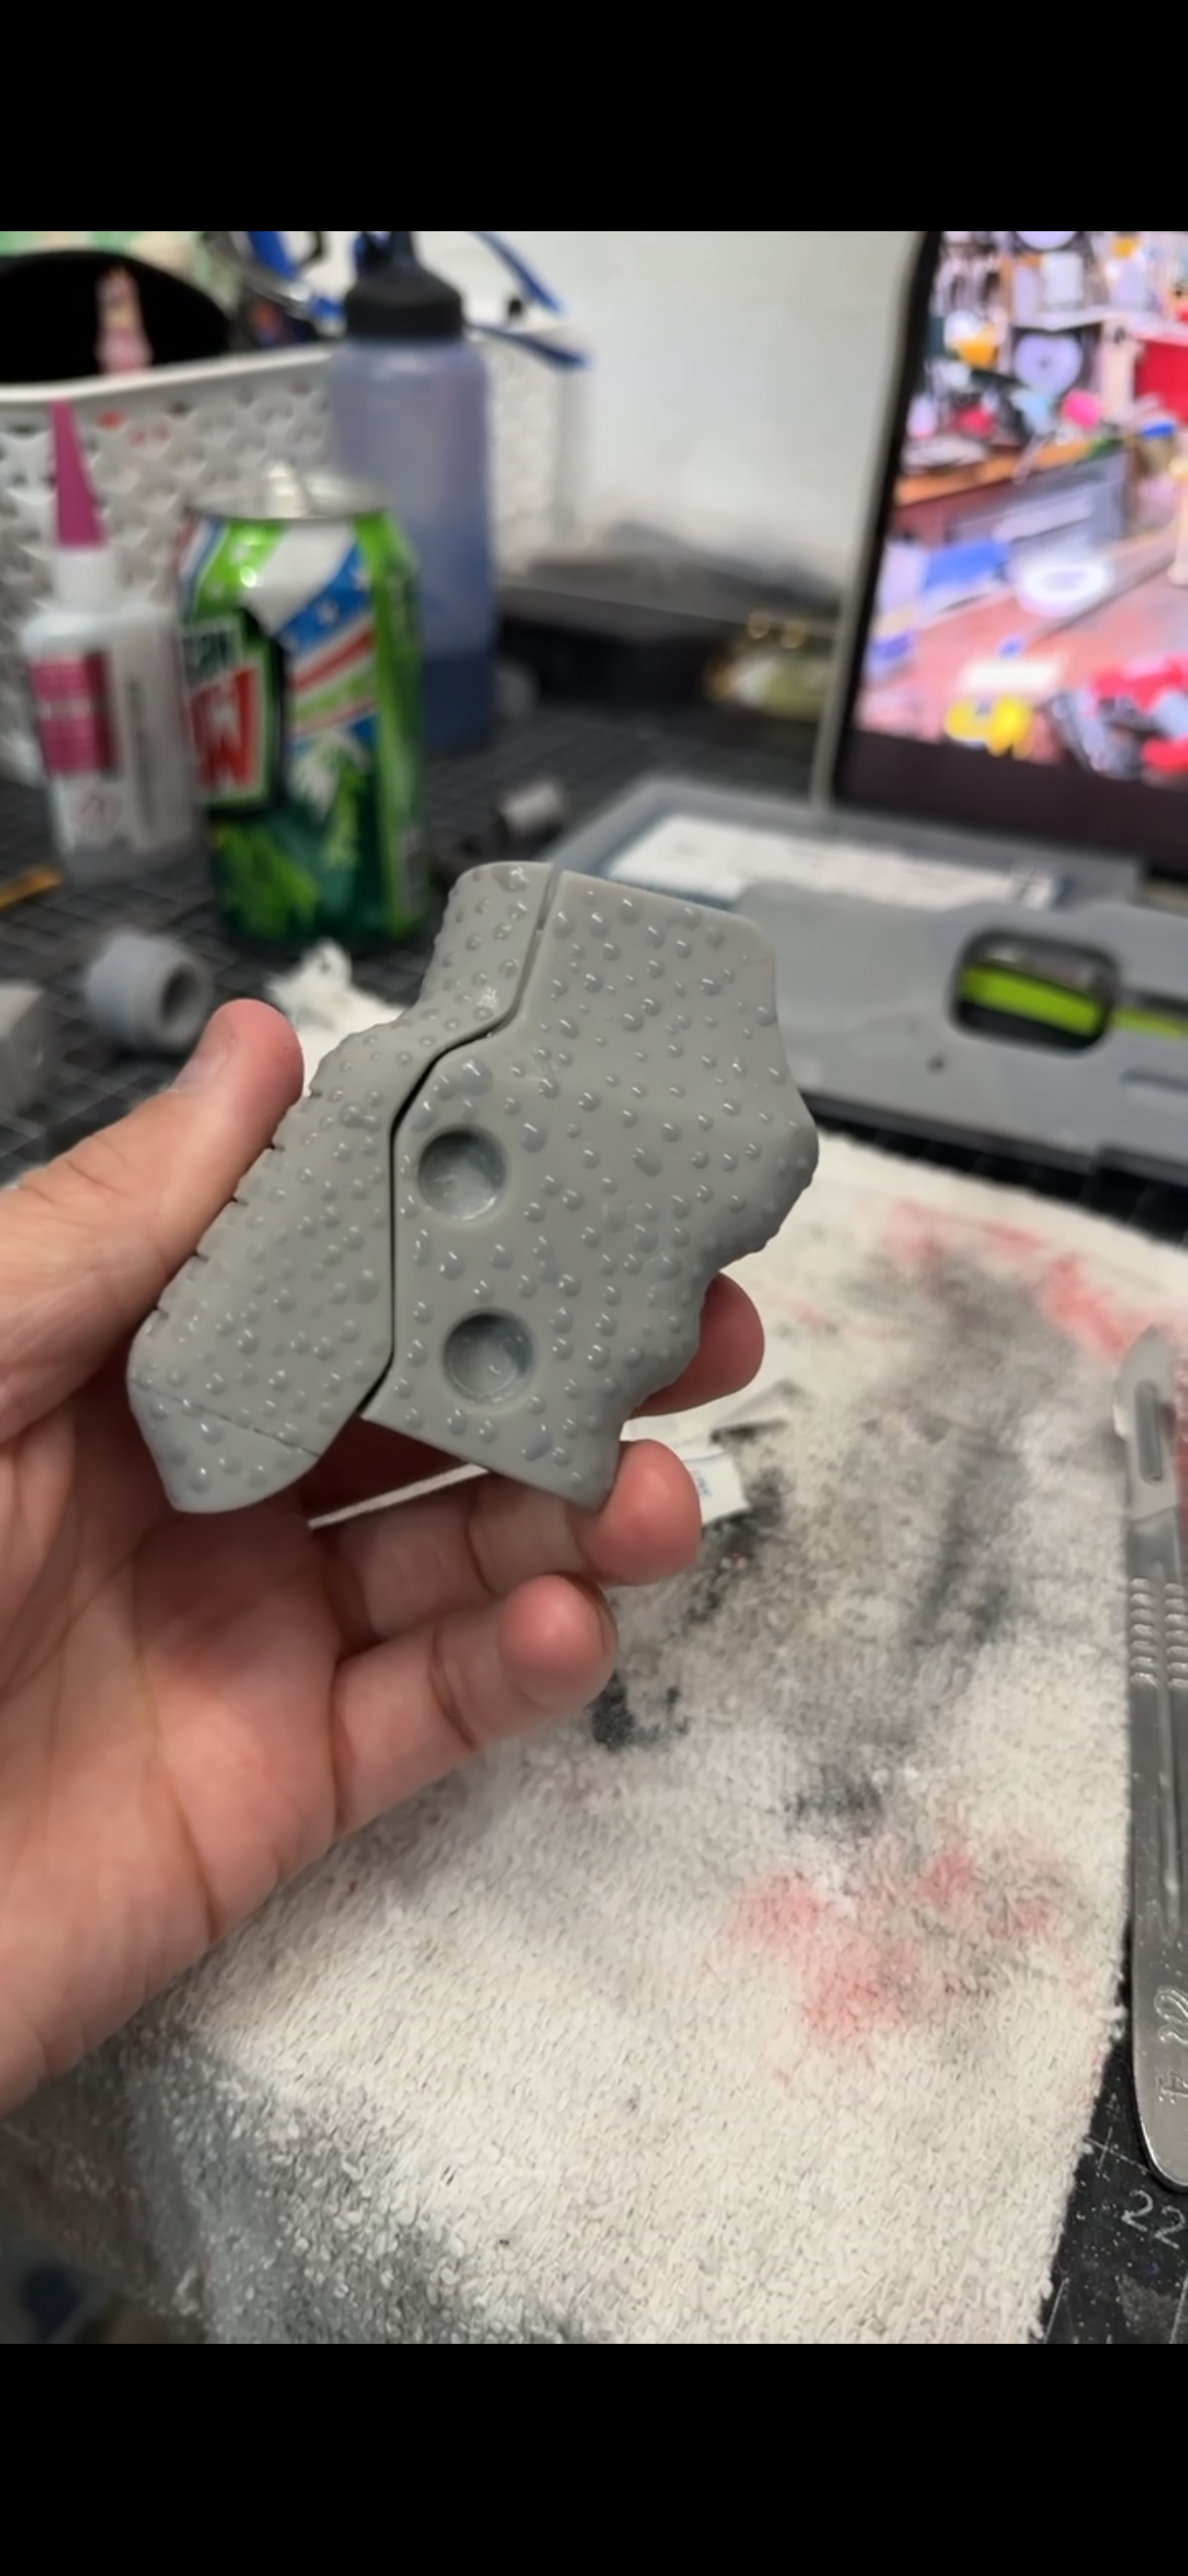
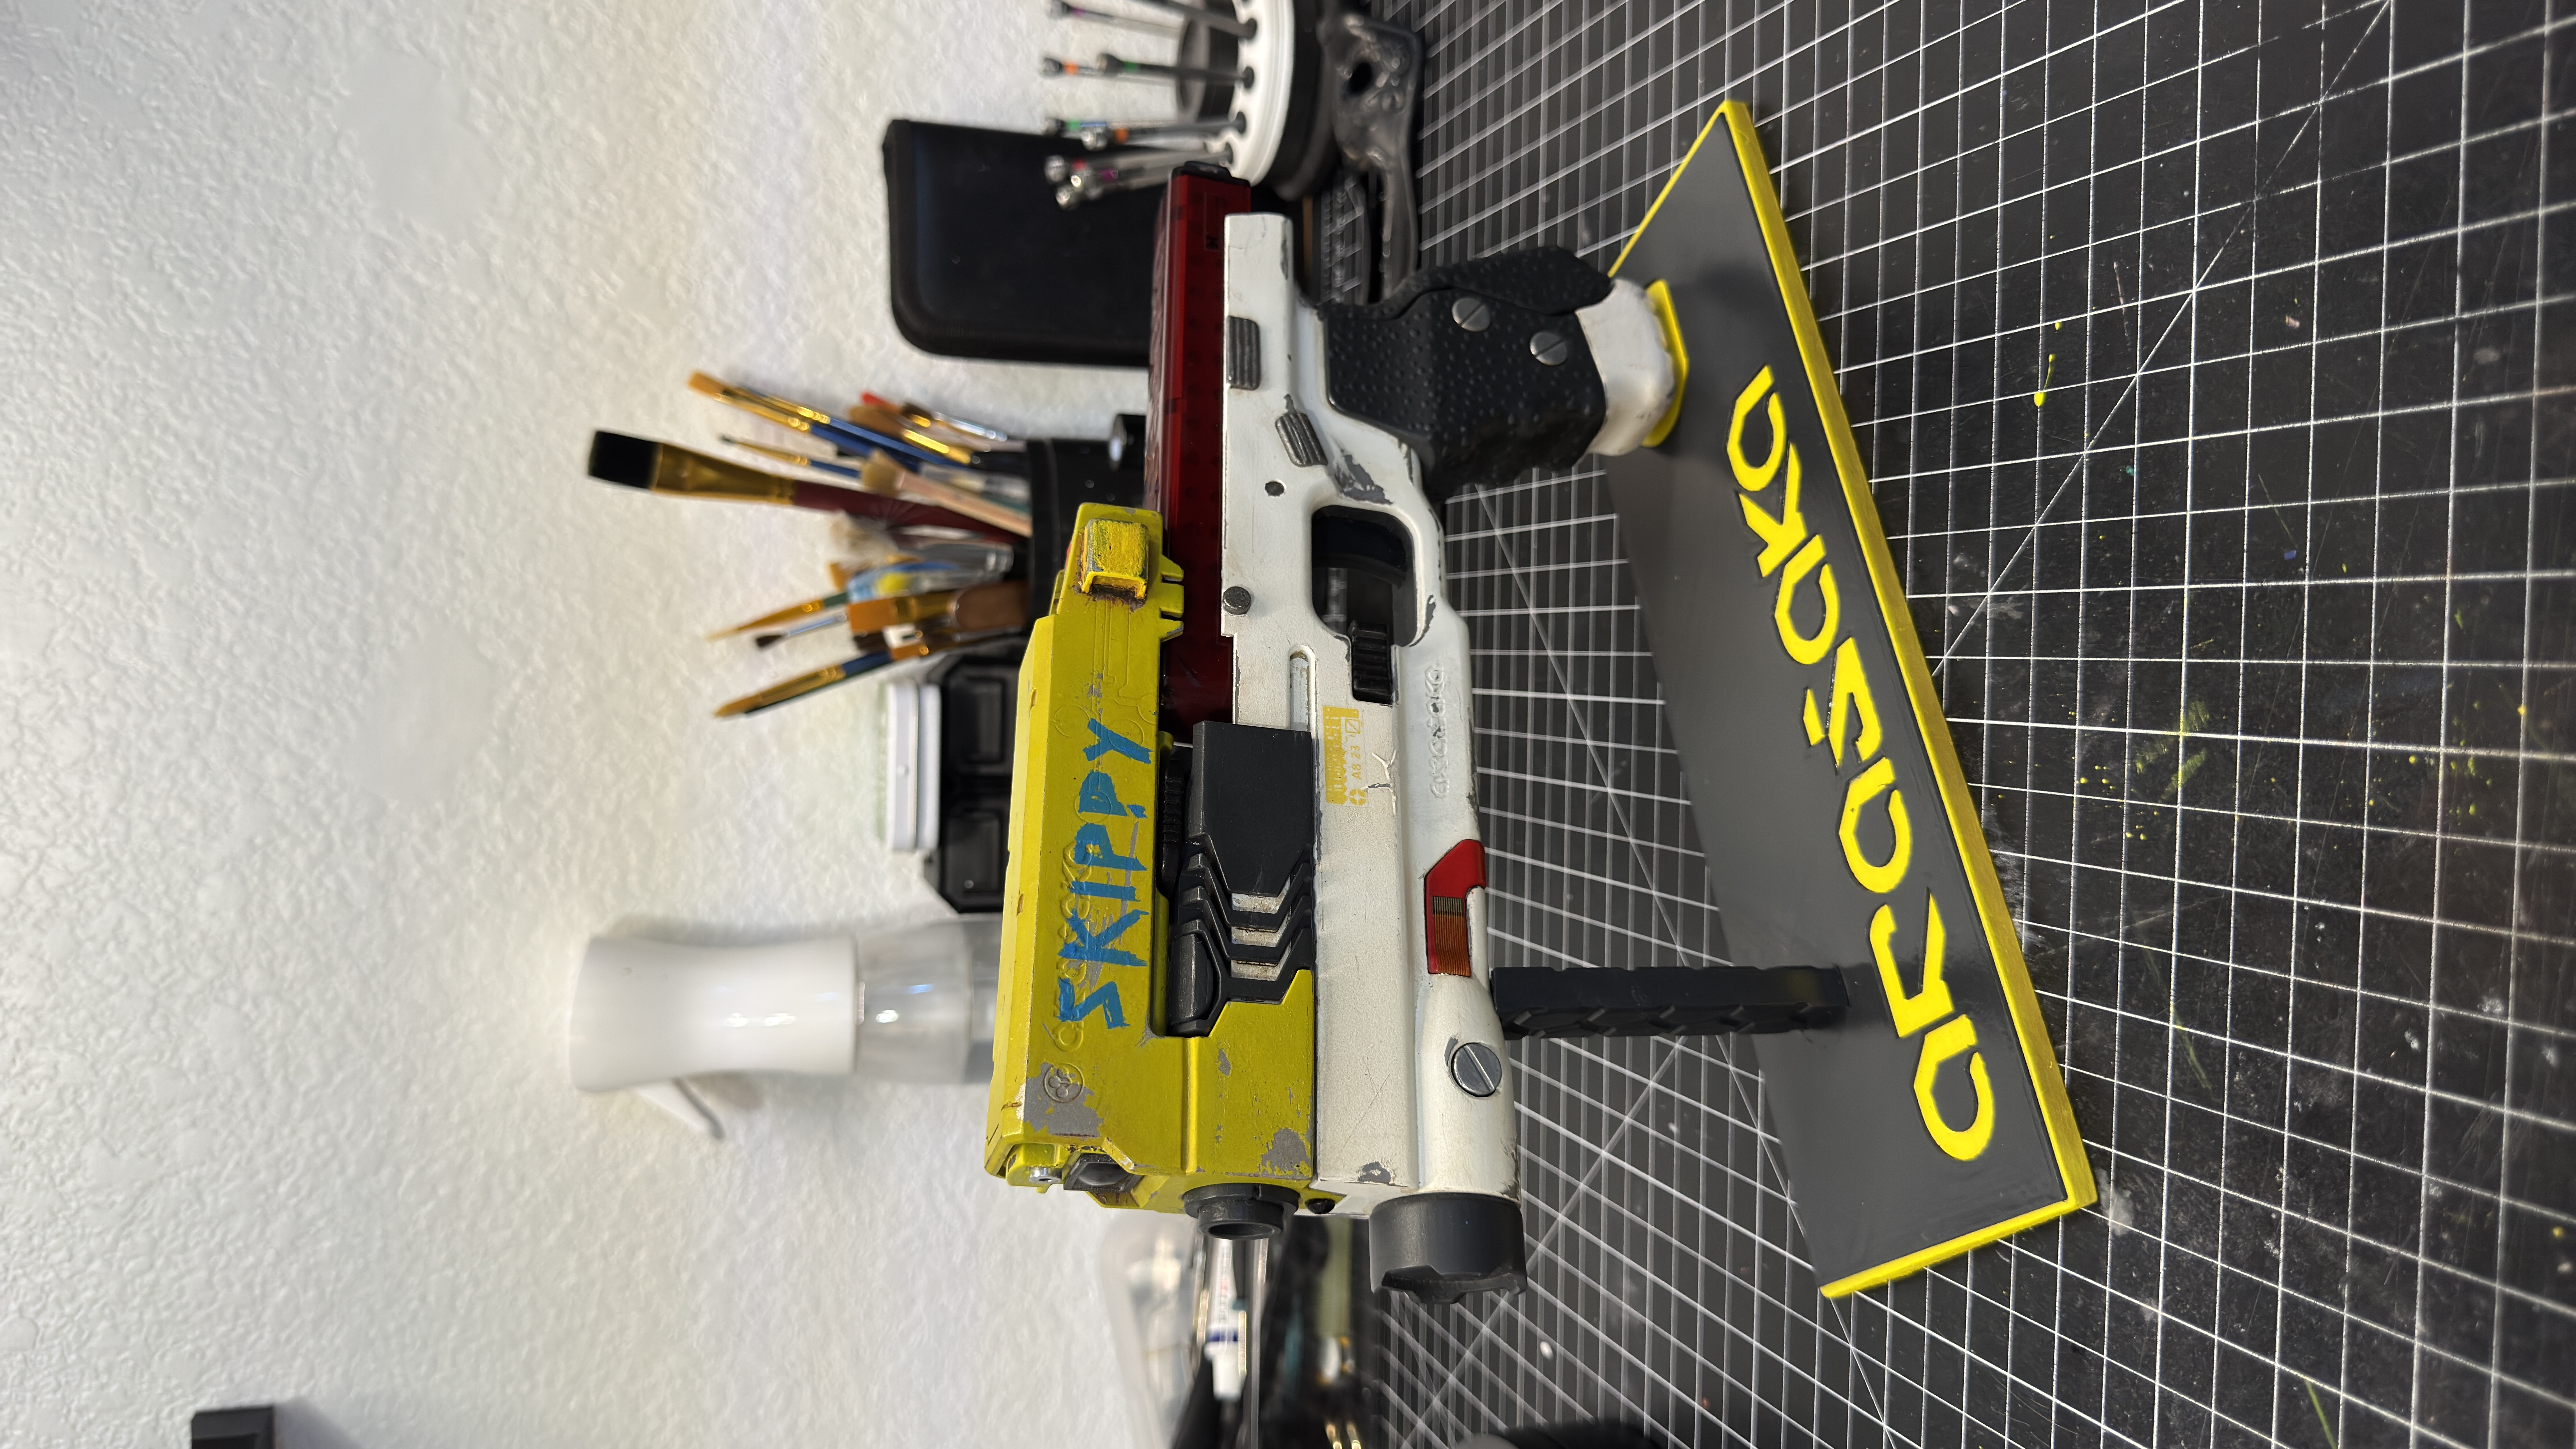
On the real Skippy, the grip has a subtle stippled rubber texture. The model didn't have that. Most people probably wouldn't even notice. I couldn't stop noticing it.
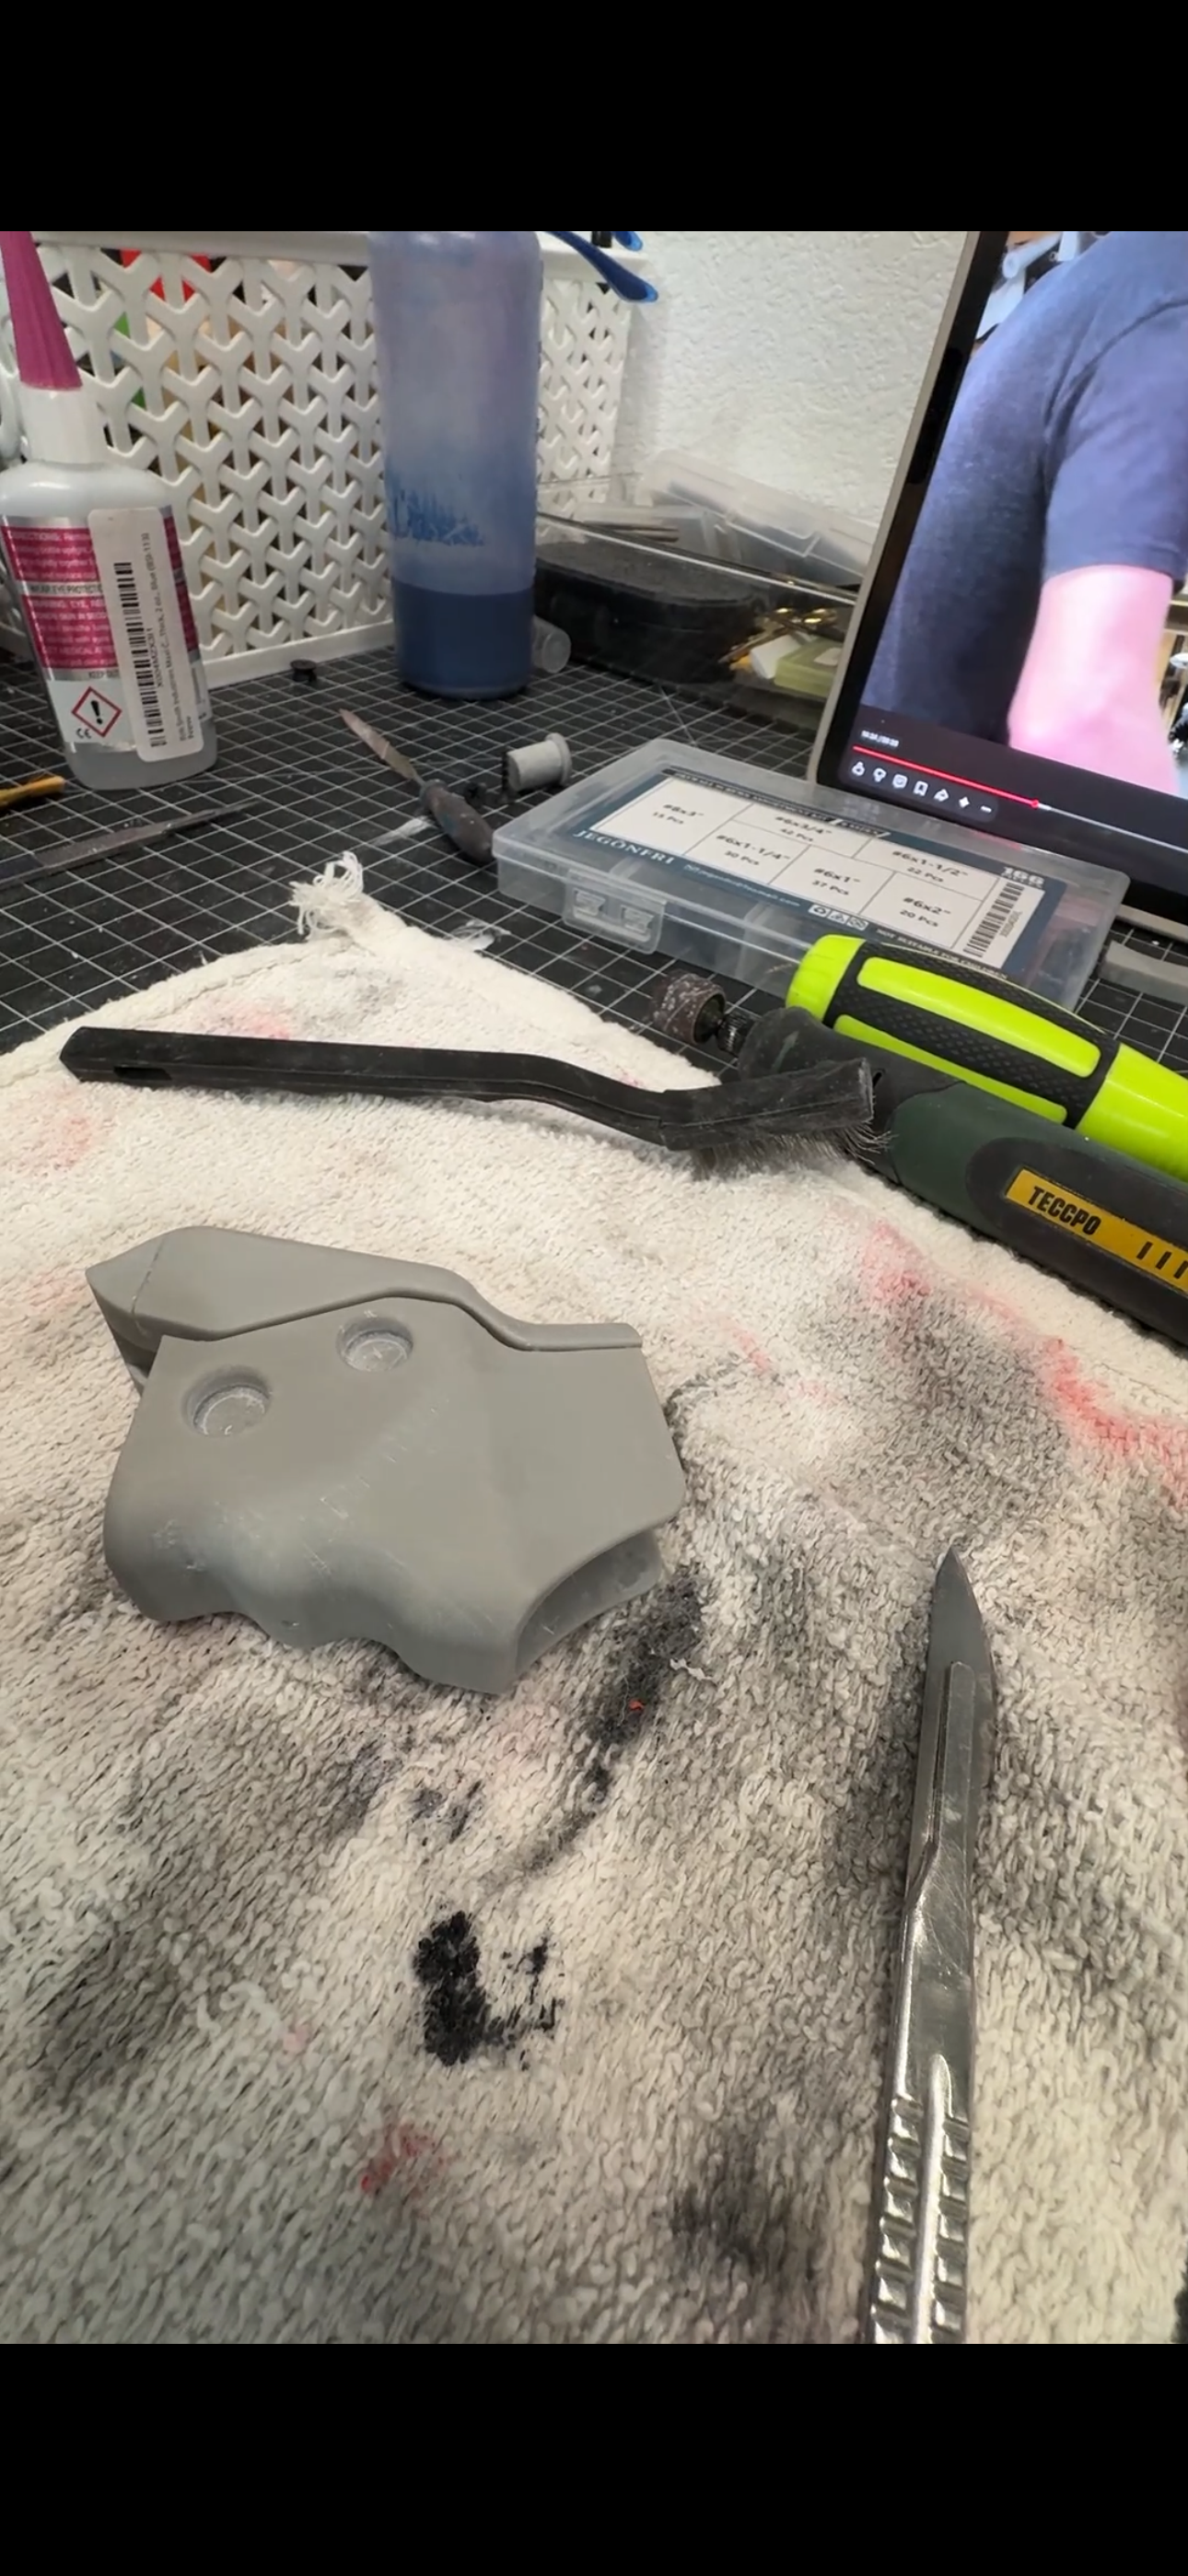
Rather than redesigning the grip, I grabbed a small precision dropper filled with UV resin and started placing tiny individual drops across both grip panels.
Drop. Cure. Drop. Cure. Repeat... Over and over.
It was tedious as hell, but once it was painted, the texture looked exactly like molded rubber. It's one of those little details that people don't immediately point out, but it subconsciously makes the prop feel more real.
Primer Time
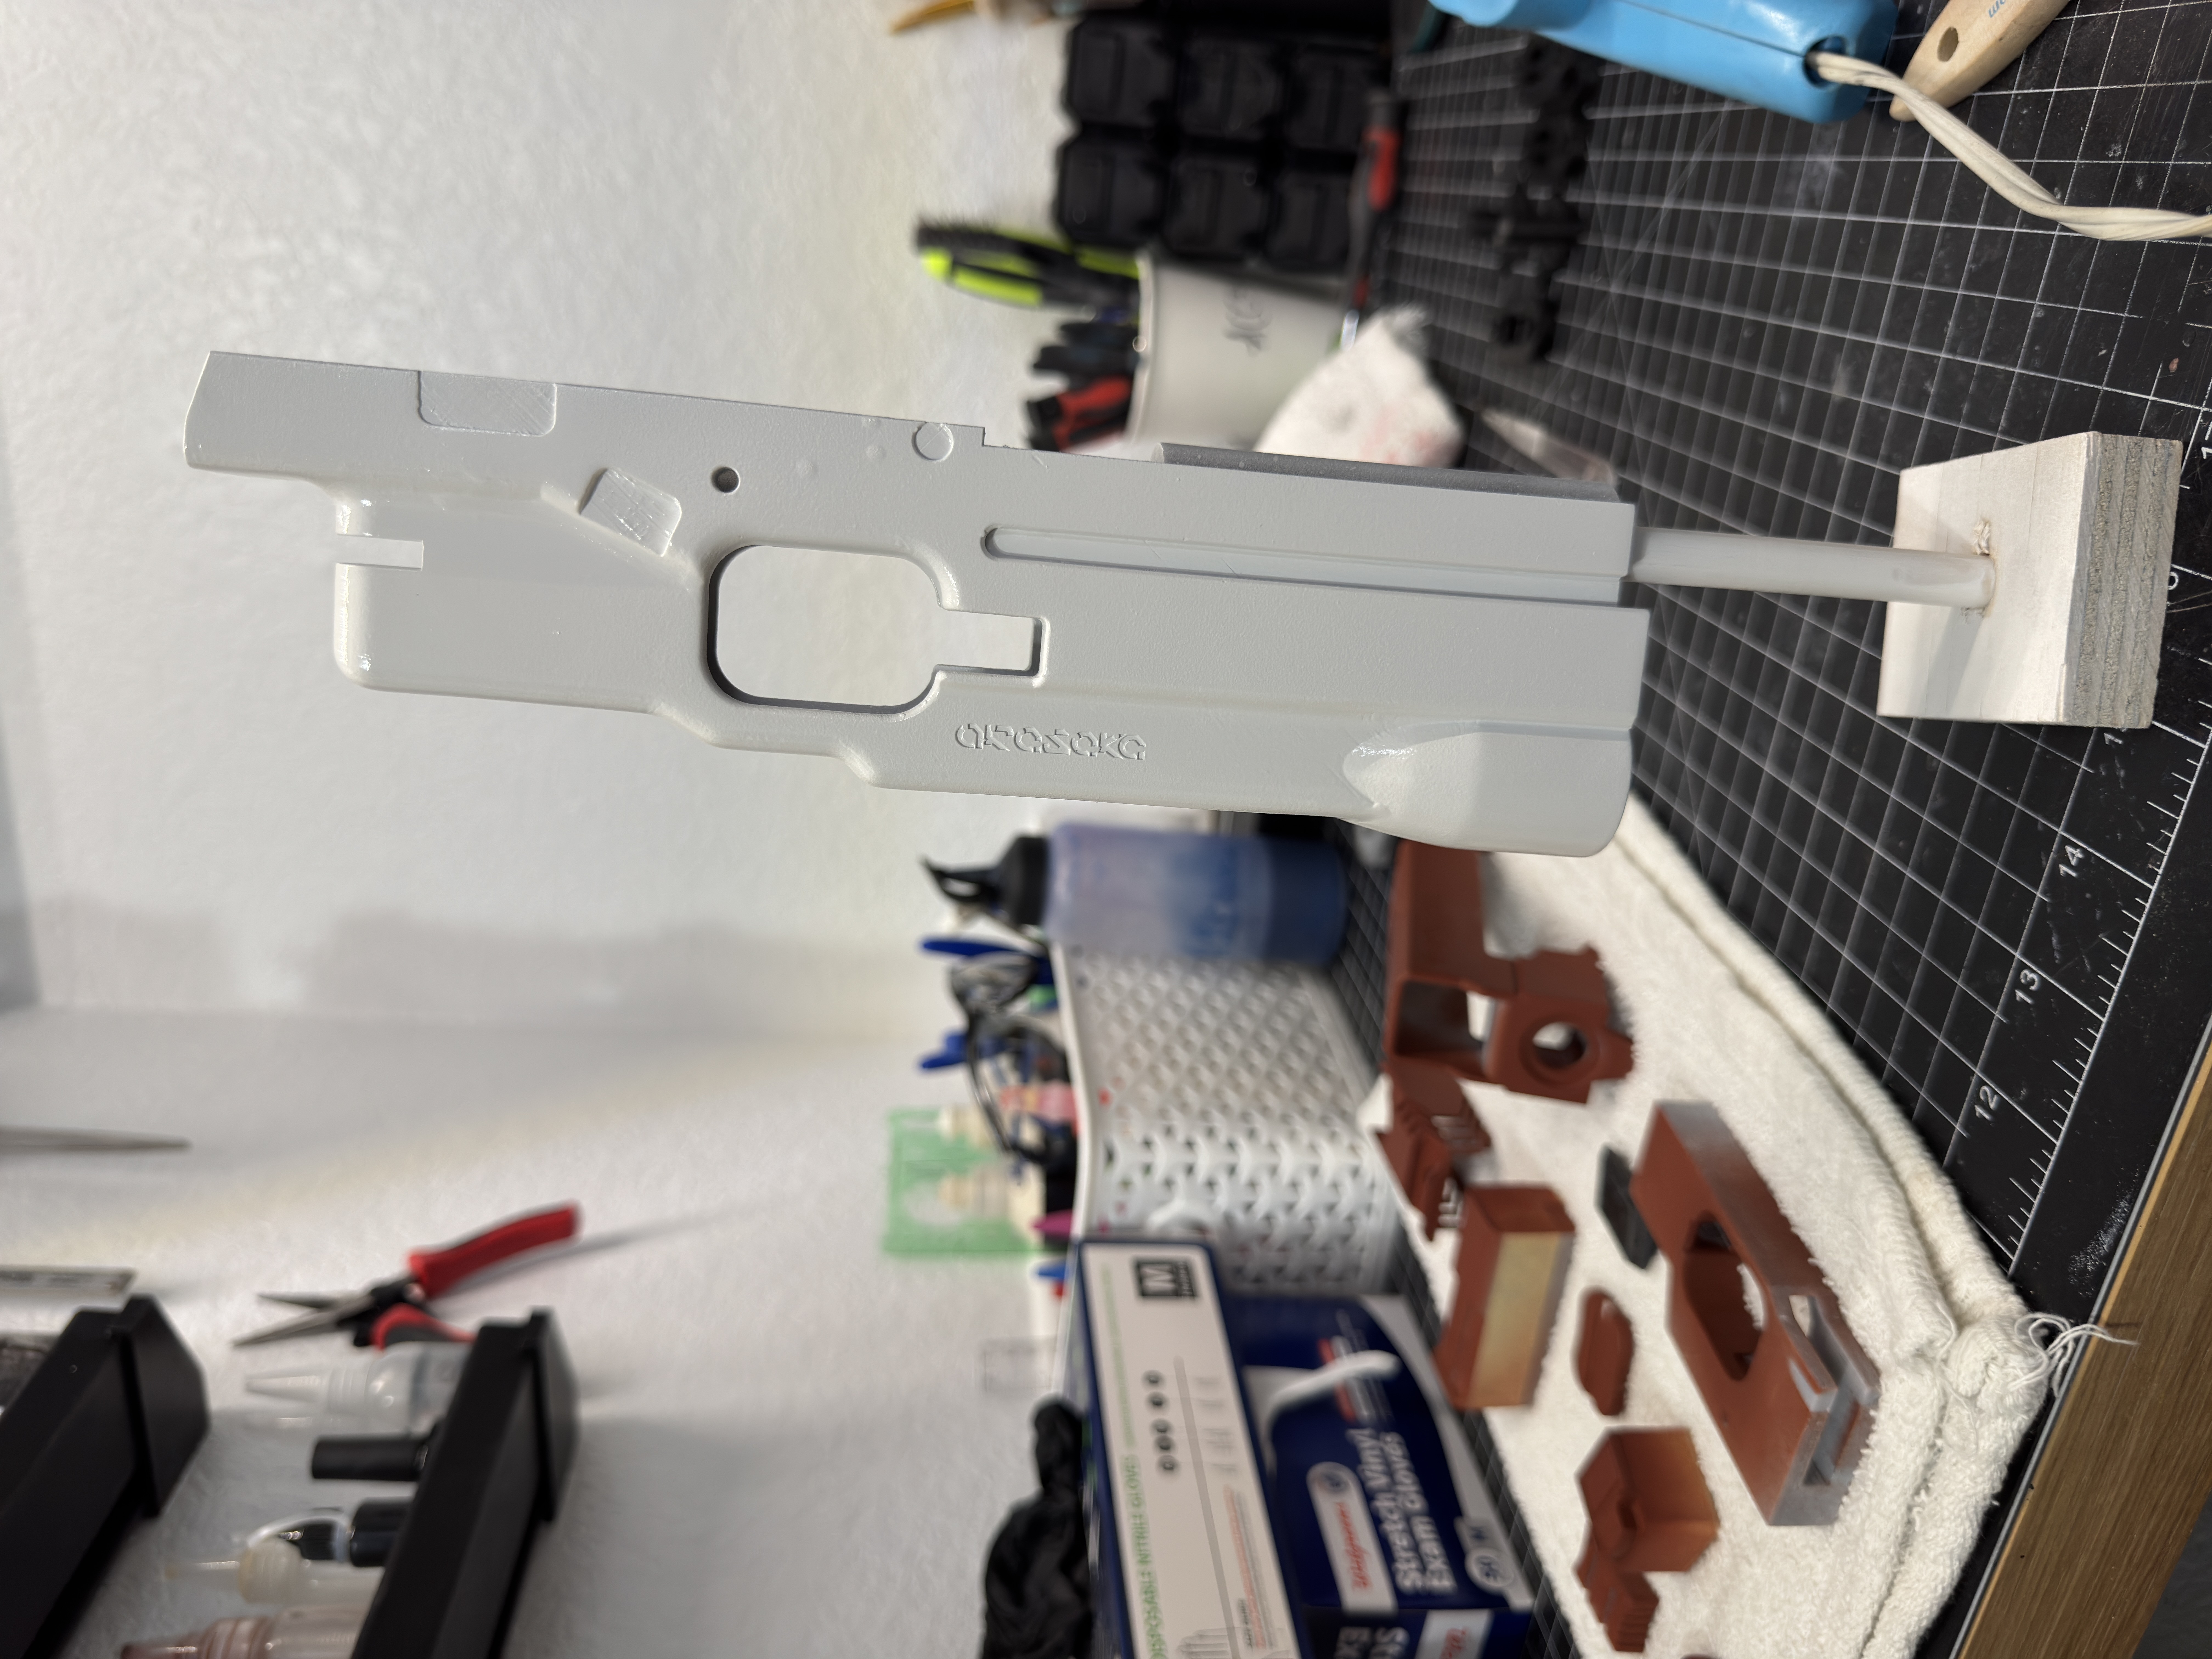
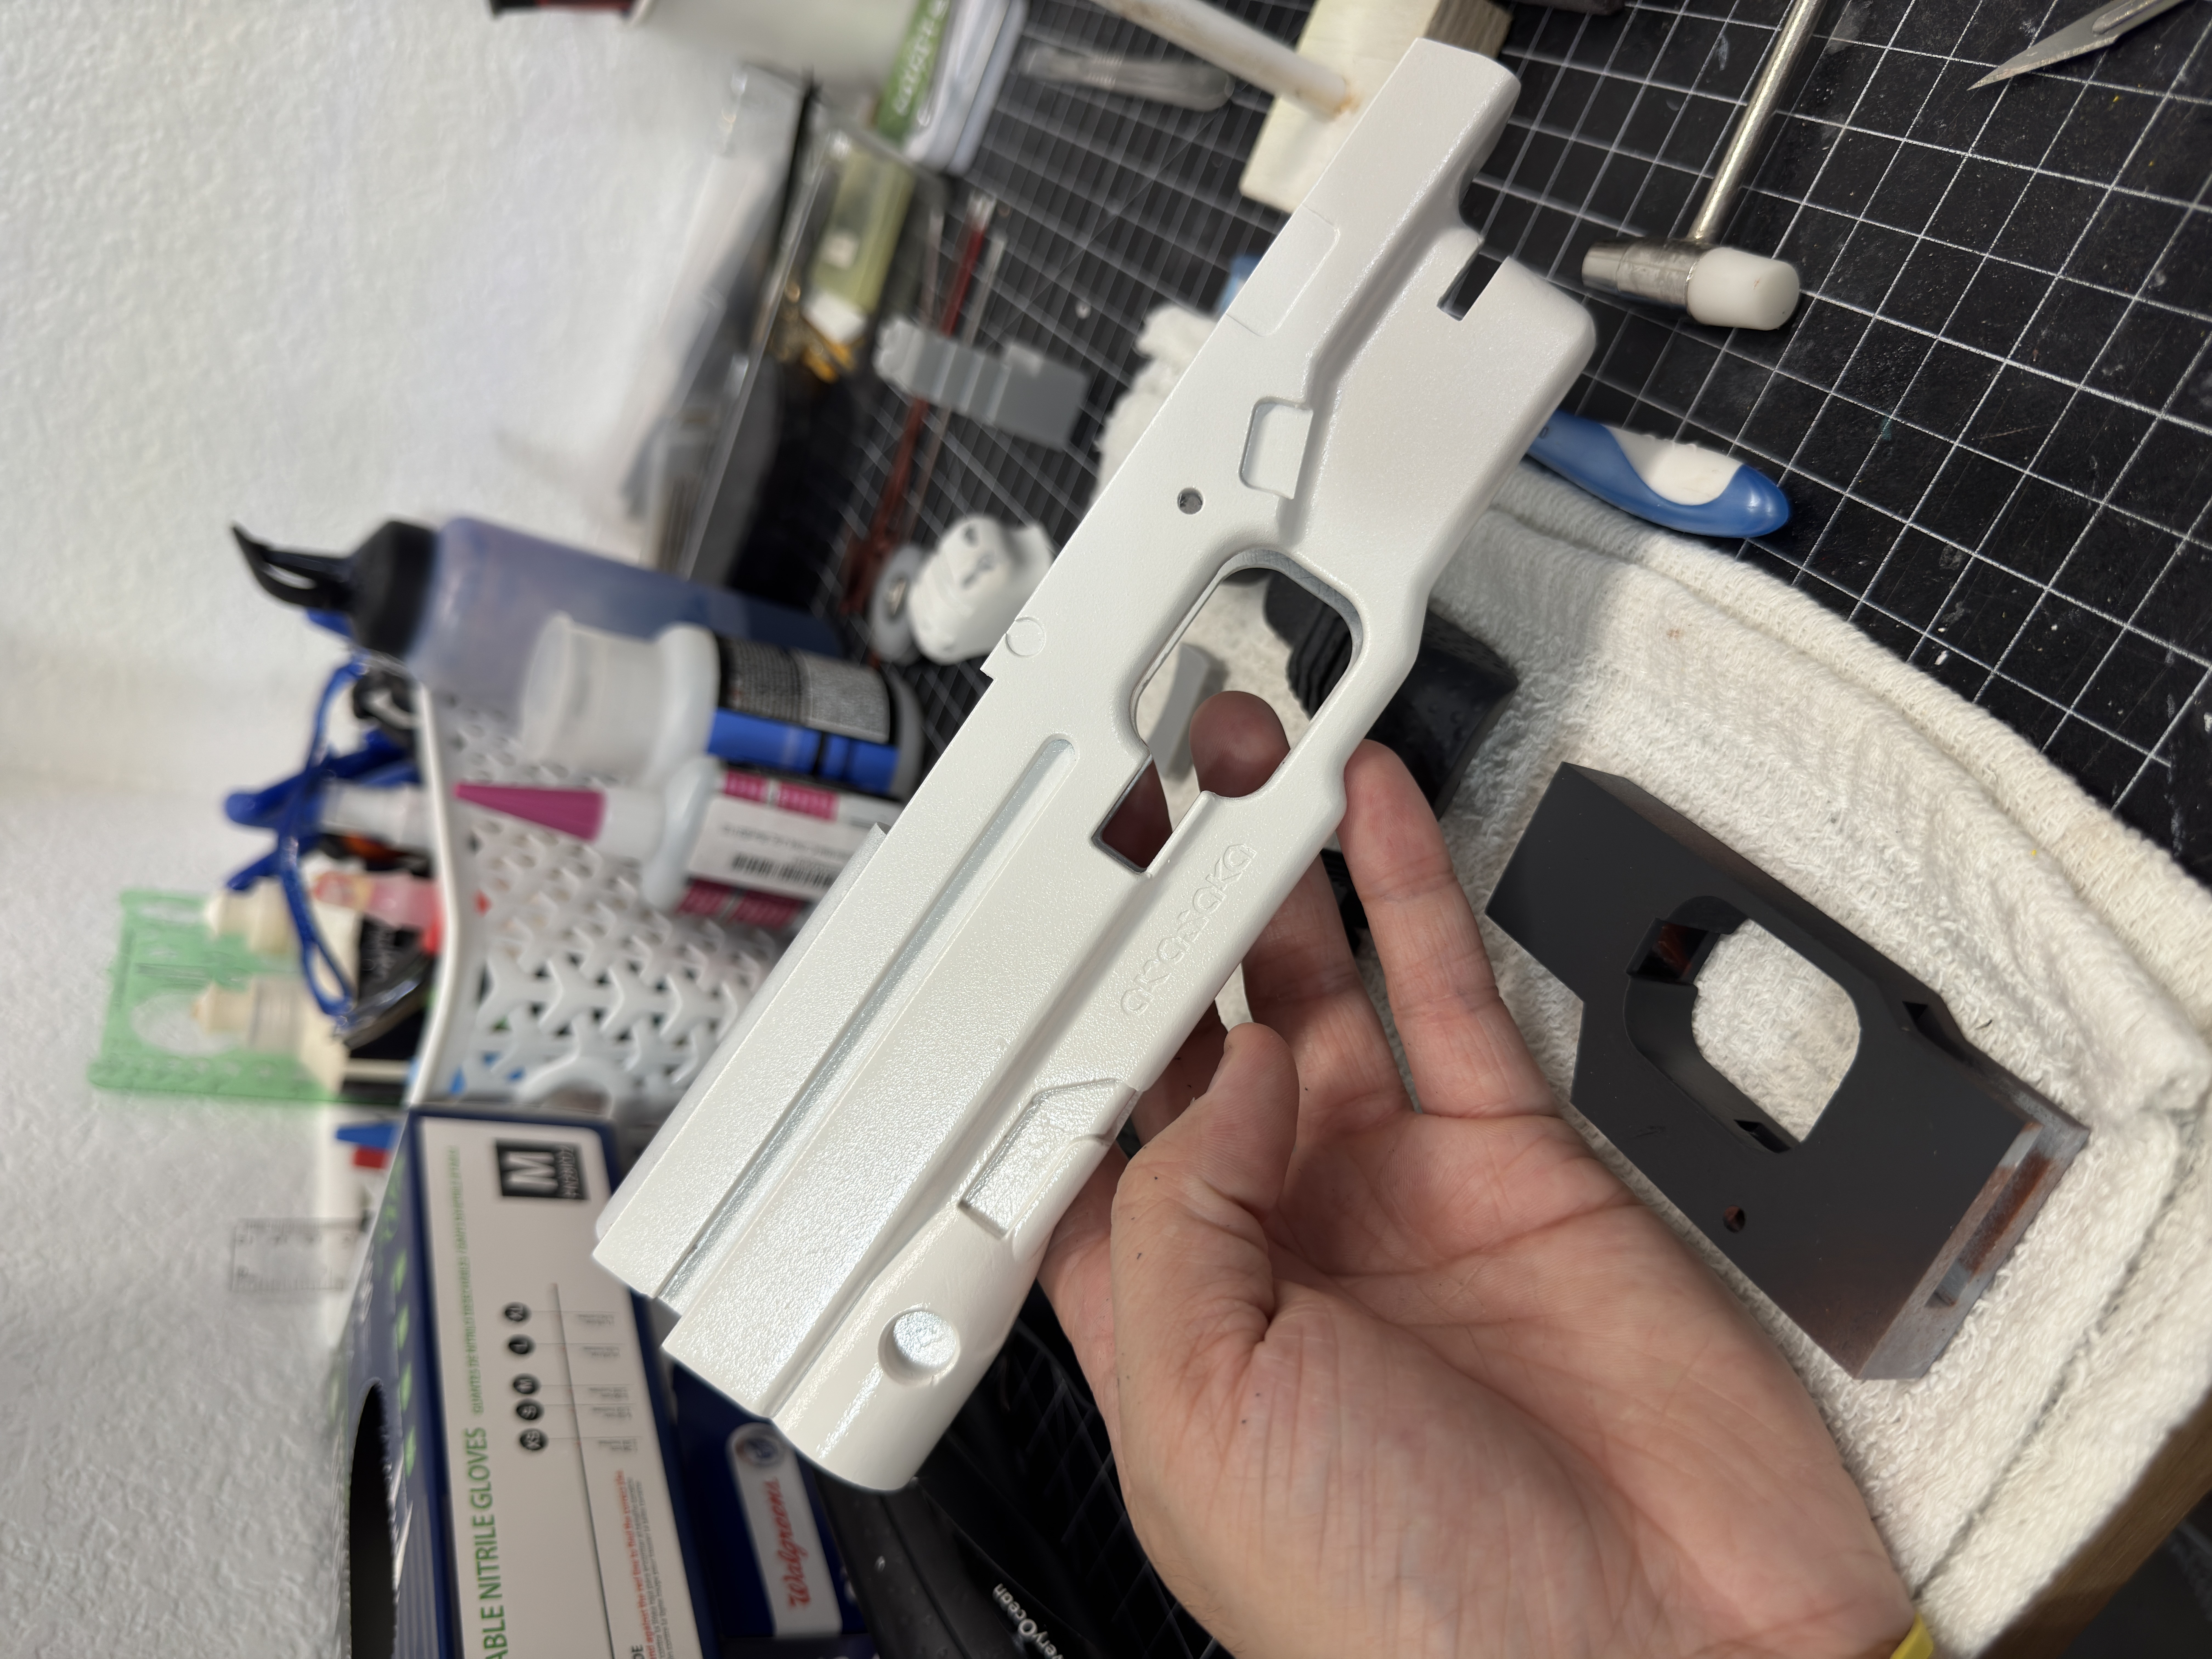
Once all the modifications were finished, everything got primed.
Primer is always the moment of truth. No matter how confident you are, primer will immediately show every scratch you missed and every repair that still needs attention. Luckily there weren't many.
I did one more round of sanding, hit everything with another coat of primer, and finally moved on to paint.
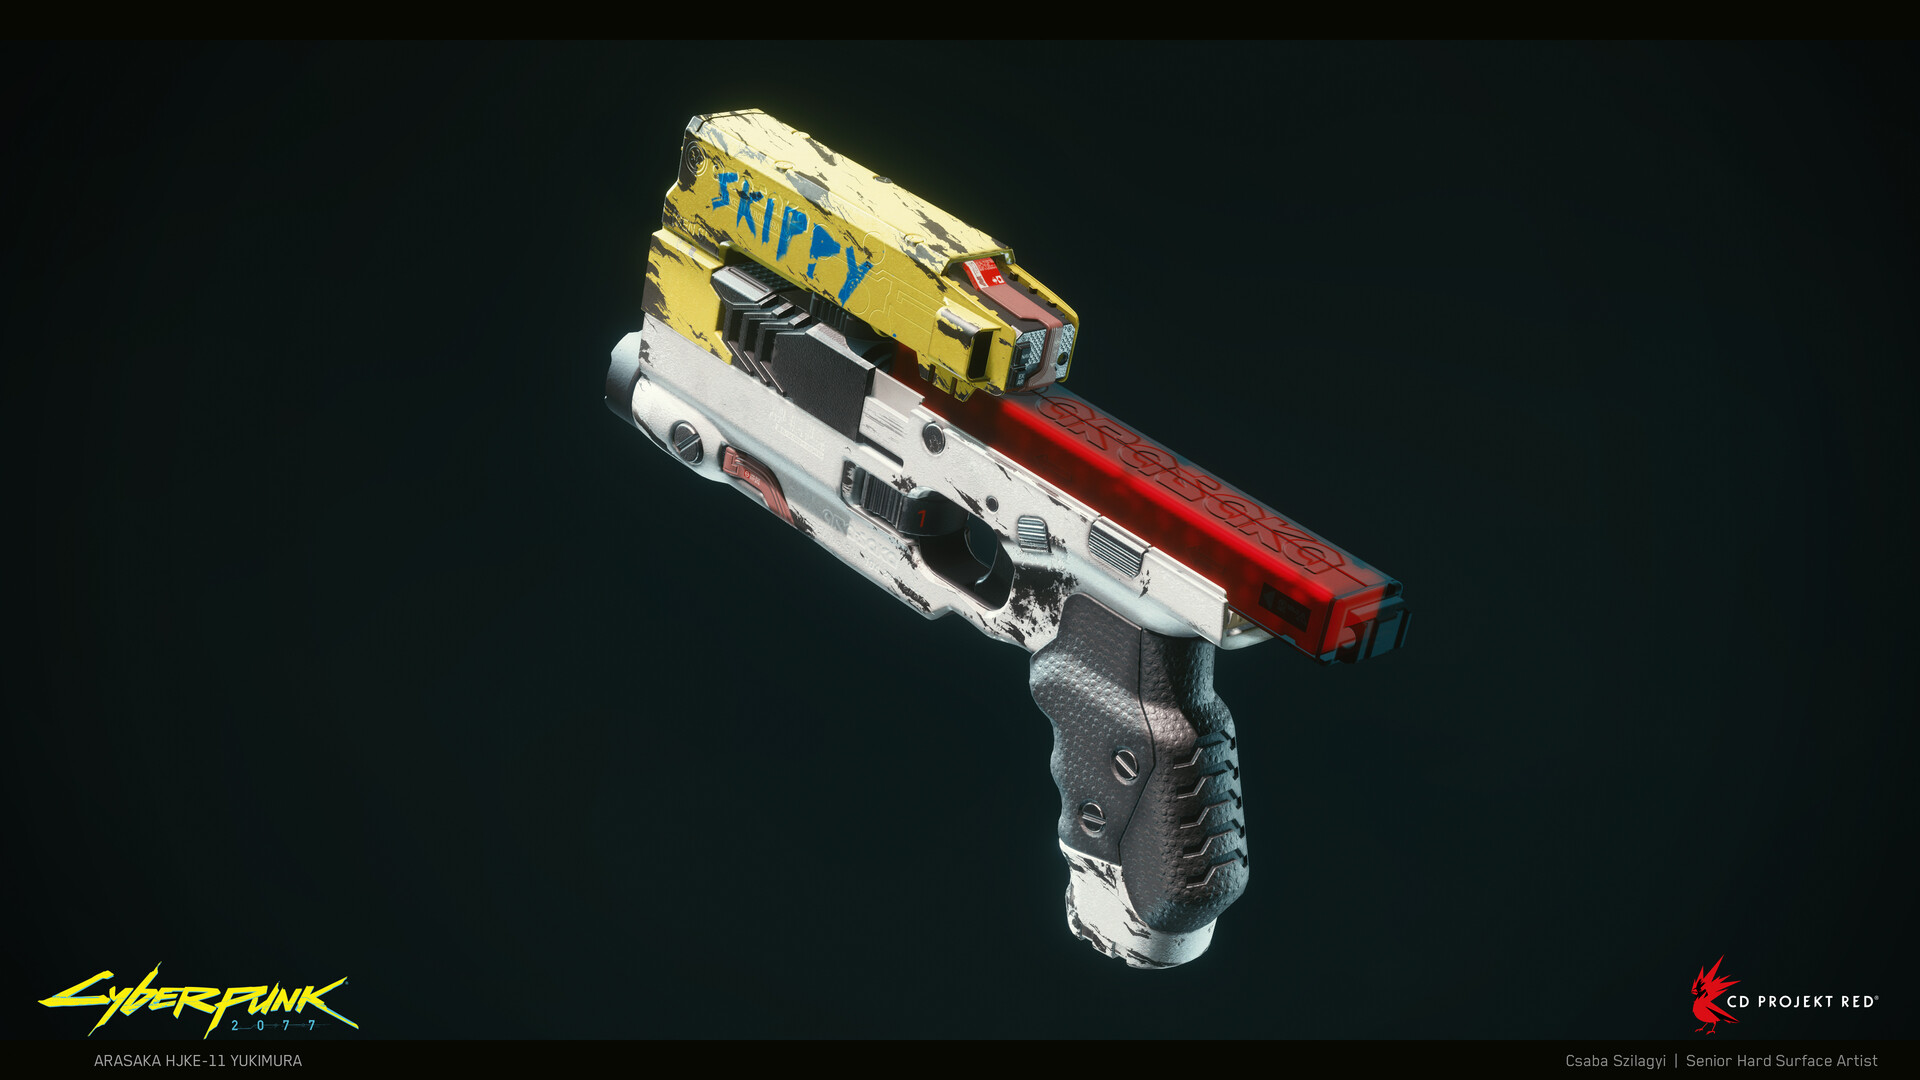
- The main frame received an off white finish.
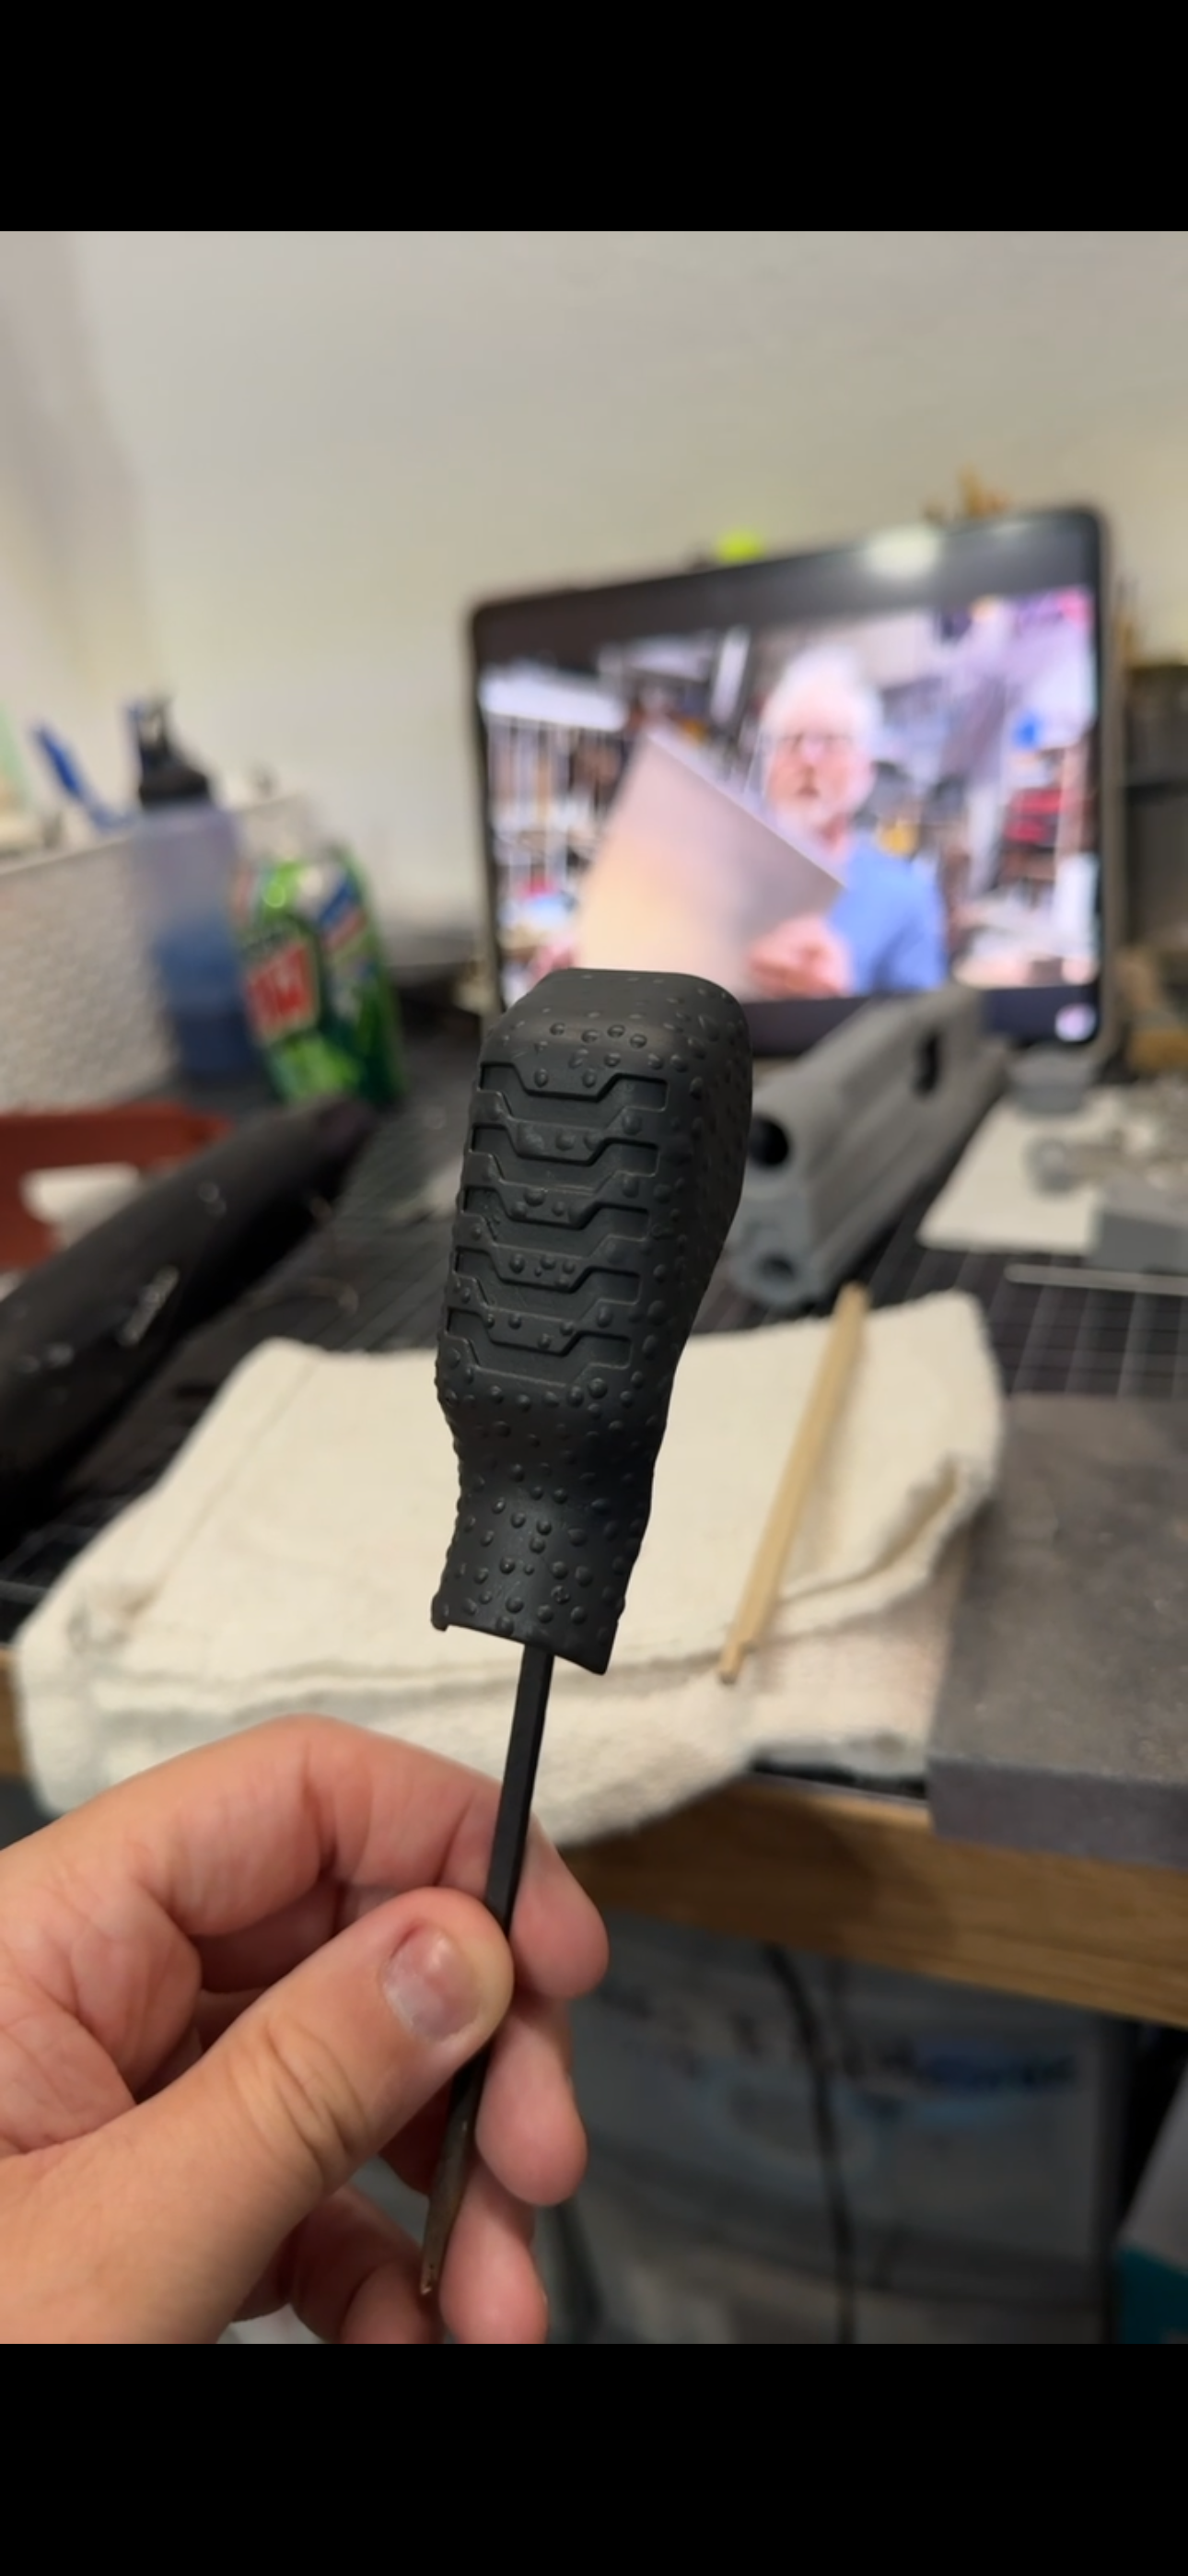
- The grips were painted a dark charcoal color to simulate rubber.
- The receiver was where things got interesting.
Hairspray Chipping
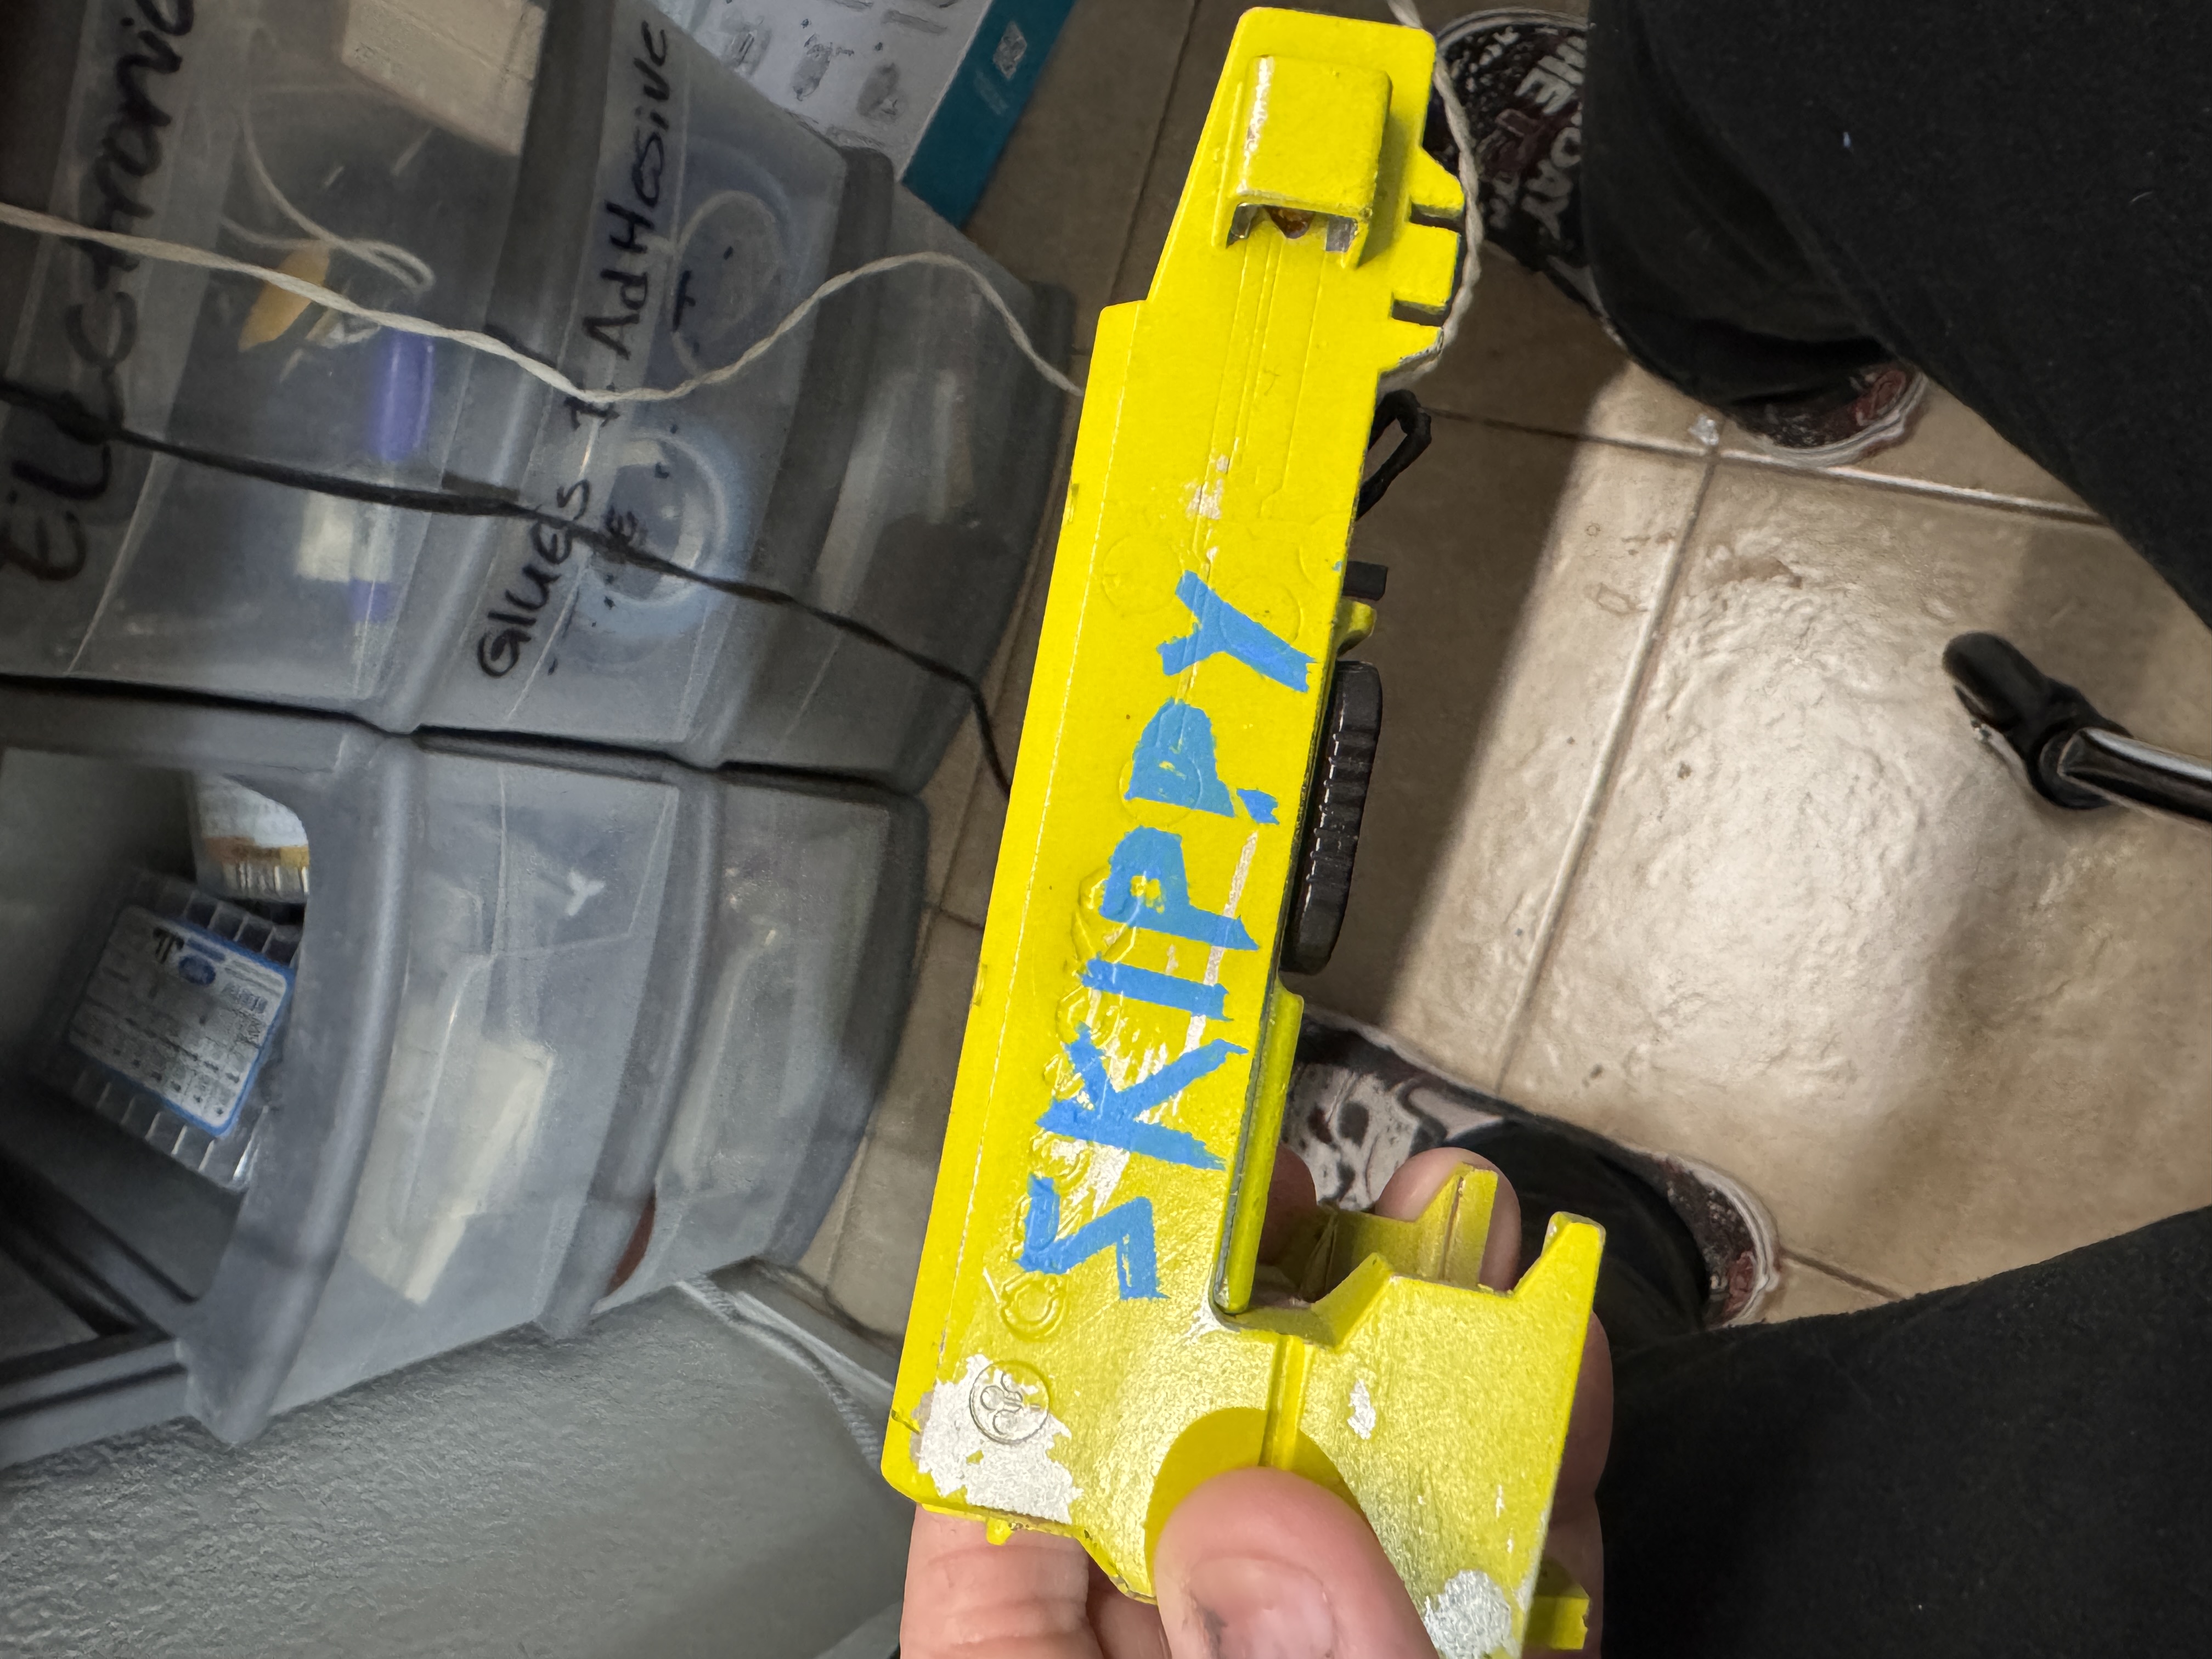
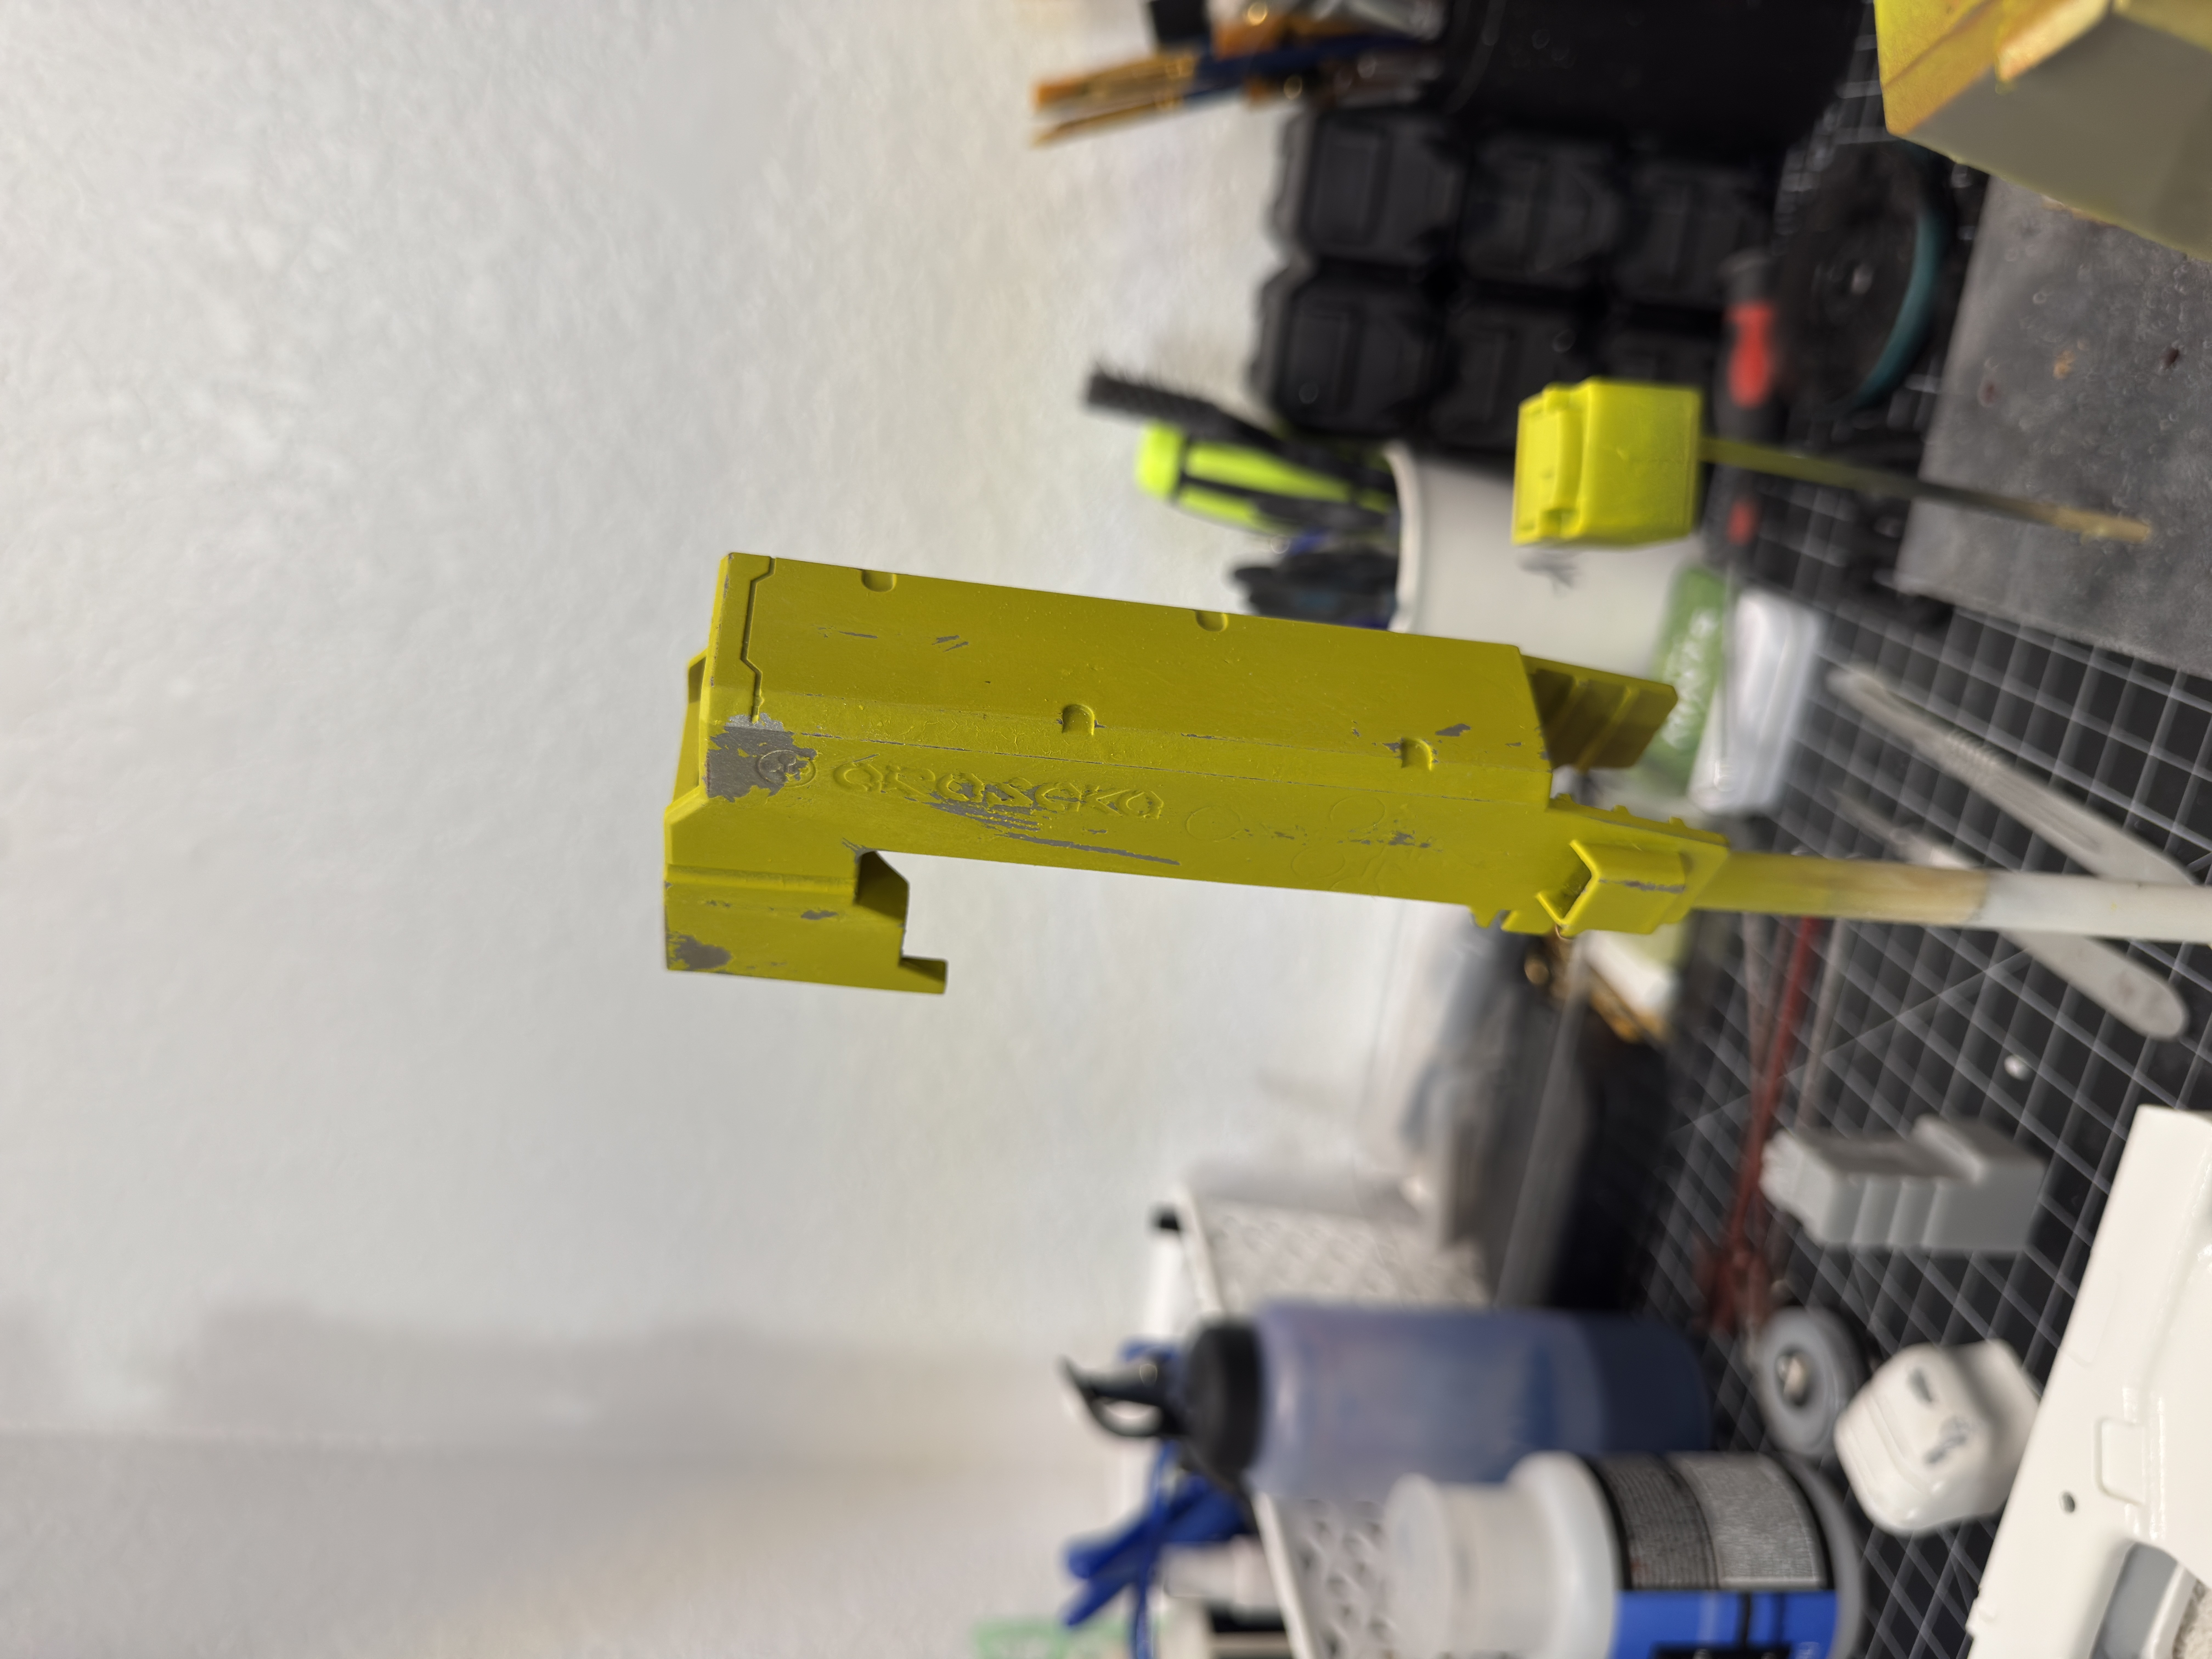
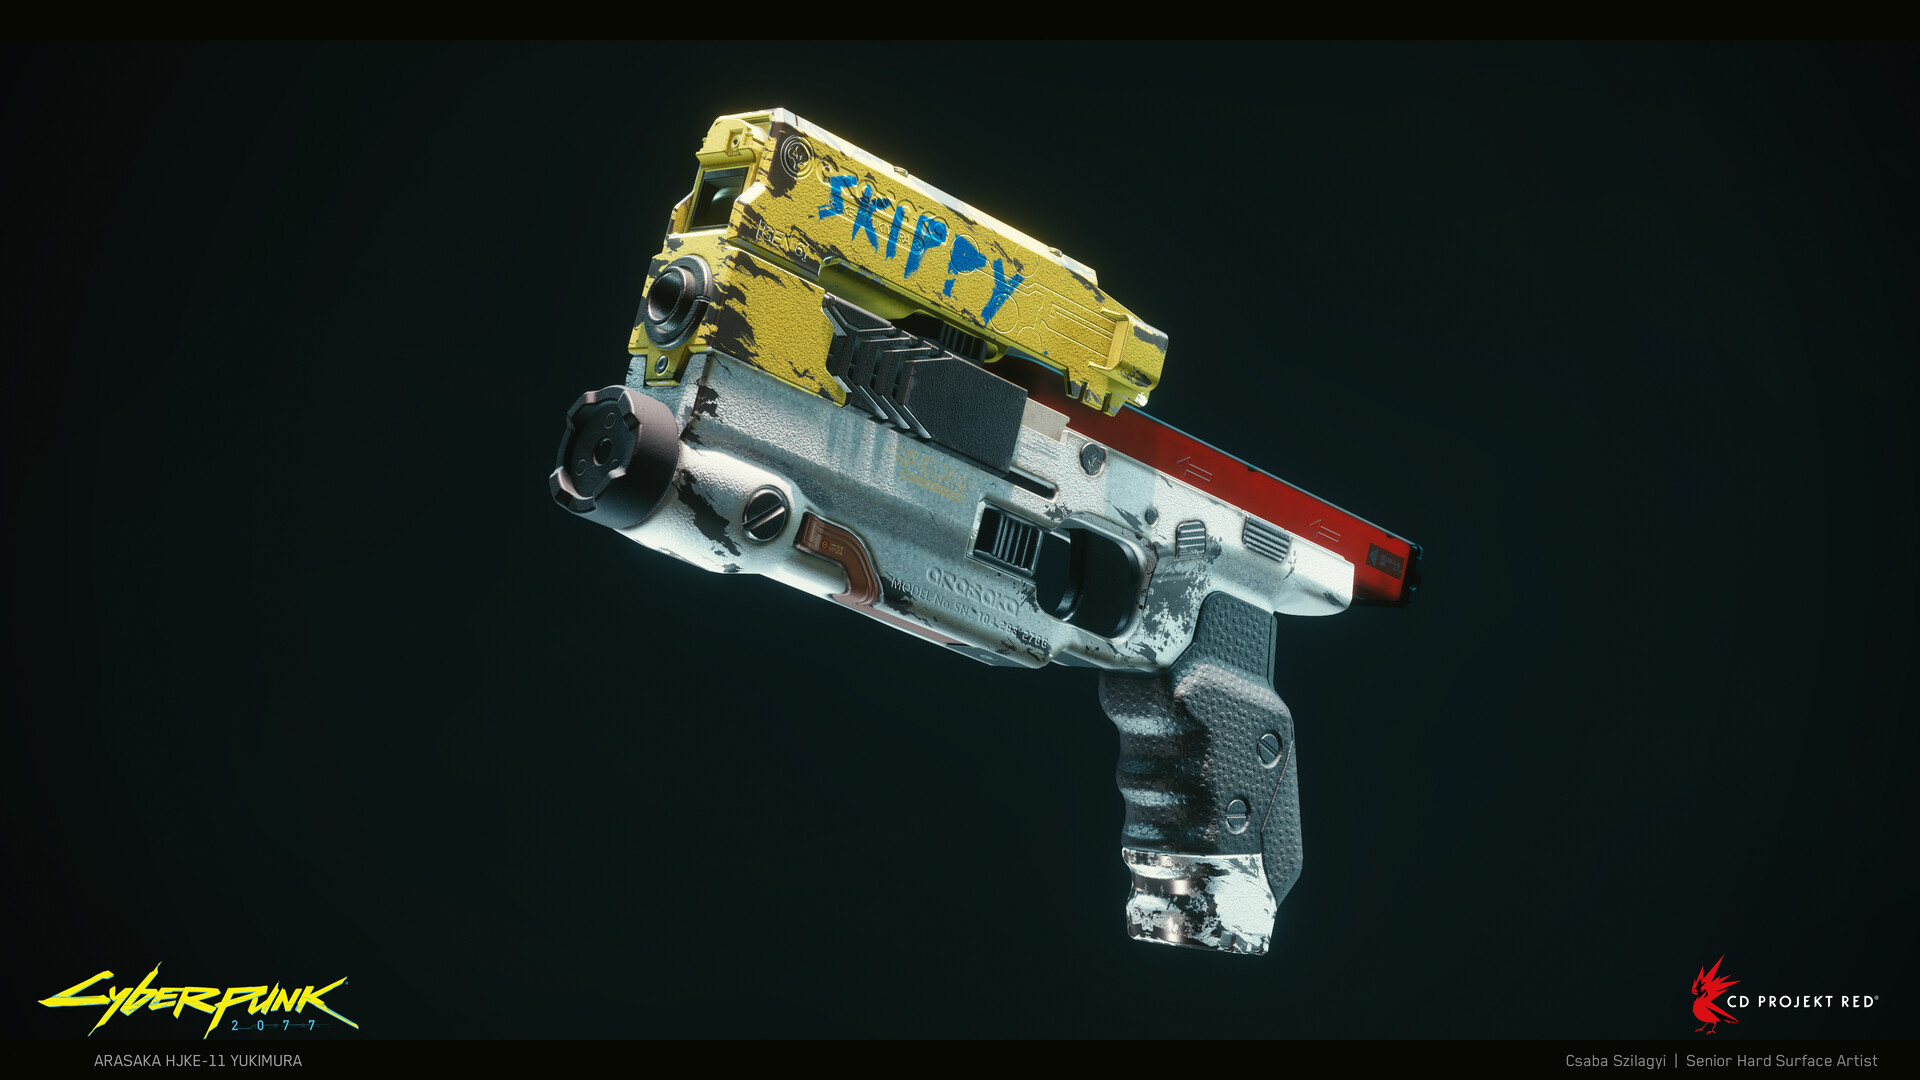
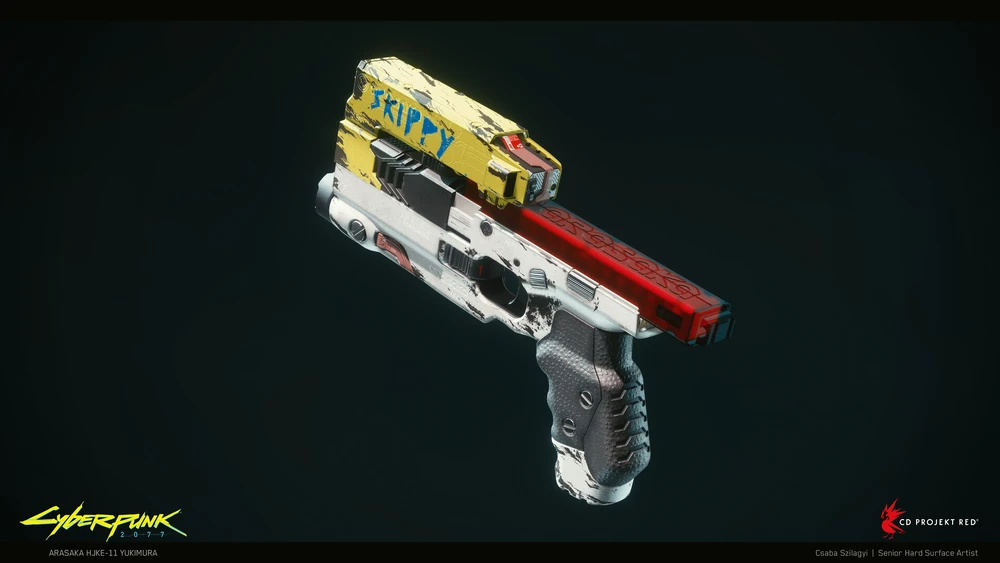
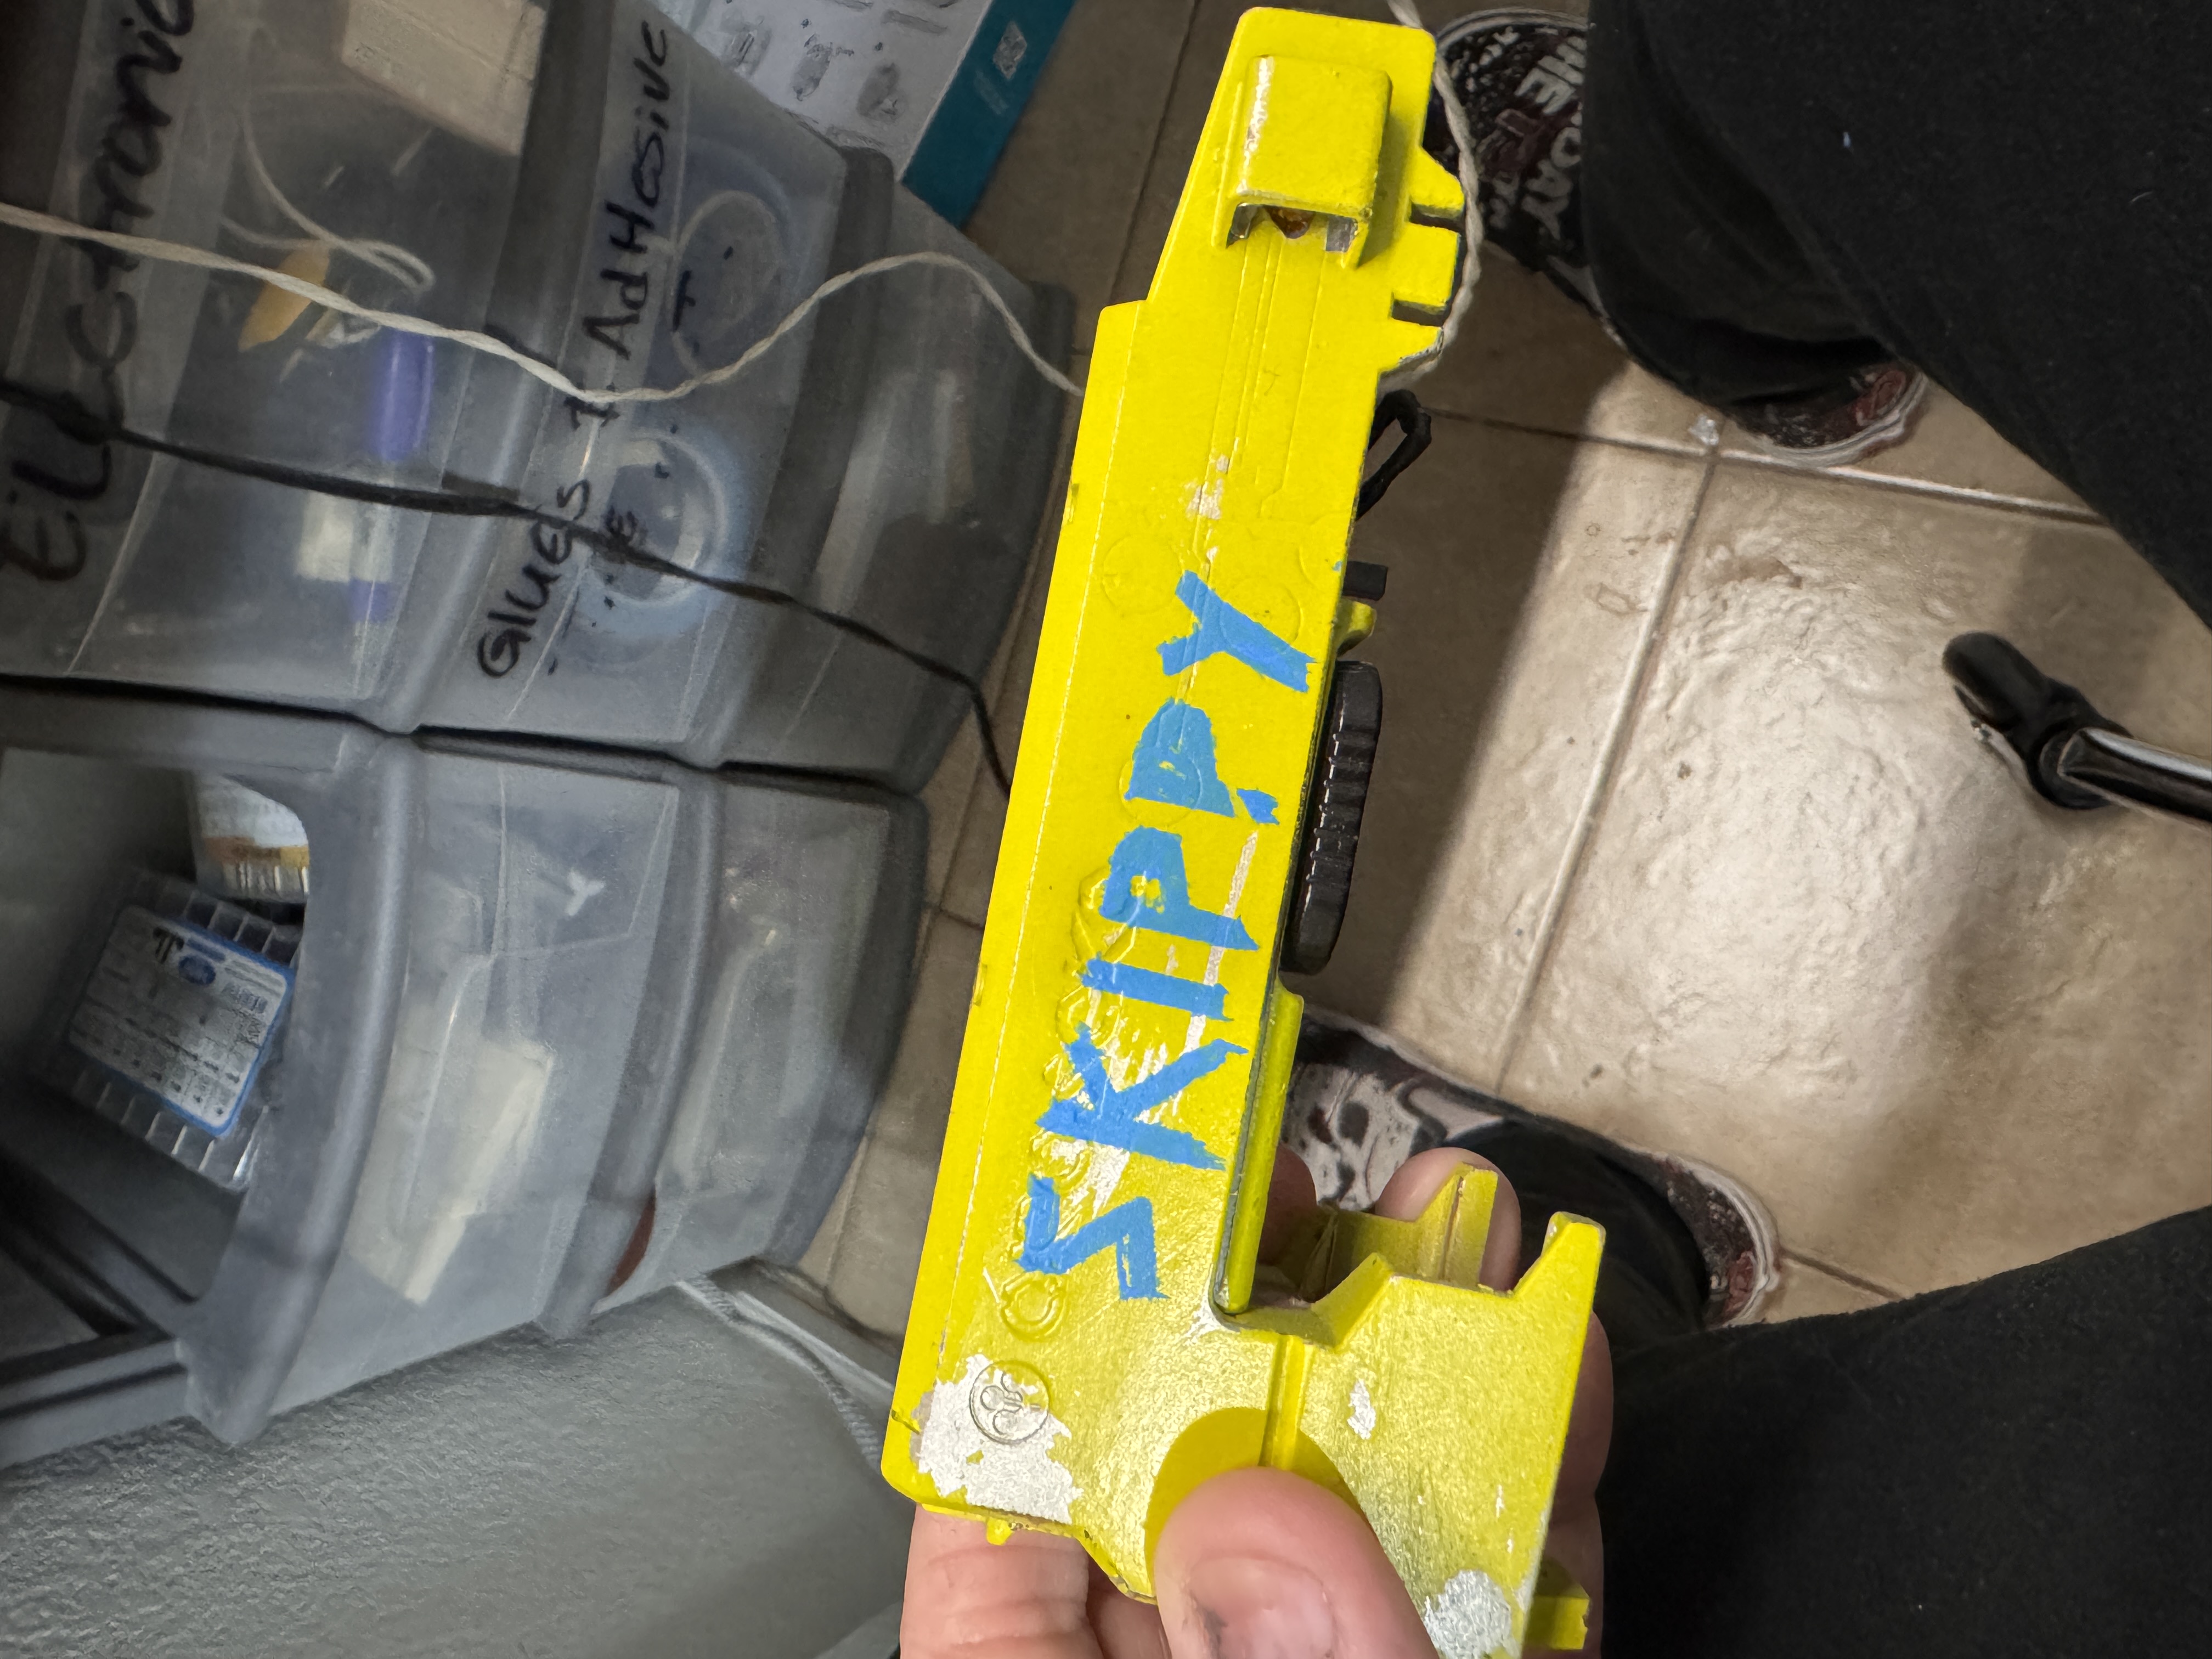
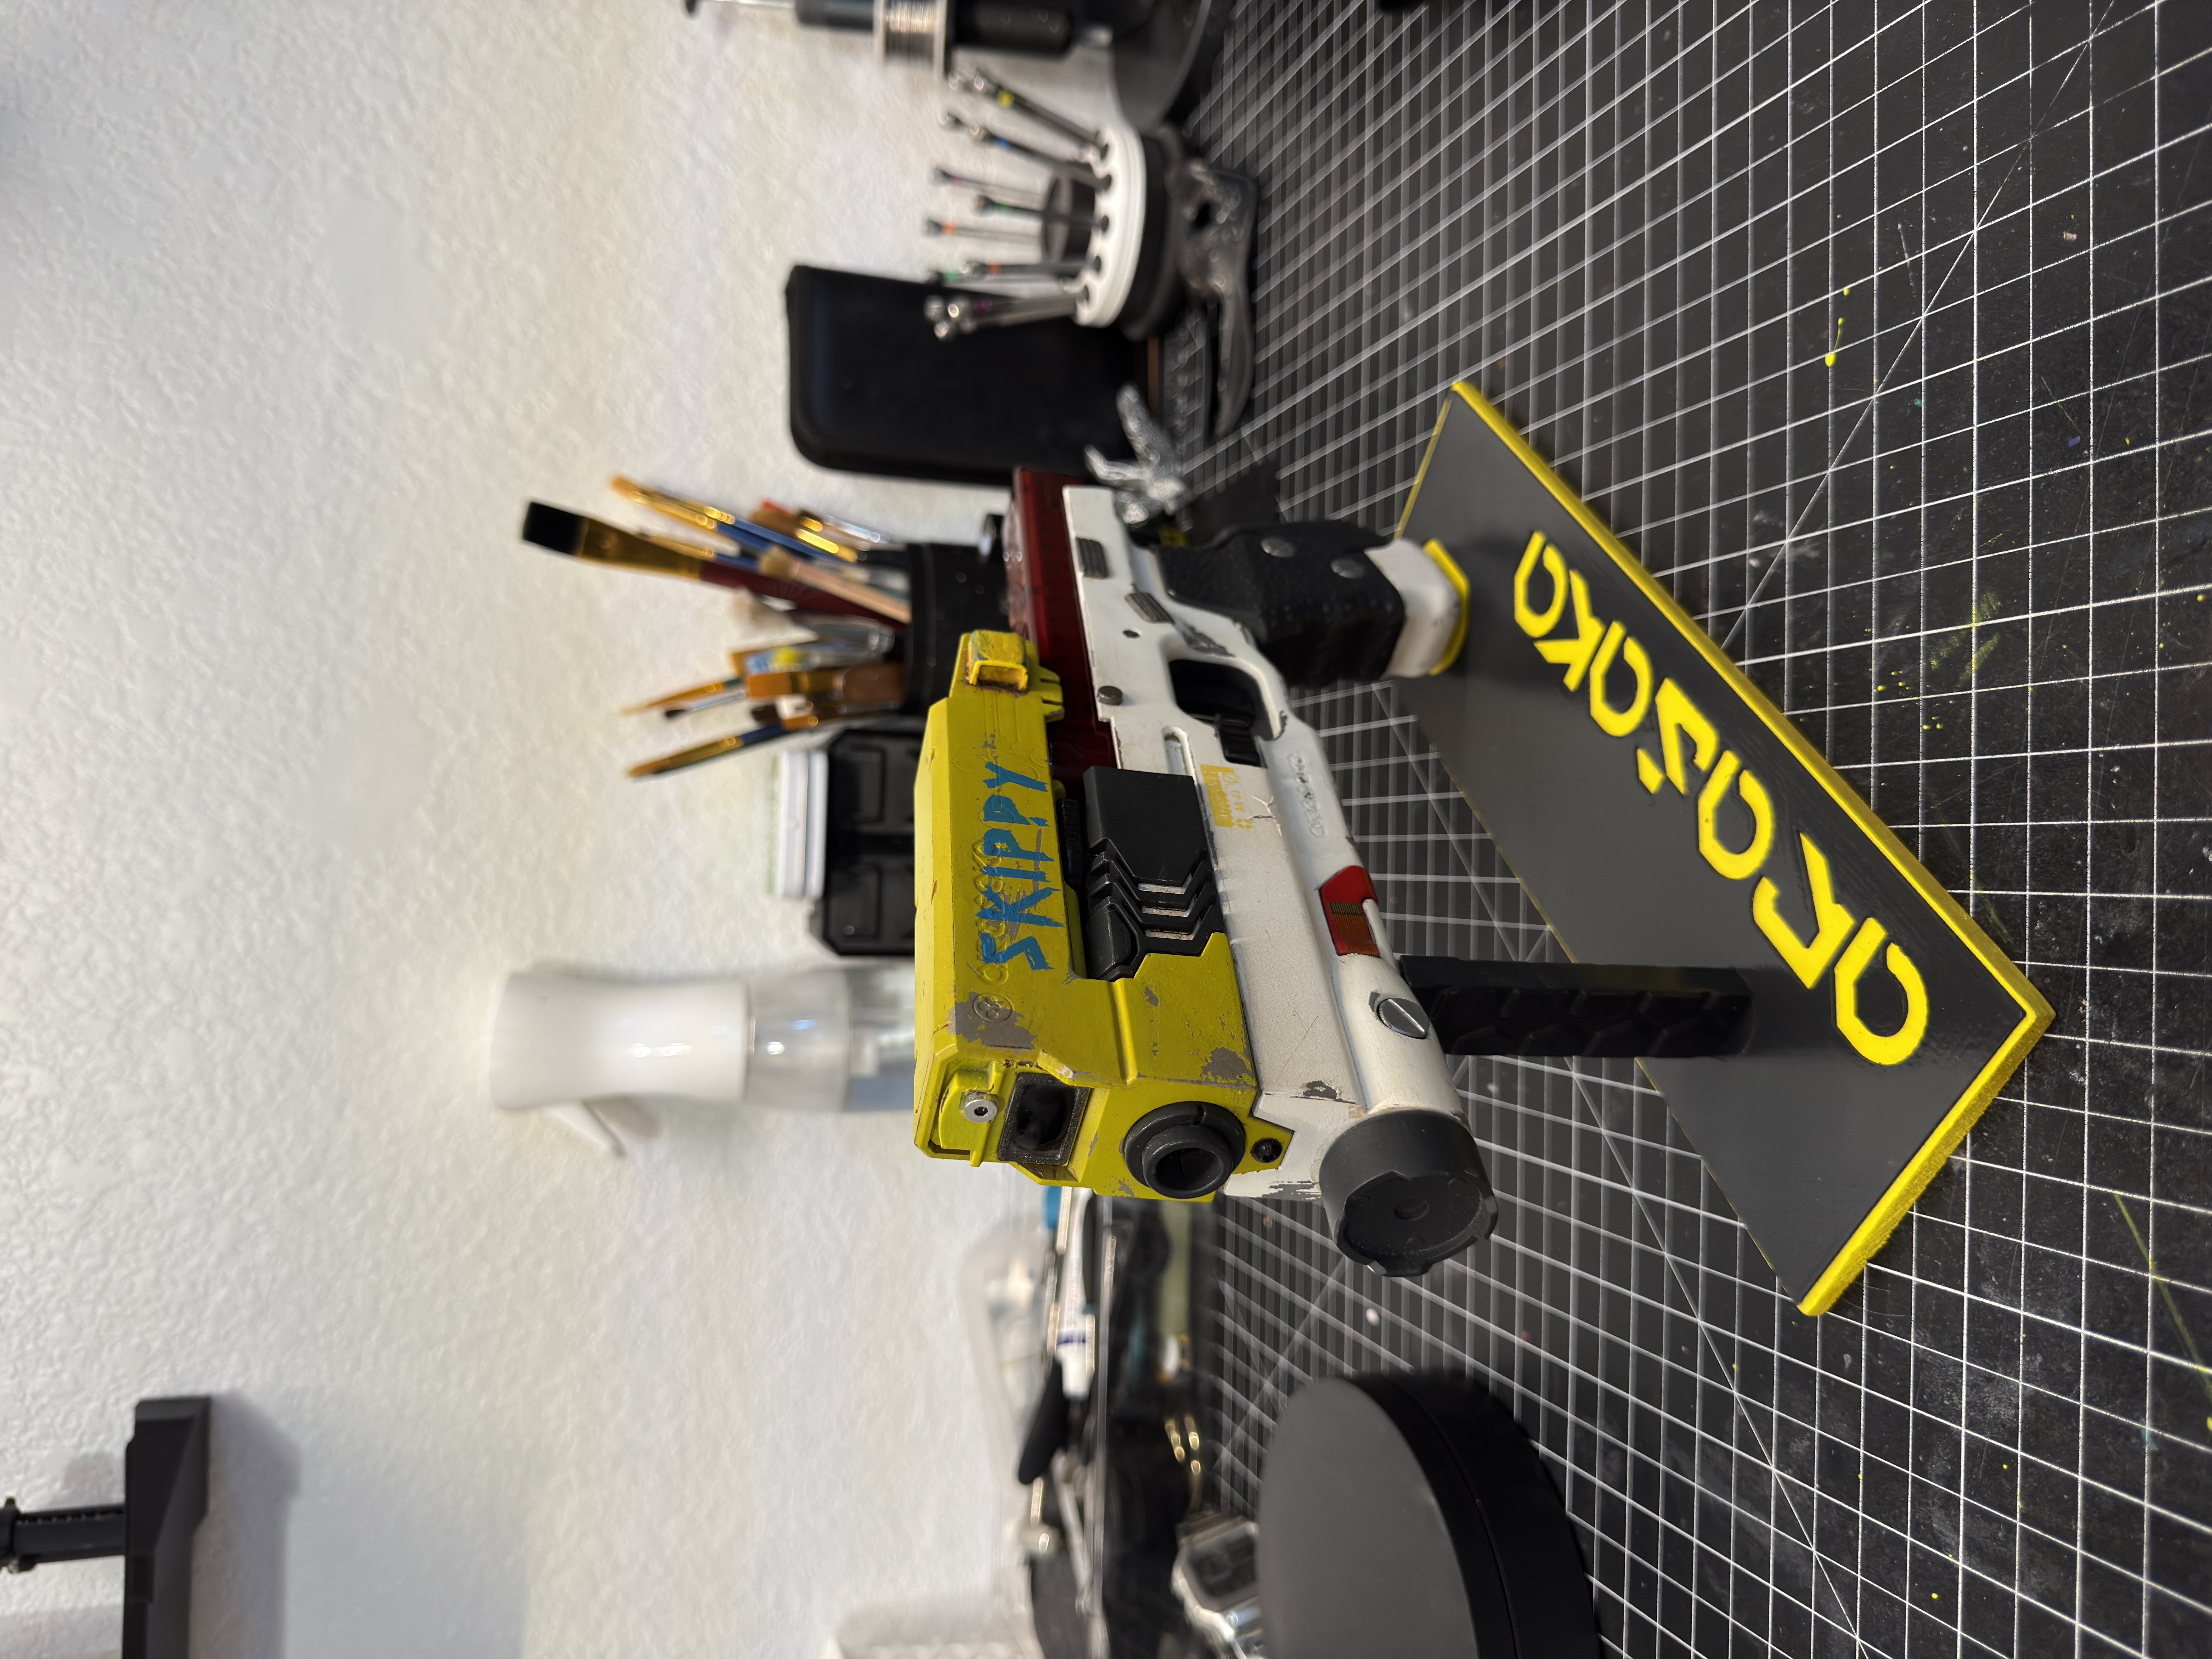
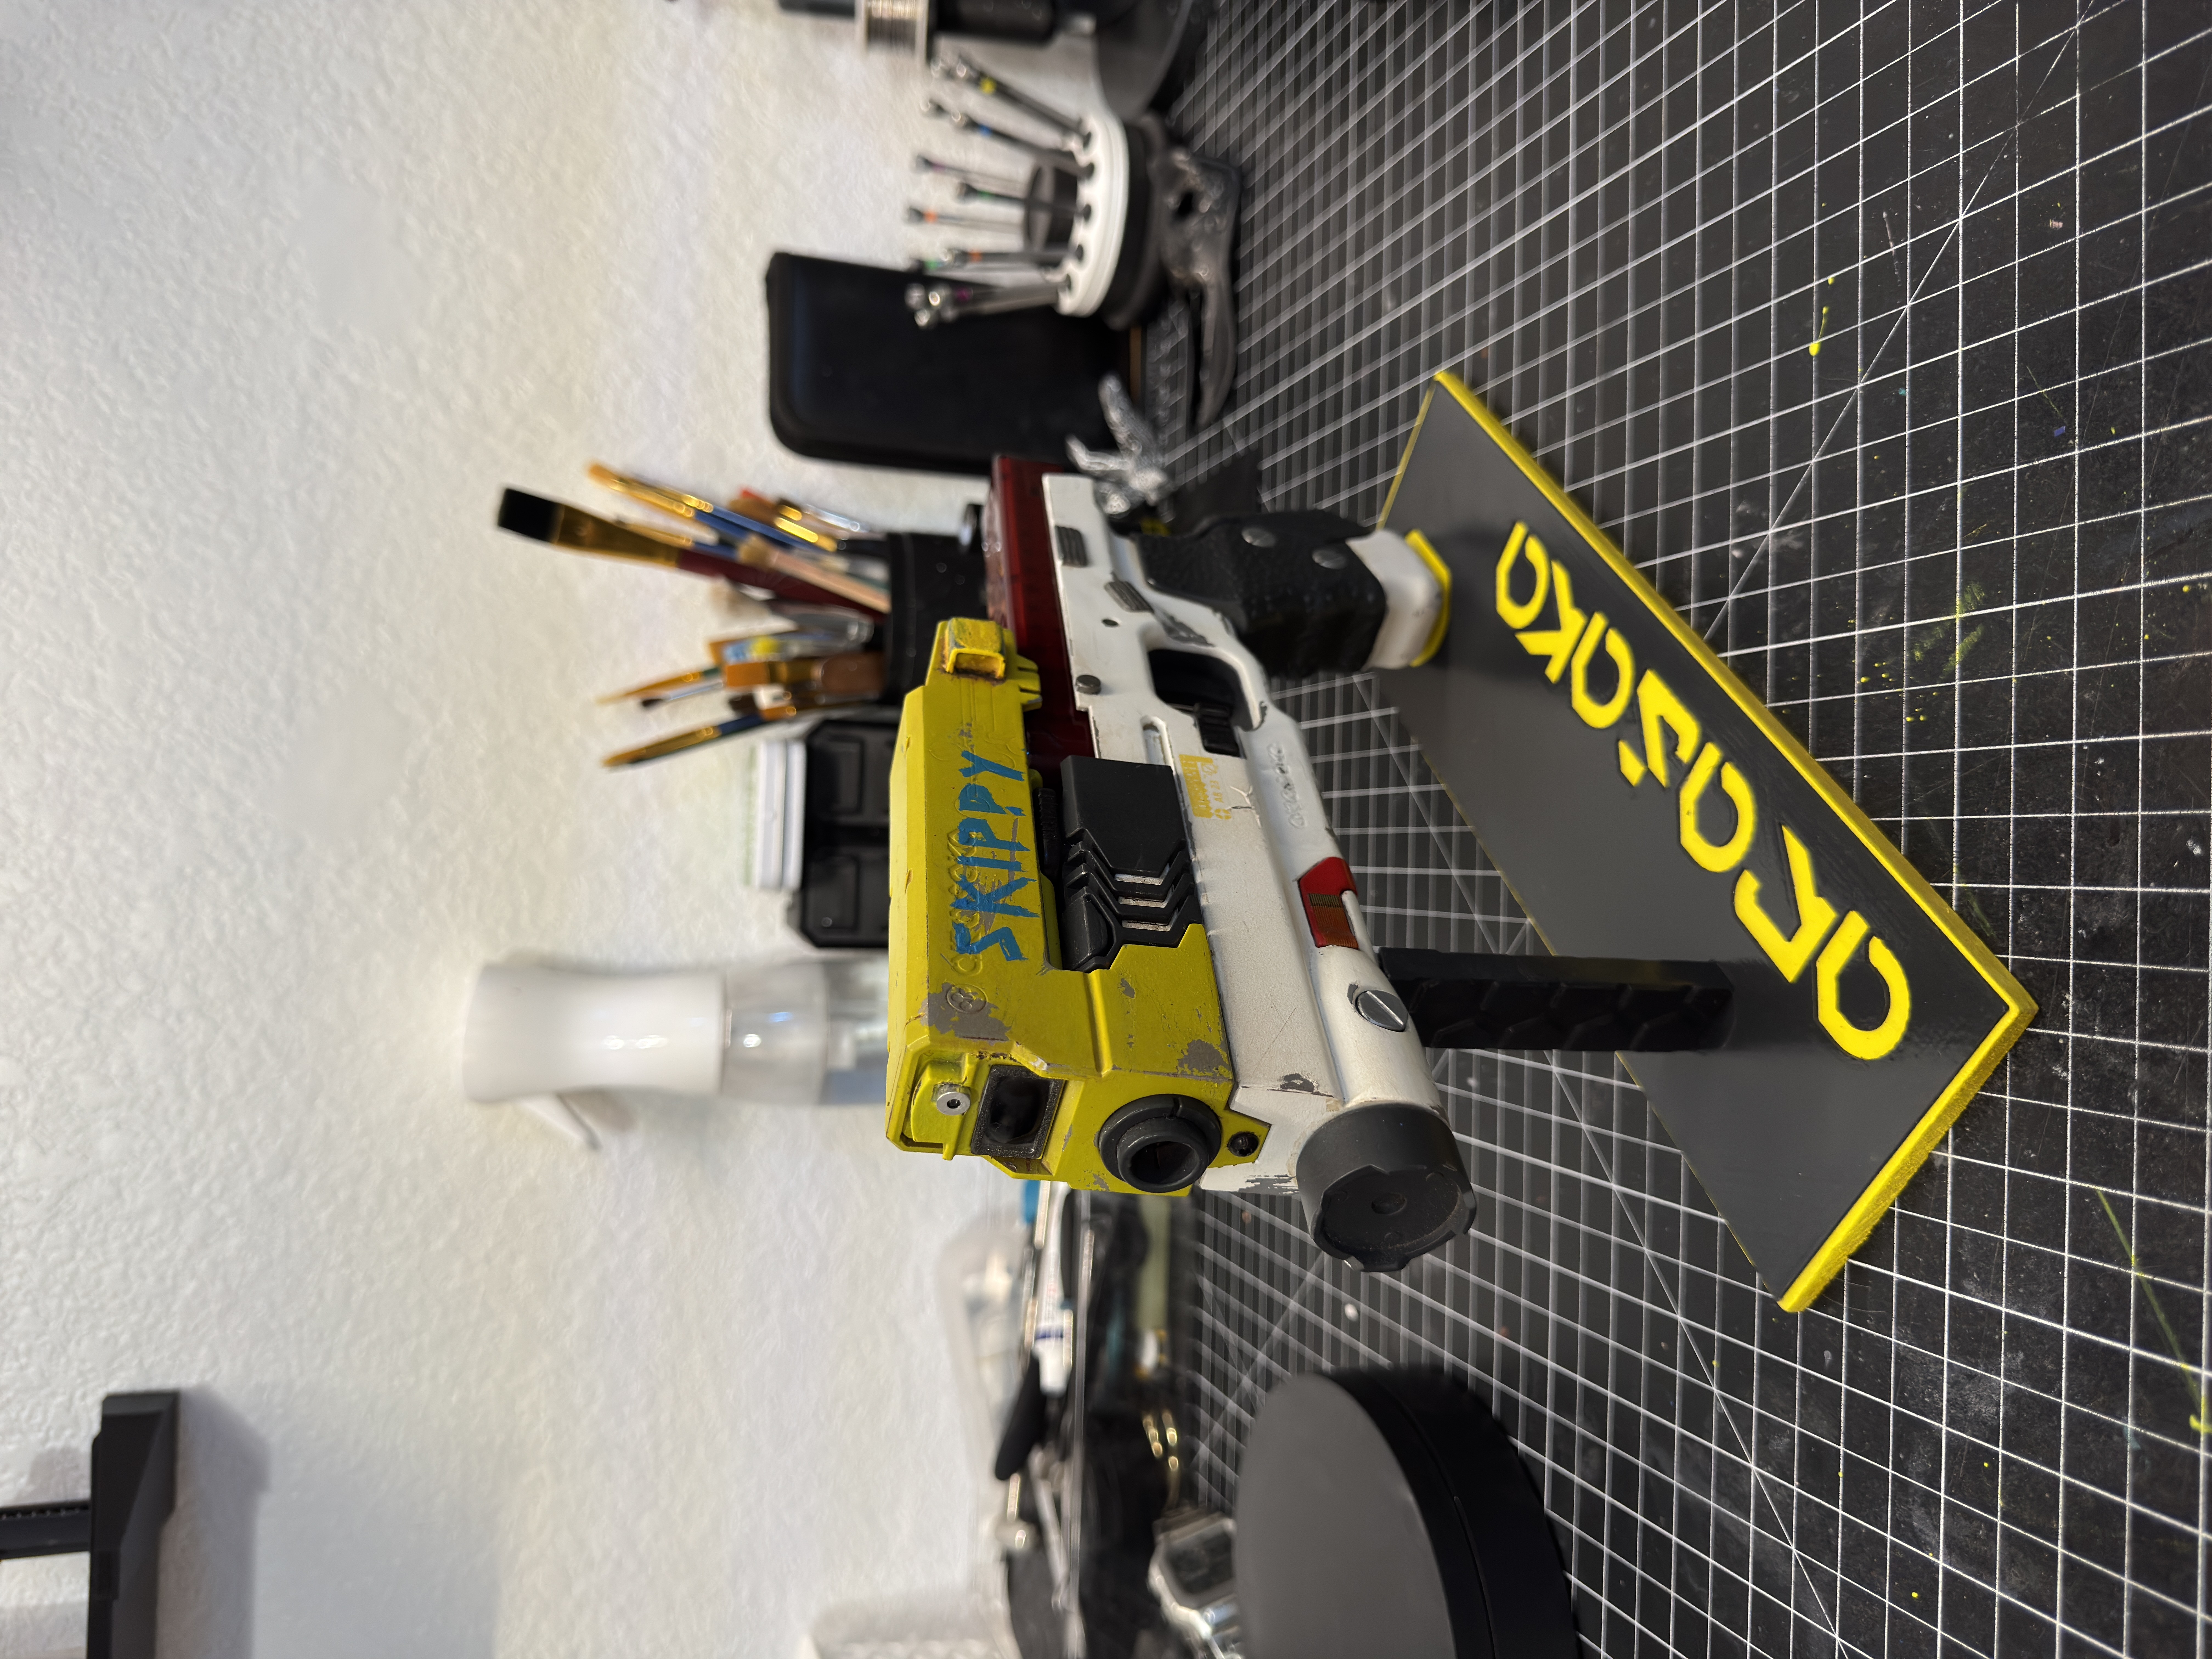
One thing I really wanted to recreate was the worn yellow finish from the game. Instead of painting fake scratches afterward, I decided to use hairspray chipping.
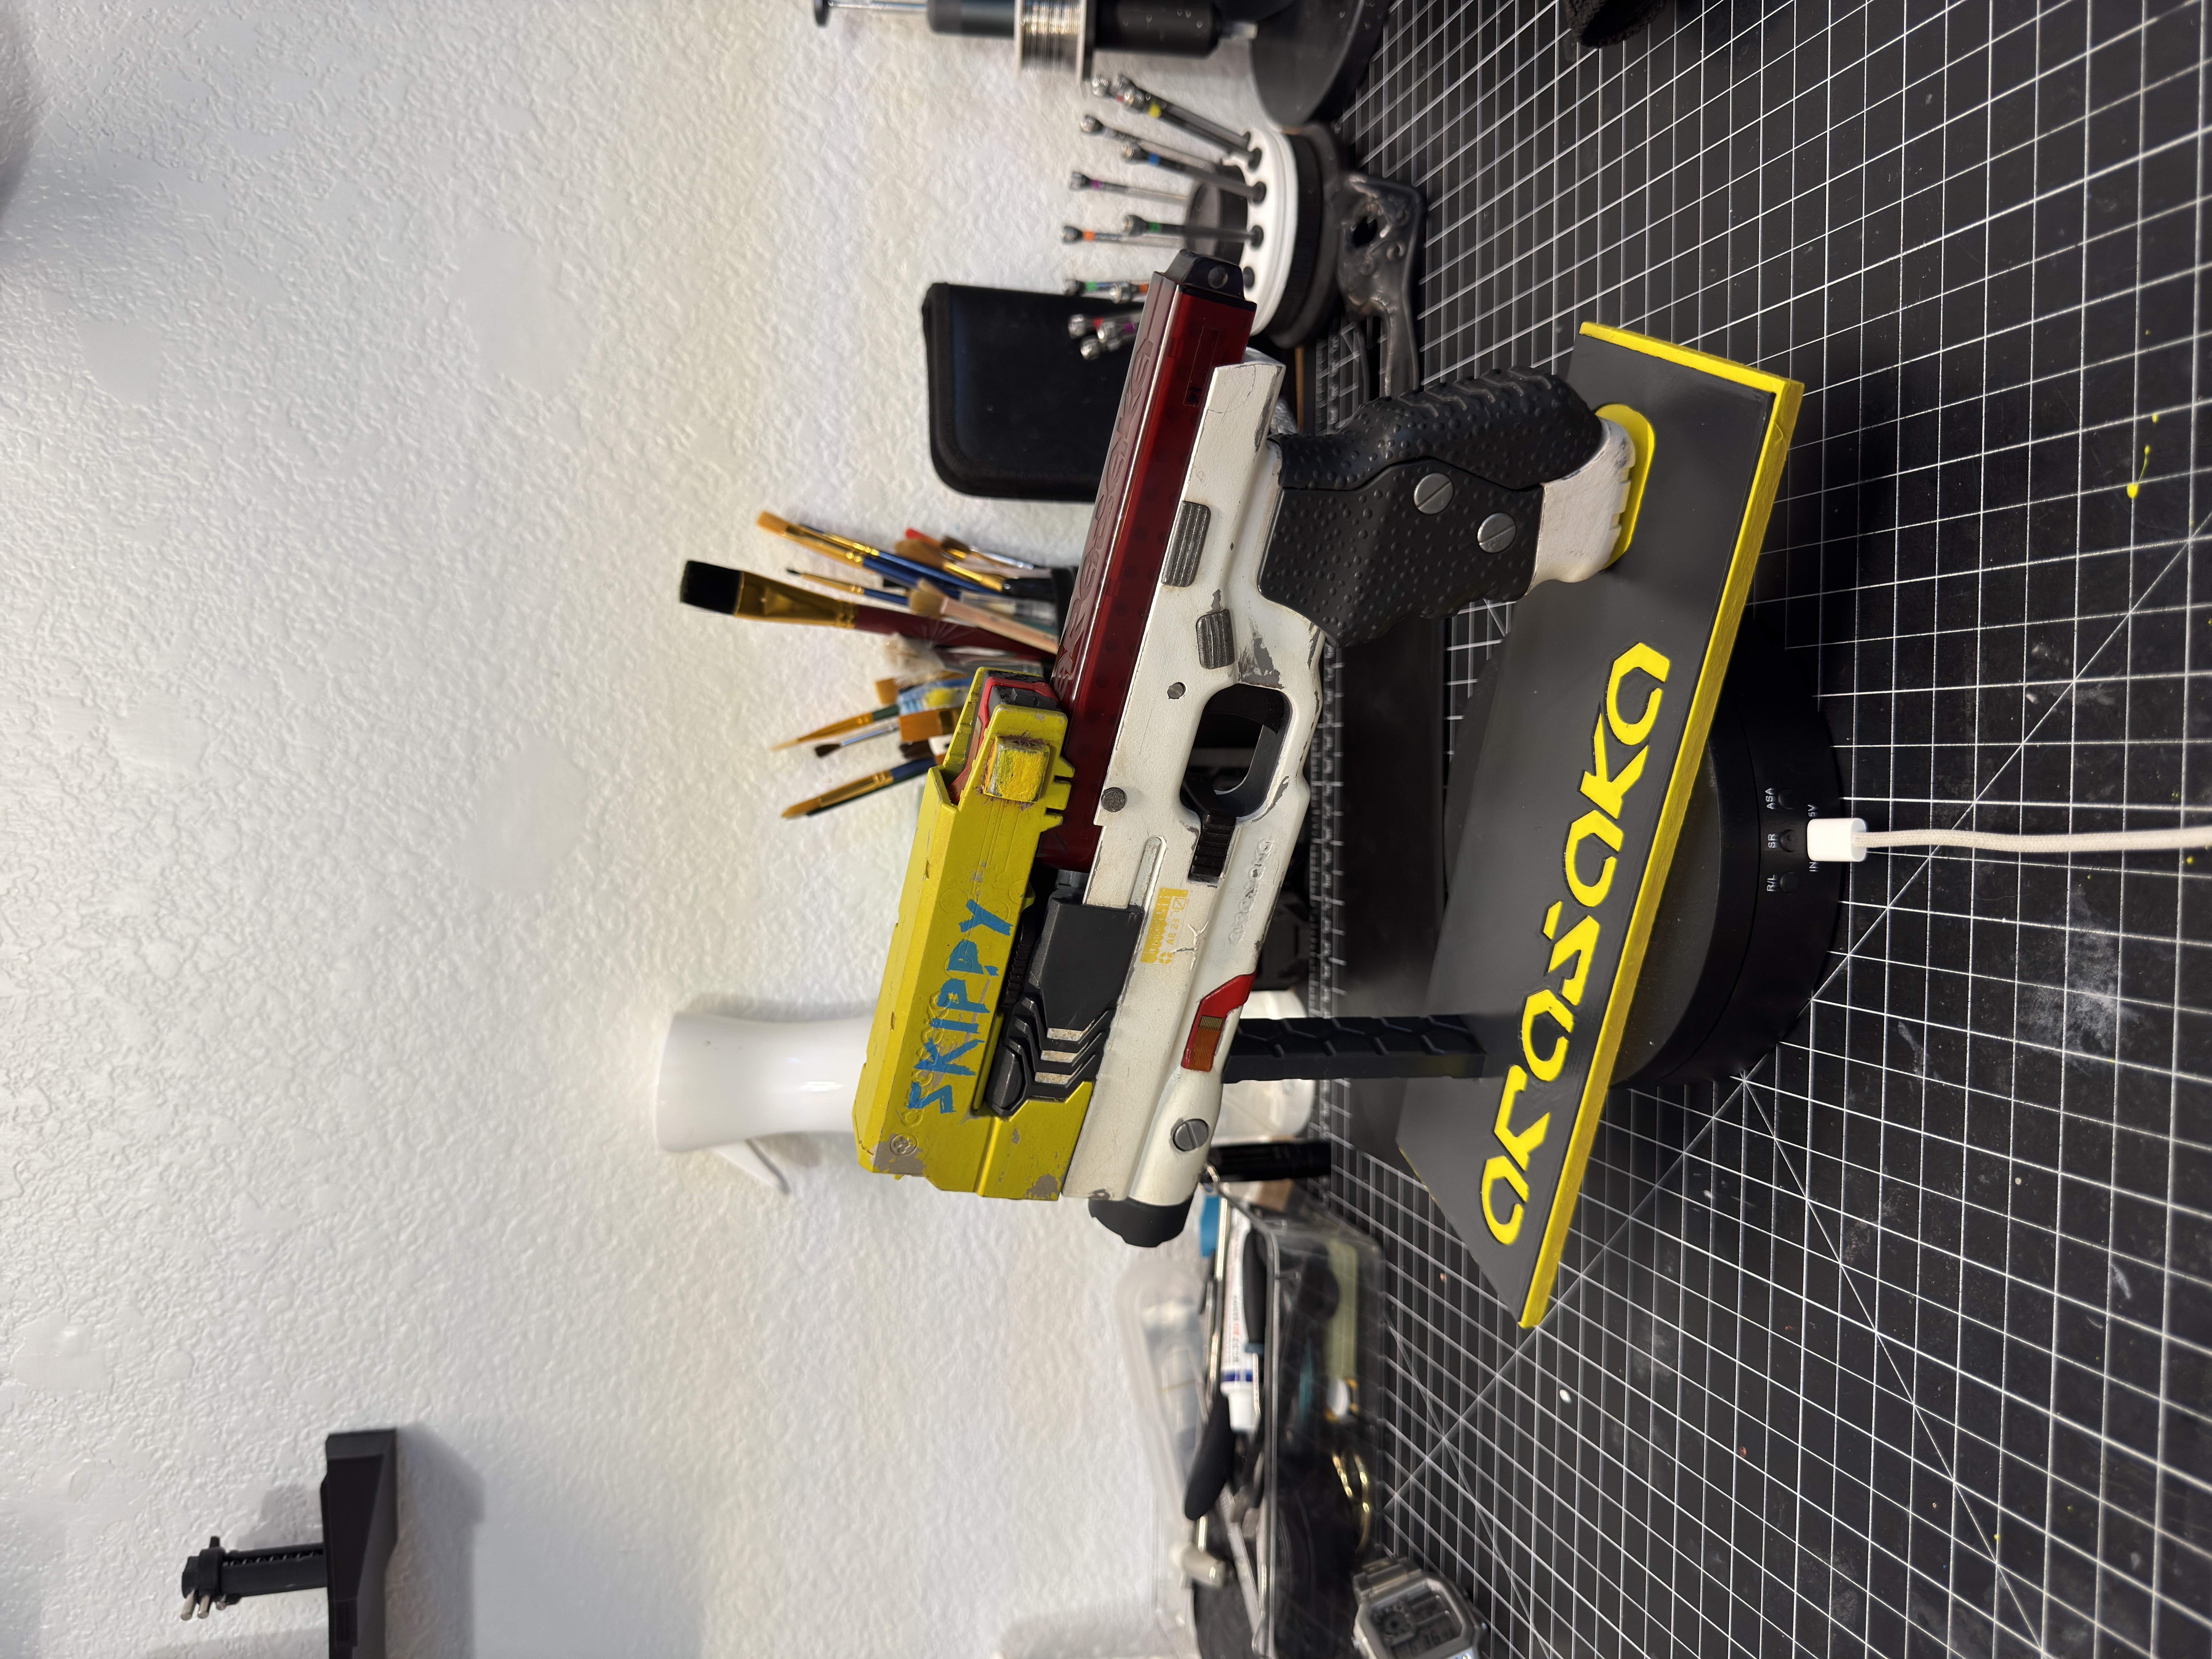
First I sprayed the receiver metallic silver. After that cured, I sprayed a layer of ordinary hairspray over the silver. Once the hairspray dried, I sprayed the final yellow color.
Later, using water and small brushes, I carefully started wearing away the yellow paint. The water reactivates the hairspray underneath, allowing the top coat to chip away naturally and reveal the silver below.
The effect looks so much better than simply painting scratches because the silver is actually underneath the paint instead of sitting on top of it. Every chip feels random and natural. Exactly like real wear.
Upgrading the Magazine
About halfway through the build, I was talking with M1LITECH again when they mentioned they had a newer version of the magazine with even more detail. Of course I had to use it.
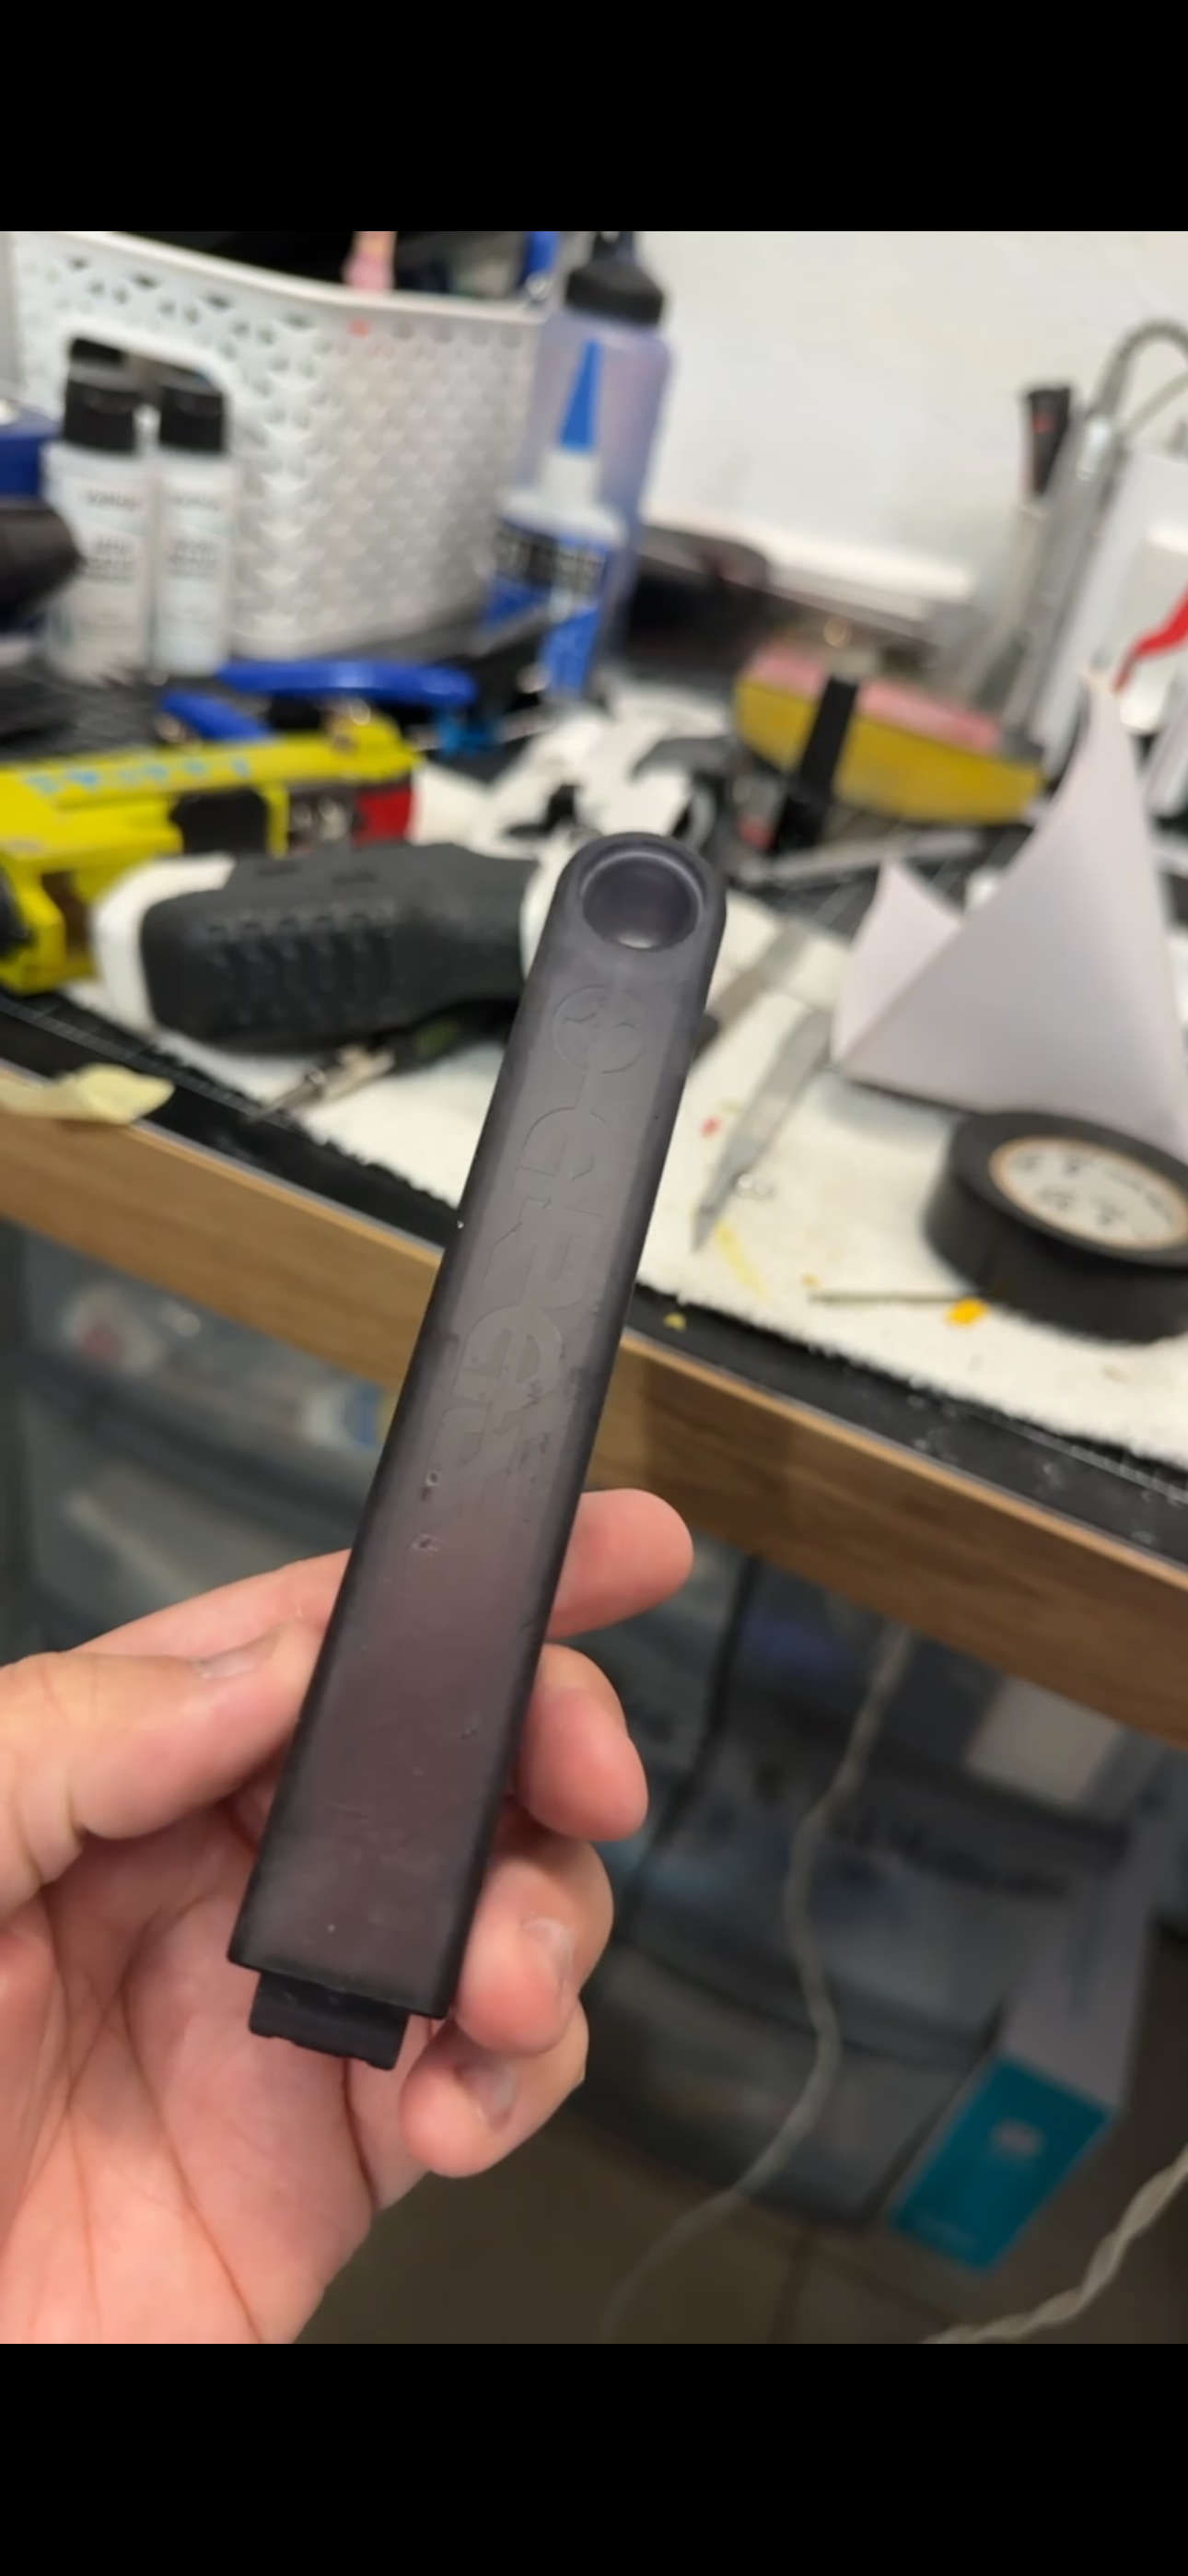
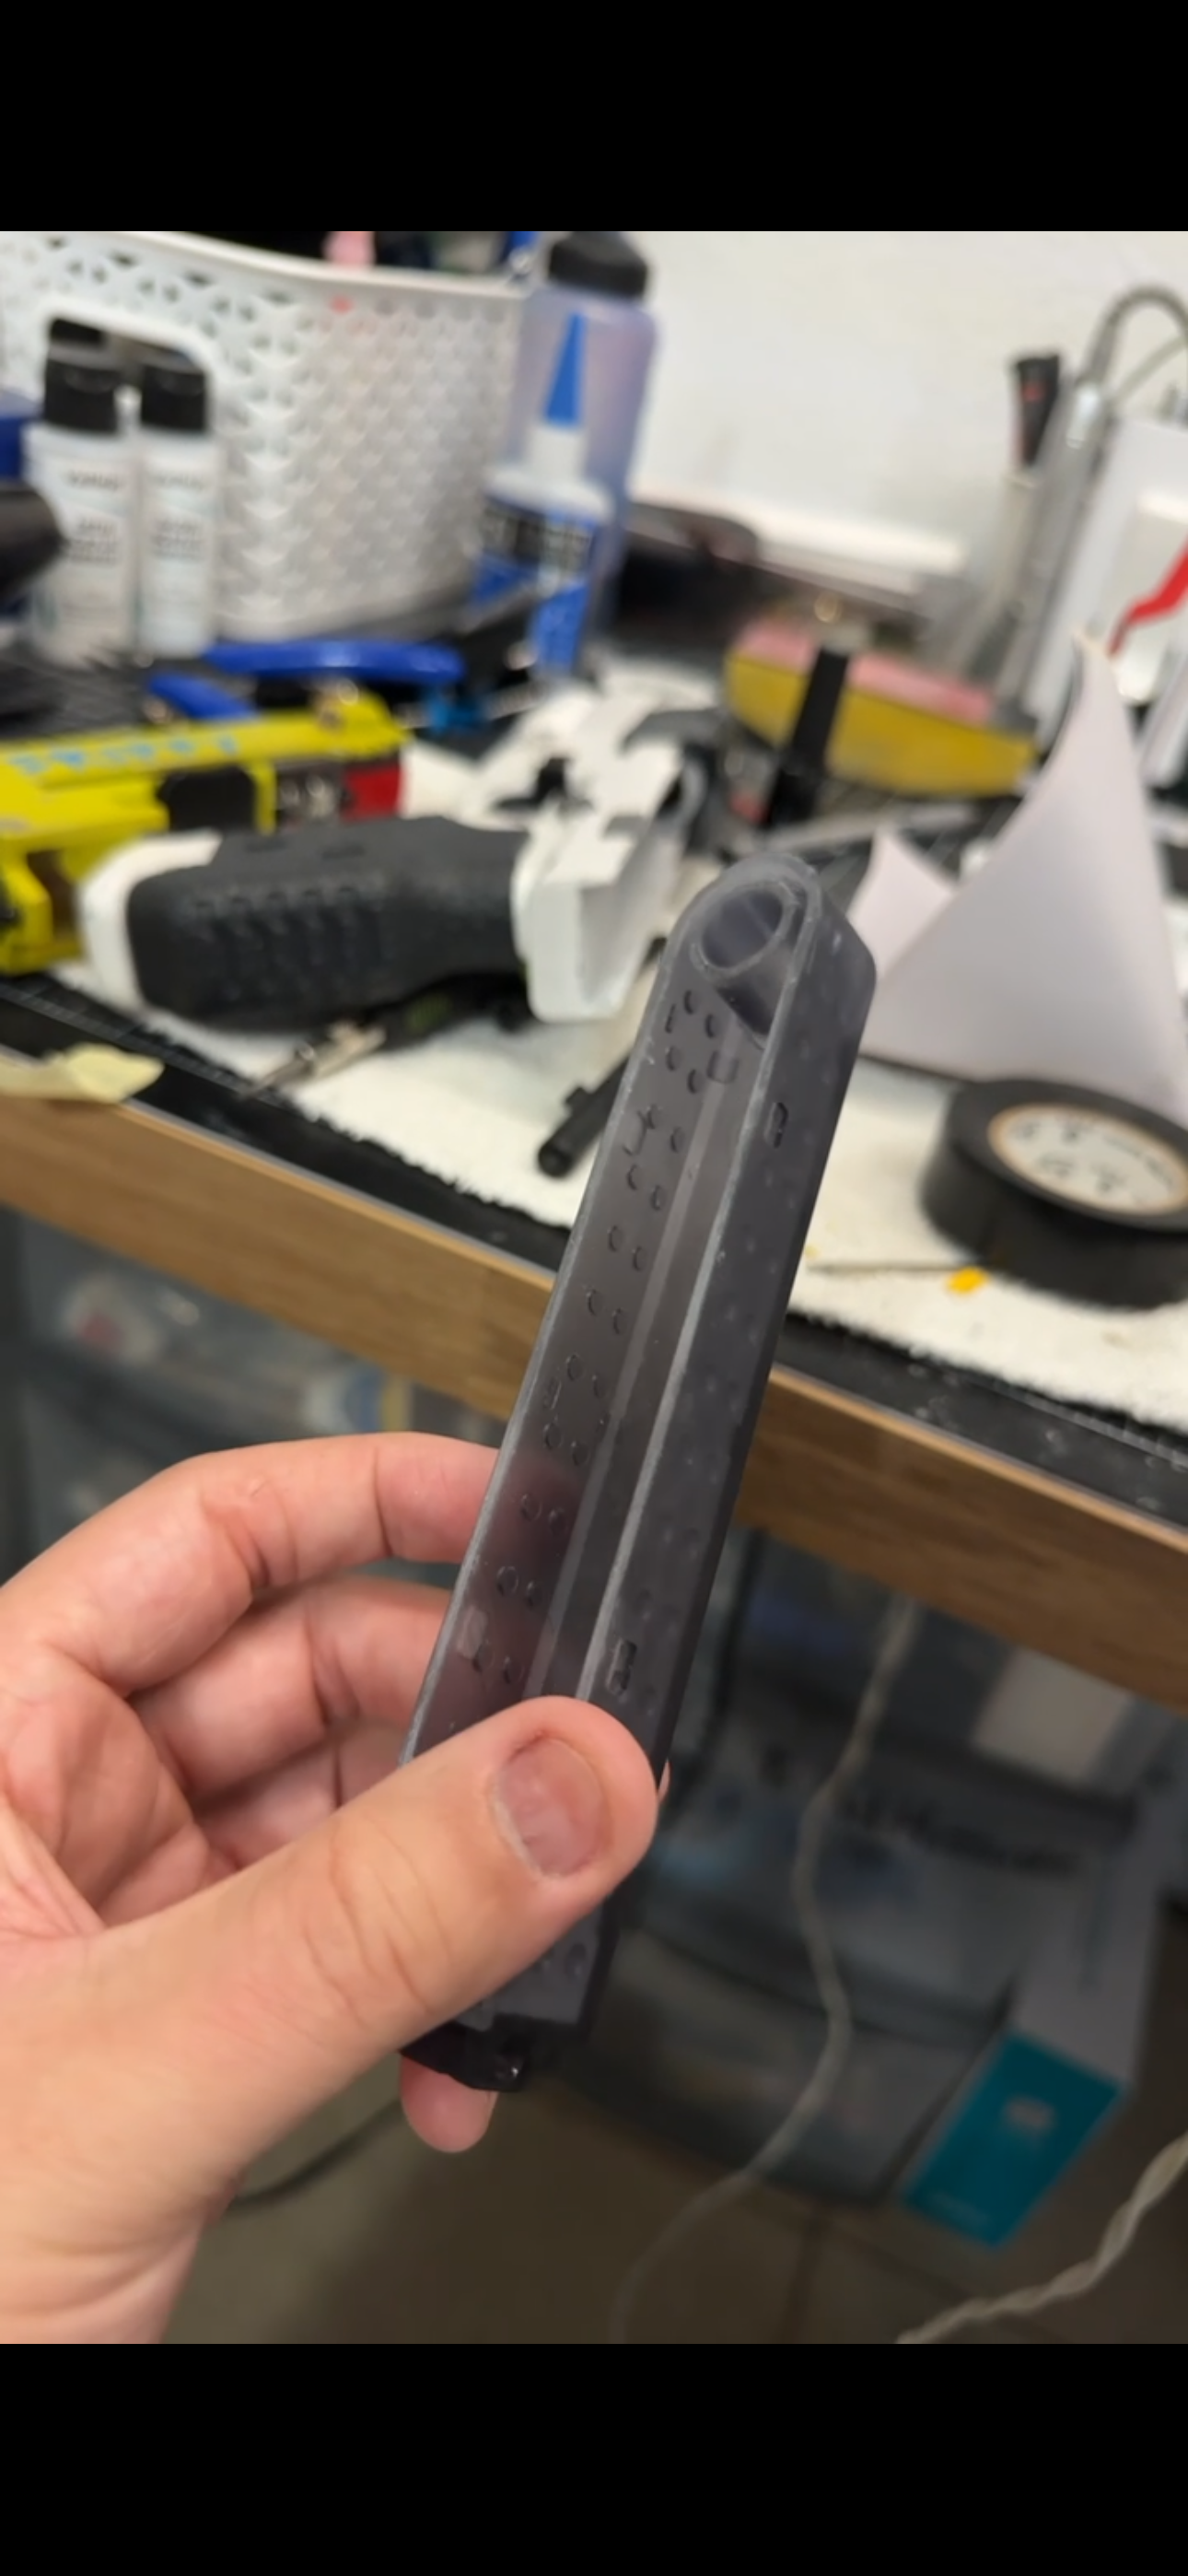
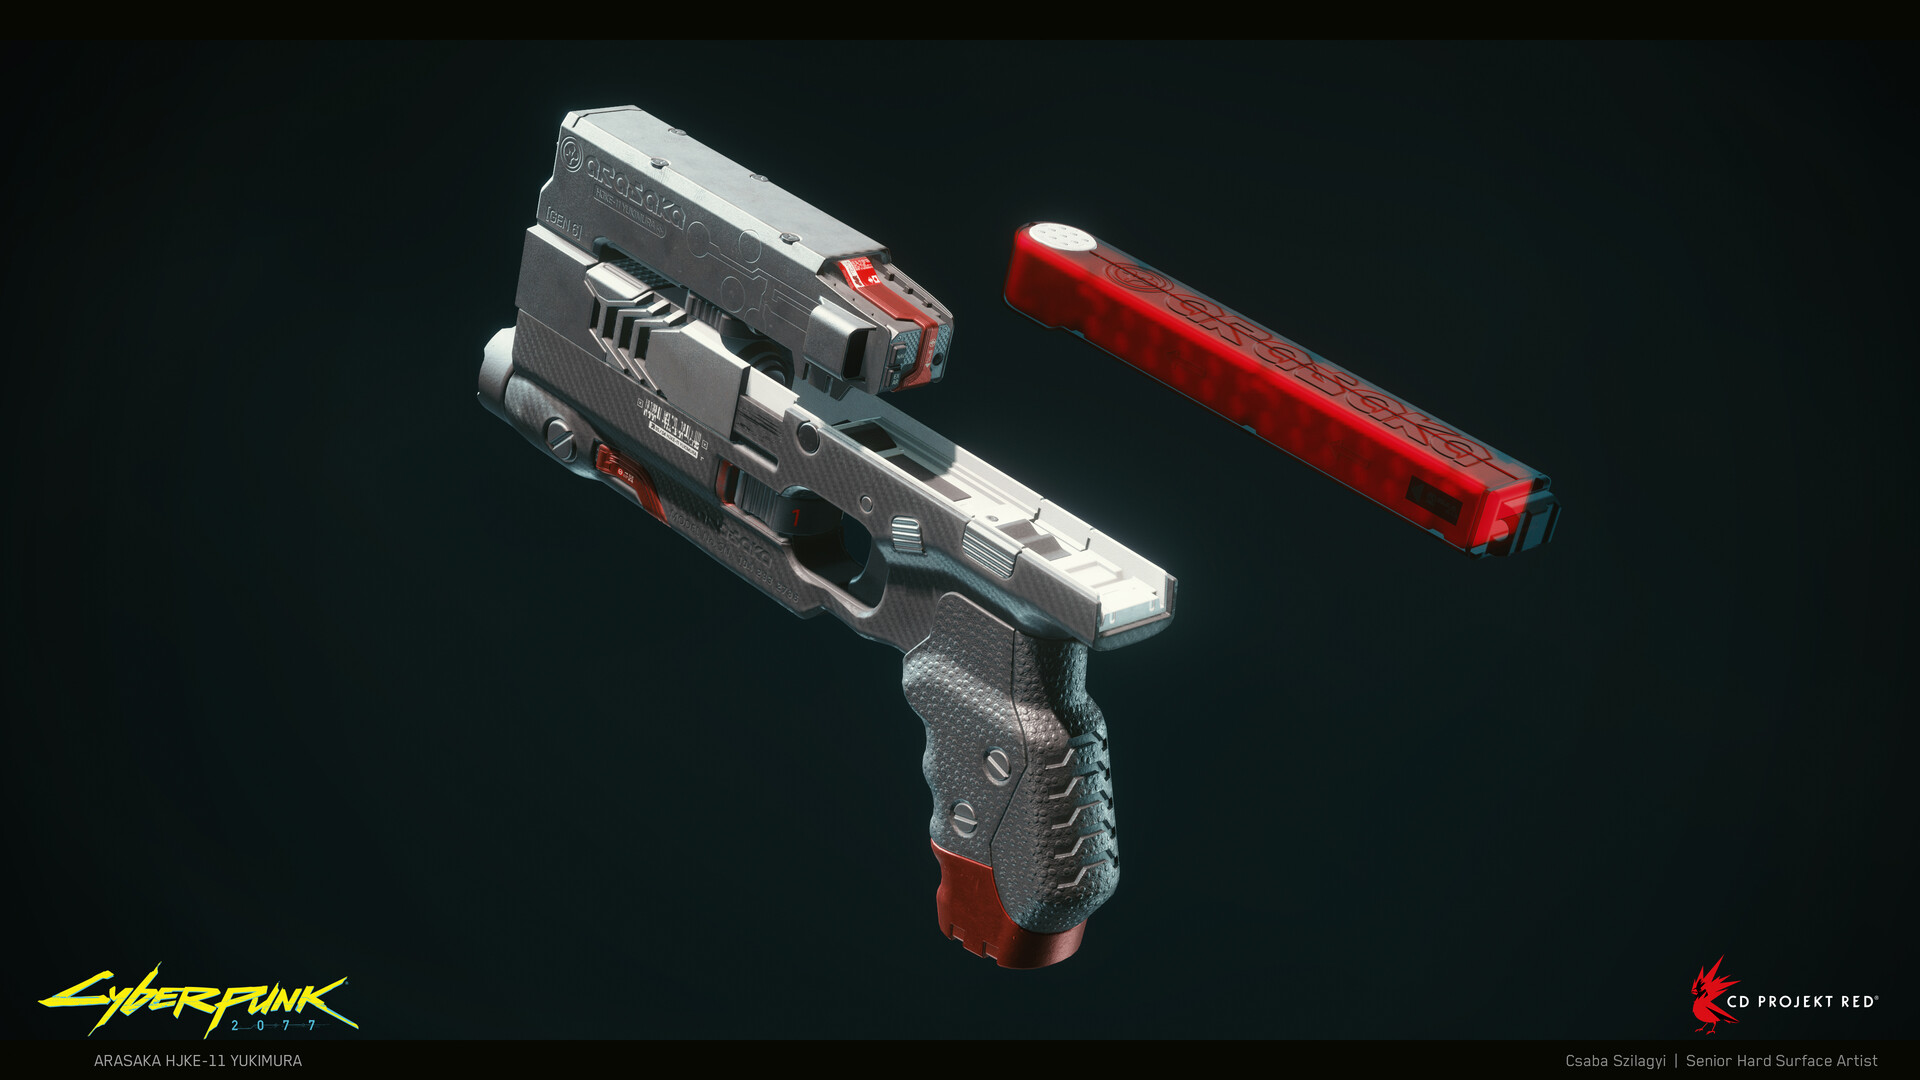
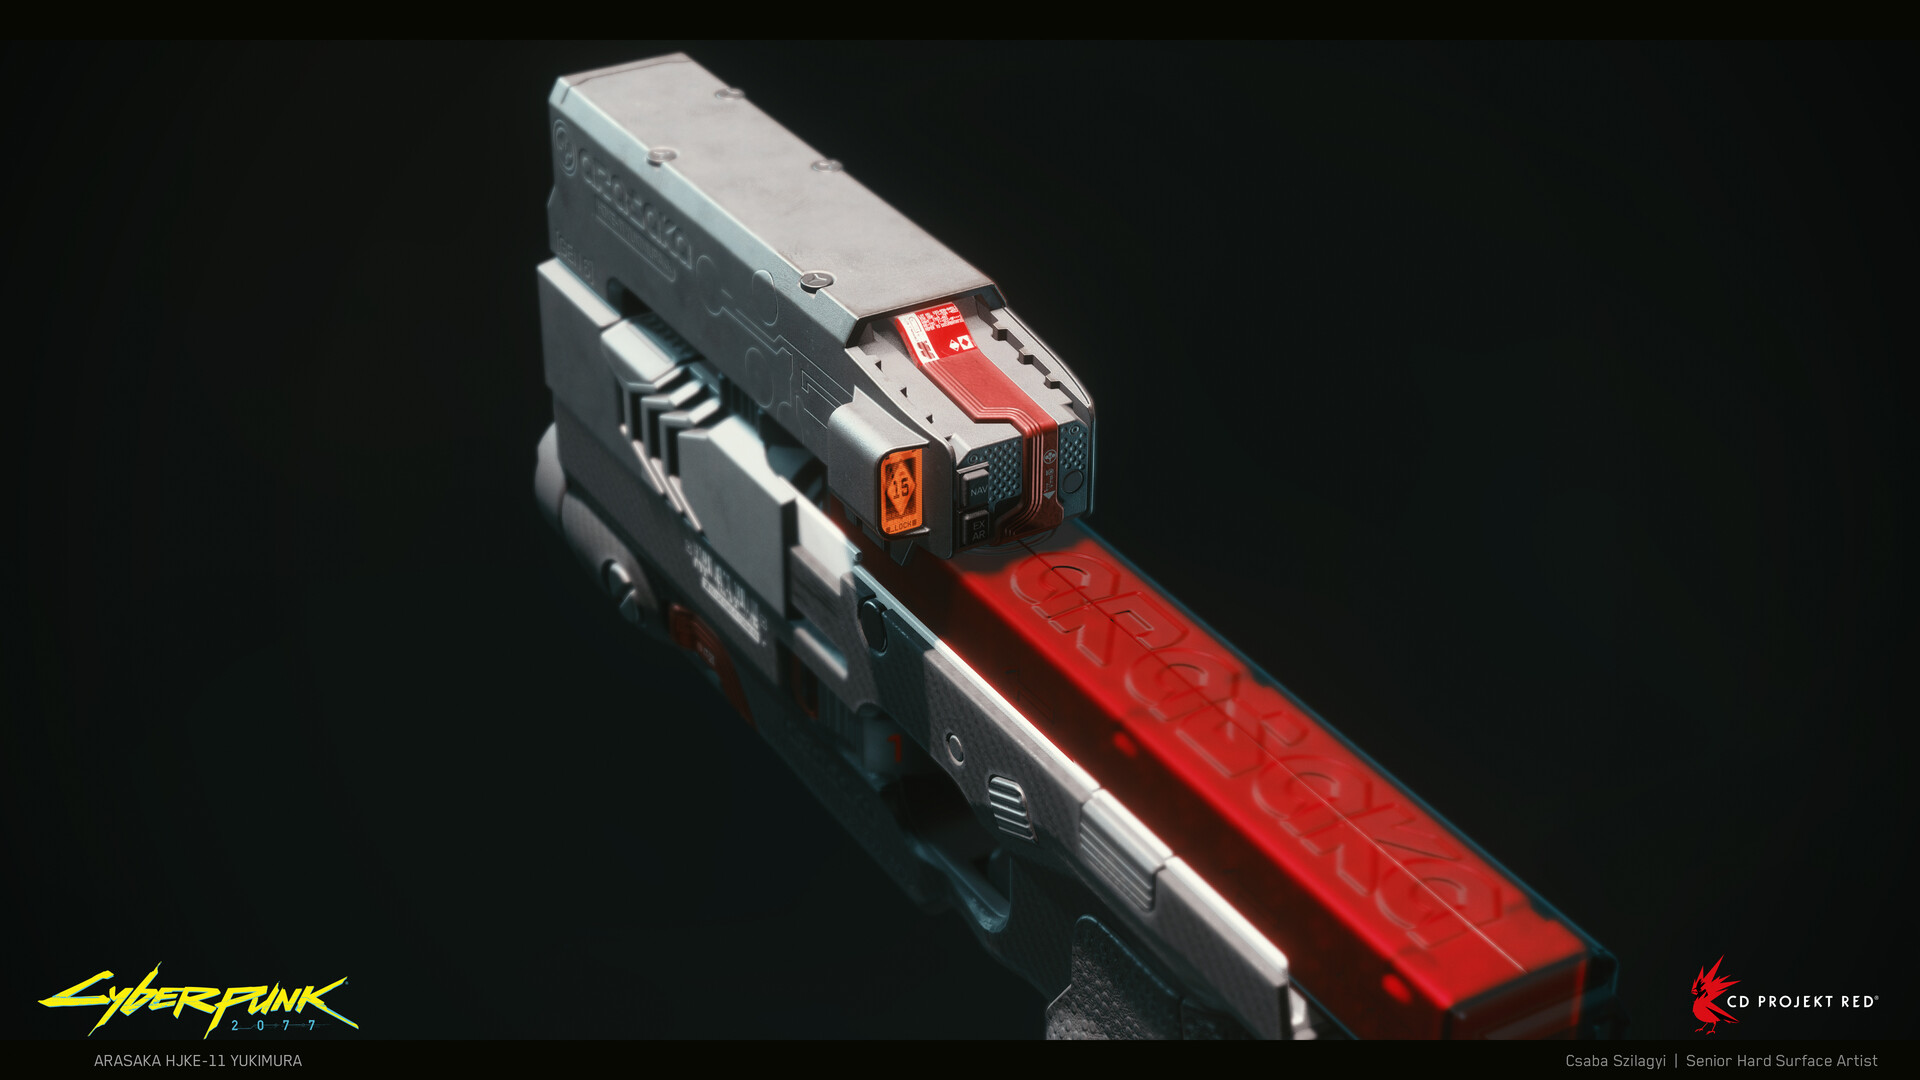
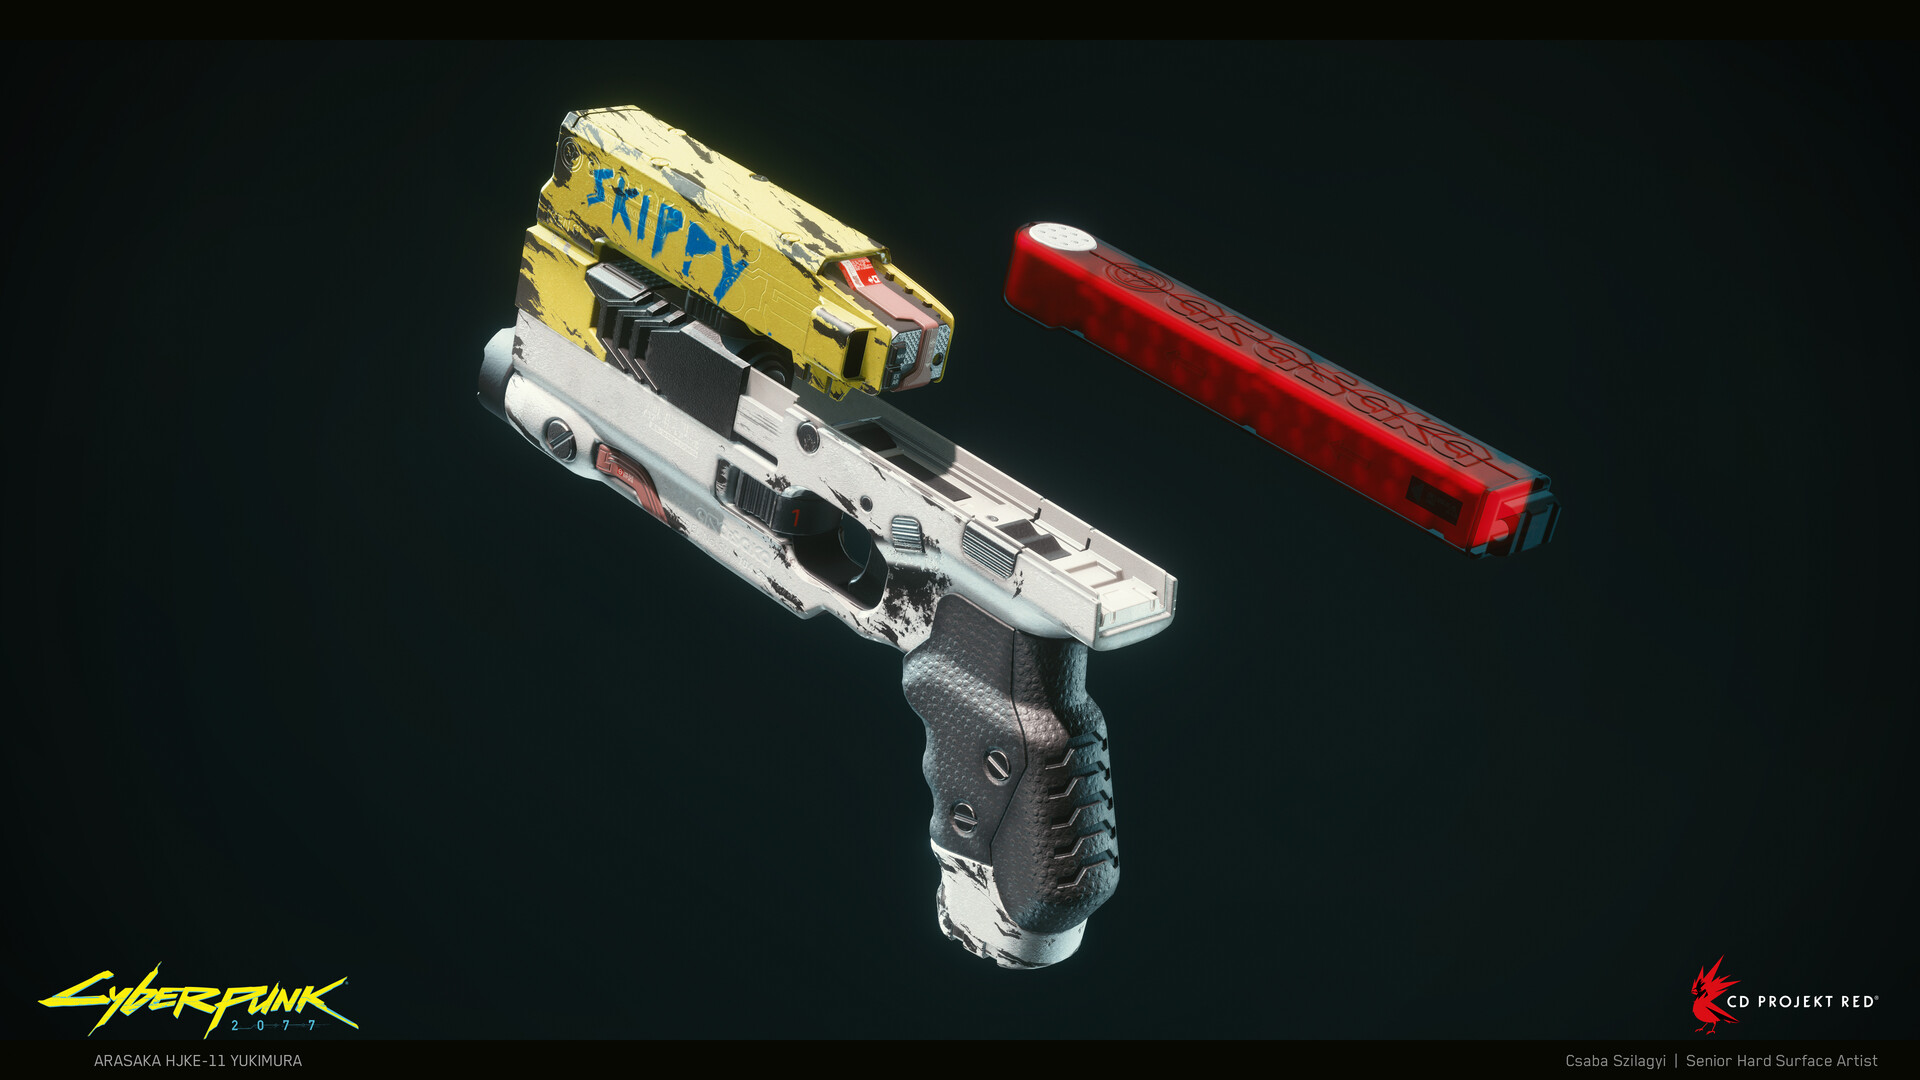
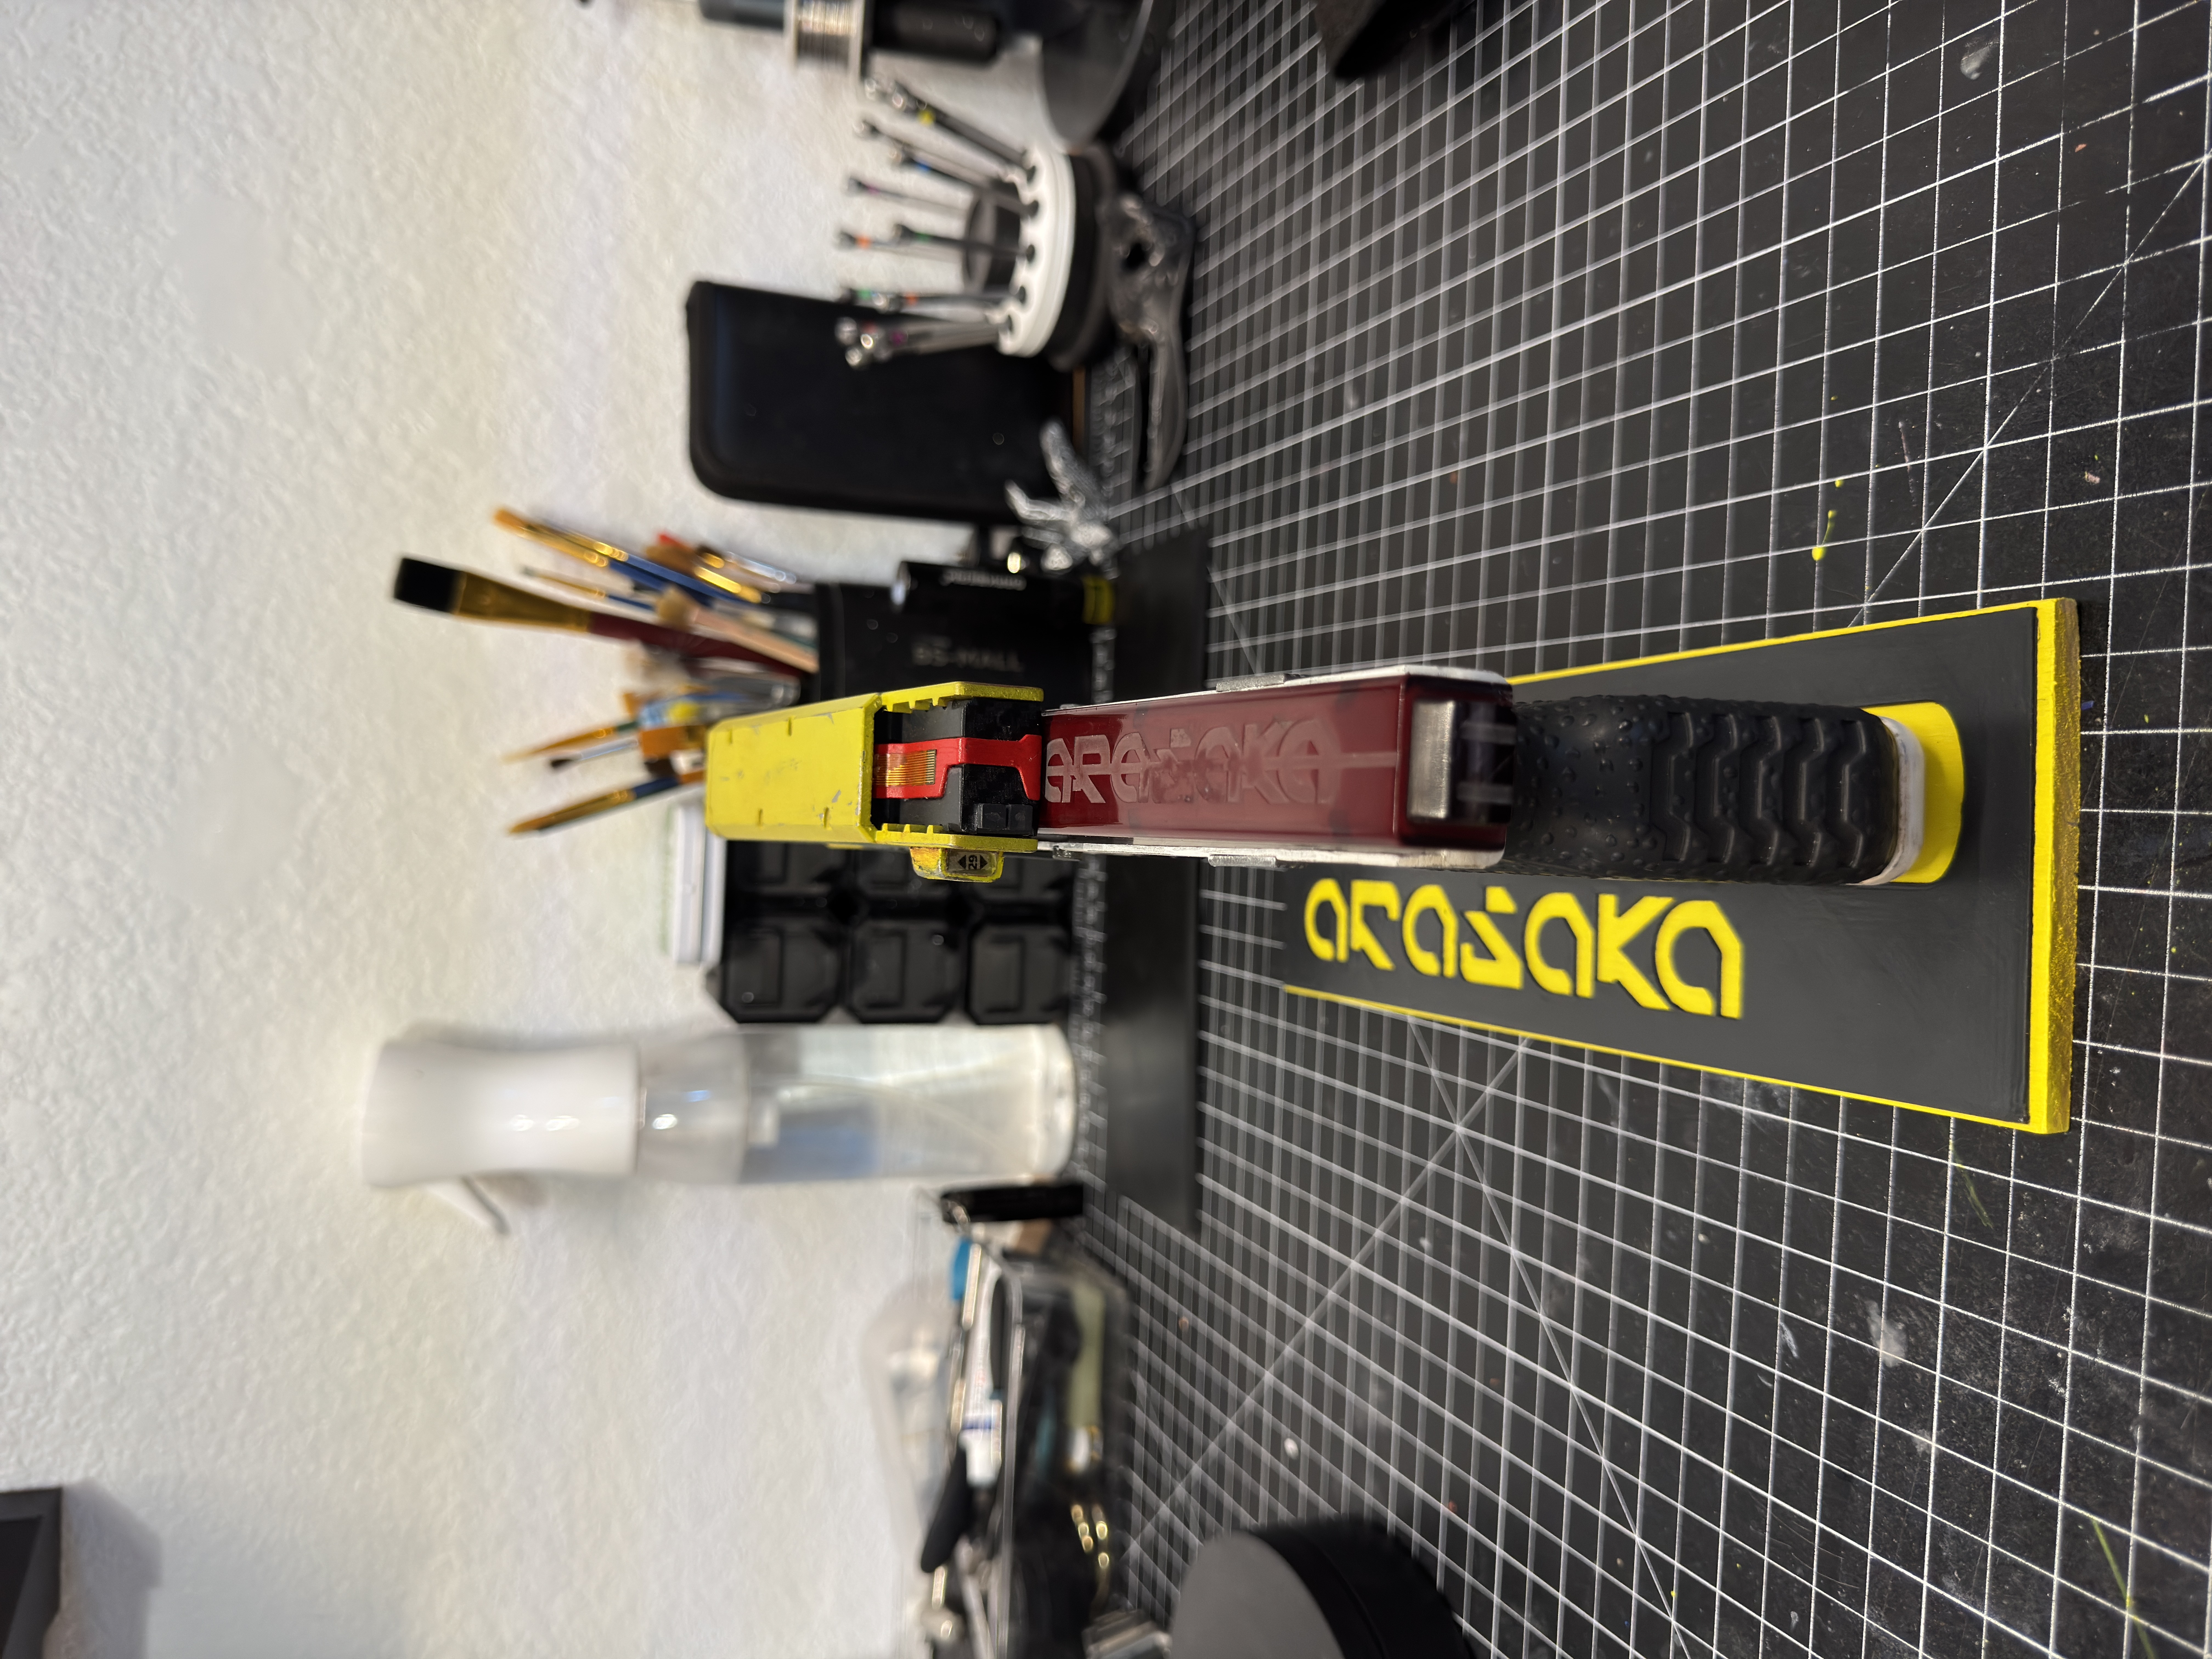
One of the coolest details on Skippy is the translucent magazine. To recreate that look, I printed it using a smoky black transparent resin instead of standard gray.
Printing it transparent was only half the trick though. The game references show a red internal section visible through the magazine, so I sprayed the inside of the print bright red before sealing everything up. The transparent resin softened the color perfectly and gave it the exact look I was after.
Then came several hours of sanding. I wet sanded the magazine through progressively finer grits all the way up to 3000 grit before polishing it until it looked like smoked acrylic instead of resin. Honestly, it's probably one of my favorite parts of the whole build.
Weathering Everything
This is always my favorite stage. Fresh paint almost never looks believable. Props need wear.
Using sandpaper, sanding sticks, hobby tools, and even wooden coffee stirrers, I slowly started wearing away edges and corners where the gun would naturally see use. The magazine well. The grip. Sharp corners. Raised edges. Anywhere that would realistically rub against hands, gear, or a holster.
The hairspray chipping gave me the larger worn areas while careful sanding let me add all the little details.
Once I was happy with everything, I sealed the entire prop using both matte and gloss clear coats depending on the material I was trying to replicate. Different finishes make a huge difference. Rubber shouldn't reflect like painted metal. Plastic shouldn't look like steel. Those little differences make the whole prop feel much more believable.
Hidden Magnets
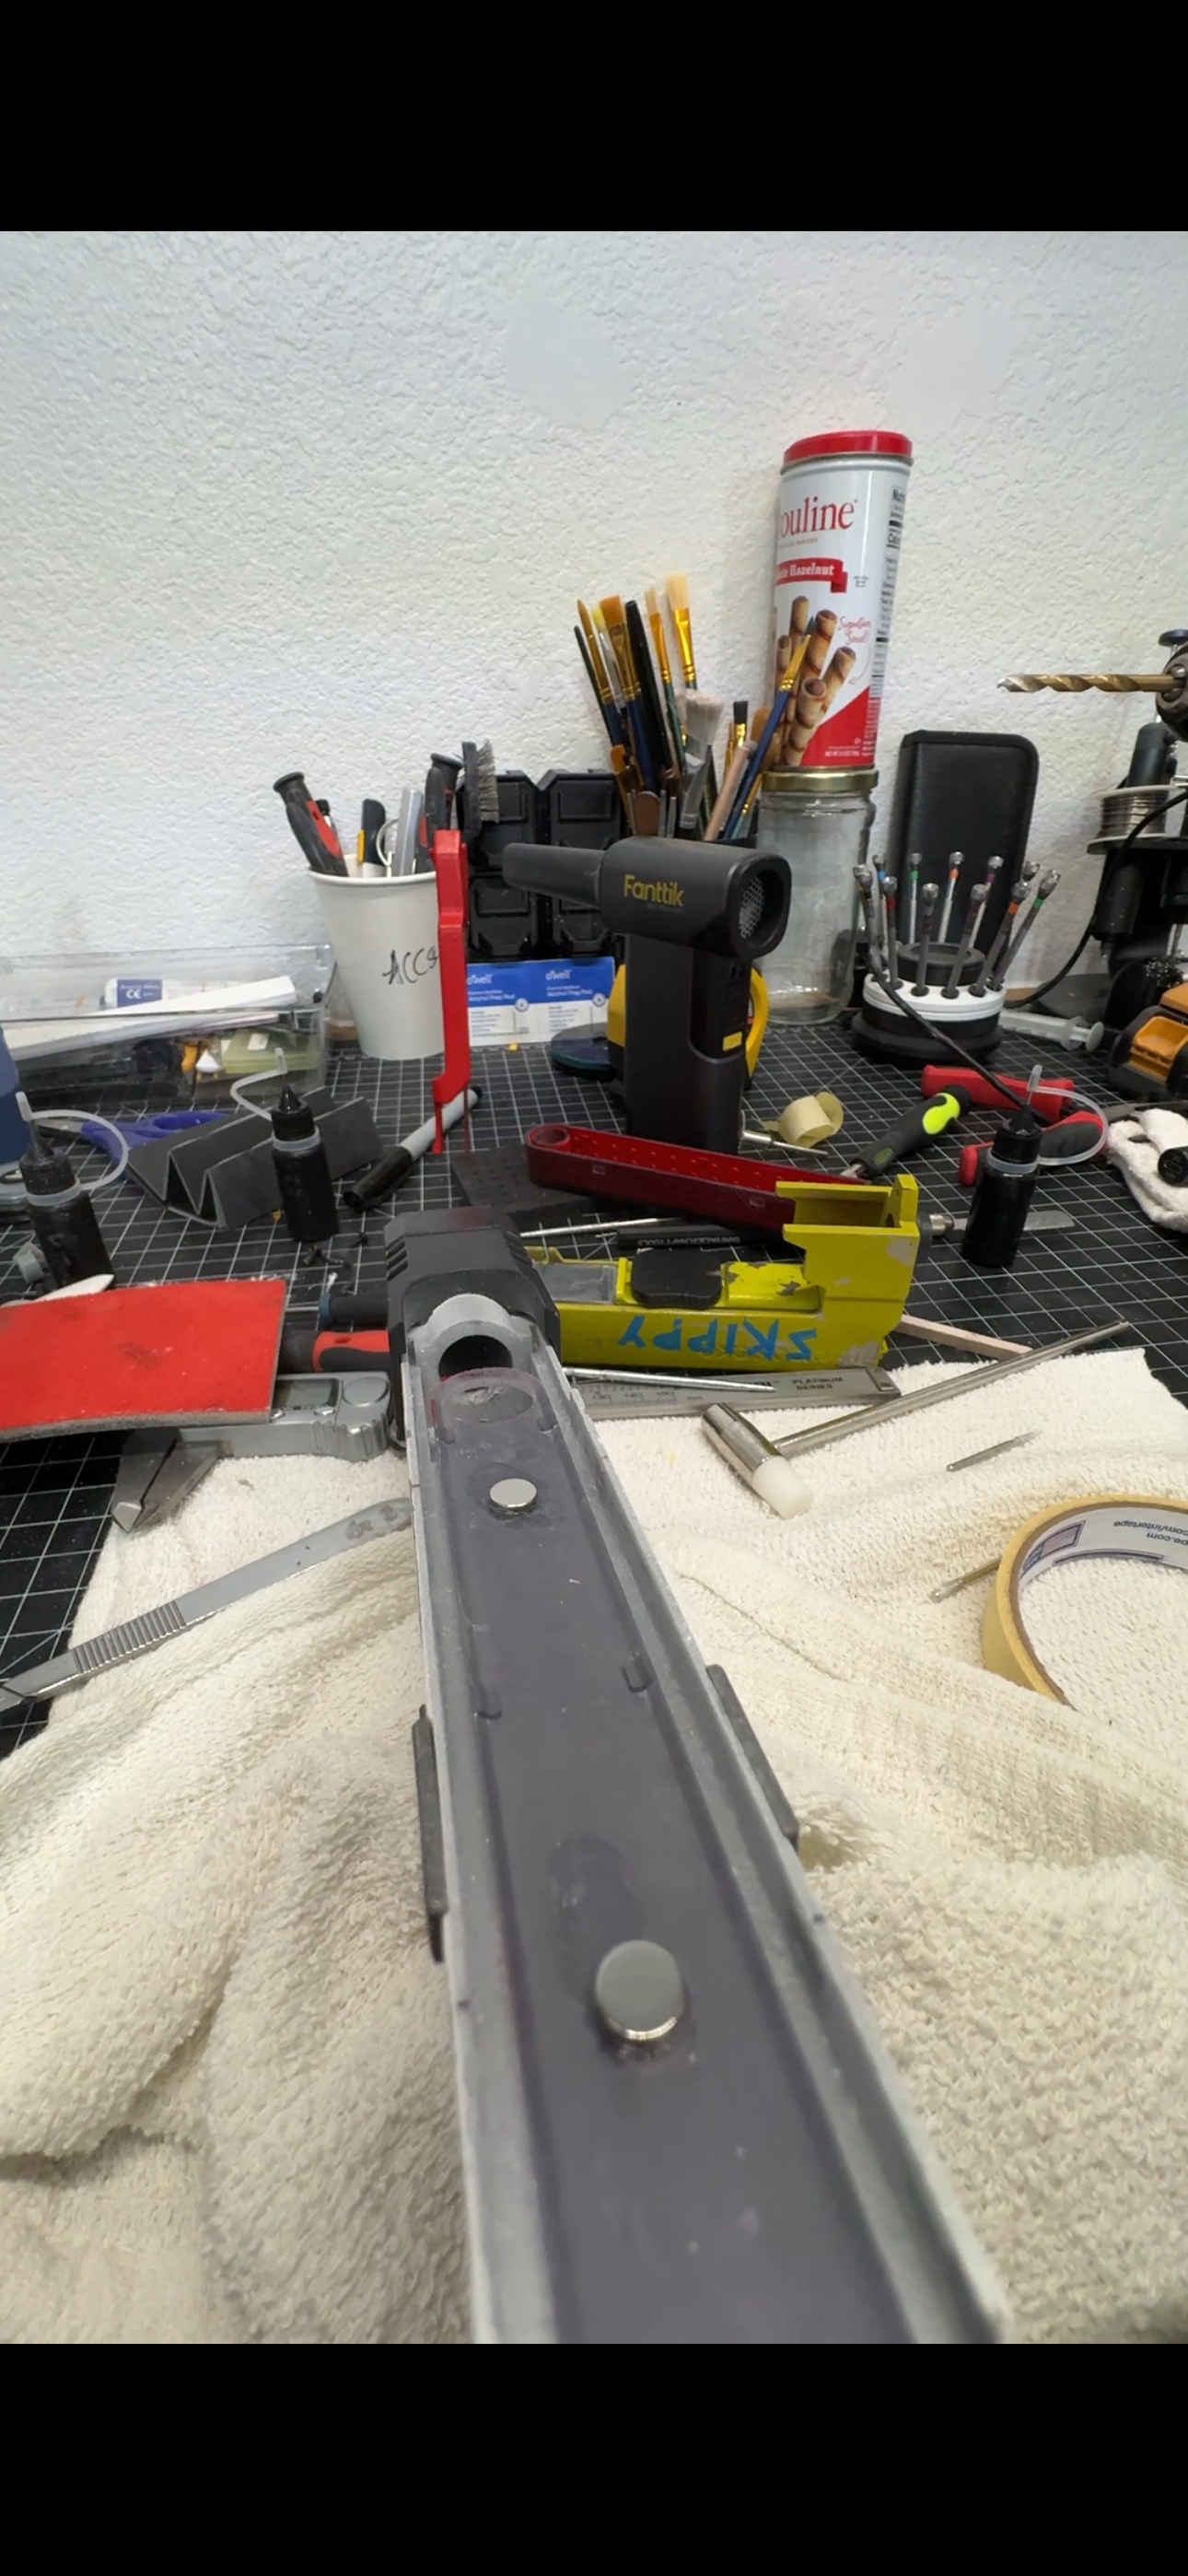
Before final assembly, I made one more modification. I installed neodymium magnets inside the lower receiver and the magazine.
Instead of relying on friction, the magazine now snaps into place with a really satisfying click while still being removable. It's such a small upgrade, but it completely changes how the prop feels every time you pick it up.
Final Details
At this point, the build was finally coming together. Now it was time for all the little things that really sell the illusion.
I designed a custom decal for the illuminated display so it actually looked like a tiny screen instead of just an orange light. I reused some decals from my Trauma Team helmet project, recolored them to better match the Cyberpunk aesthetic, and added those throughout the gun.
I also added real miniature electrical wires around the display area because it looked a little too clean without them. Finally, I wrapped the rear control panel with real carbon fiber vinyl. That little bit of texture helps break up all the painted surfaces and adds another material to the build.
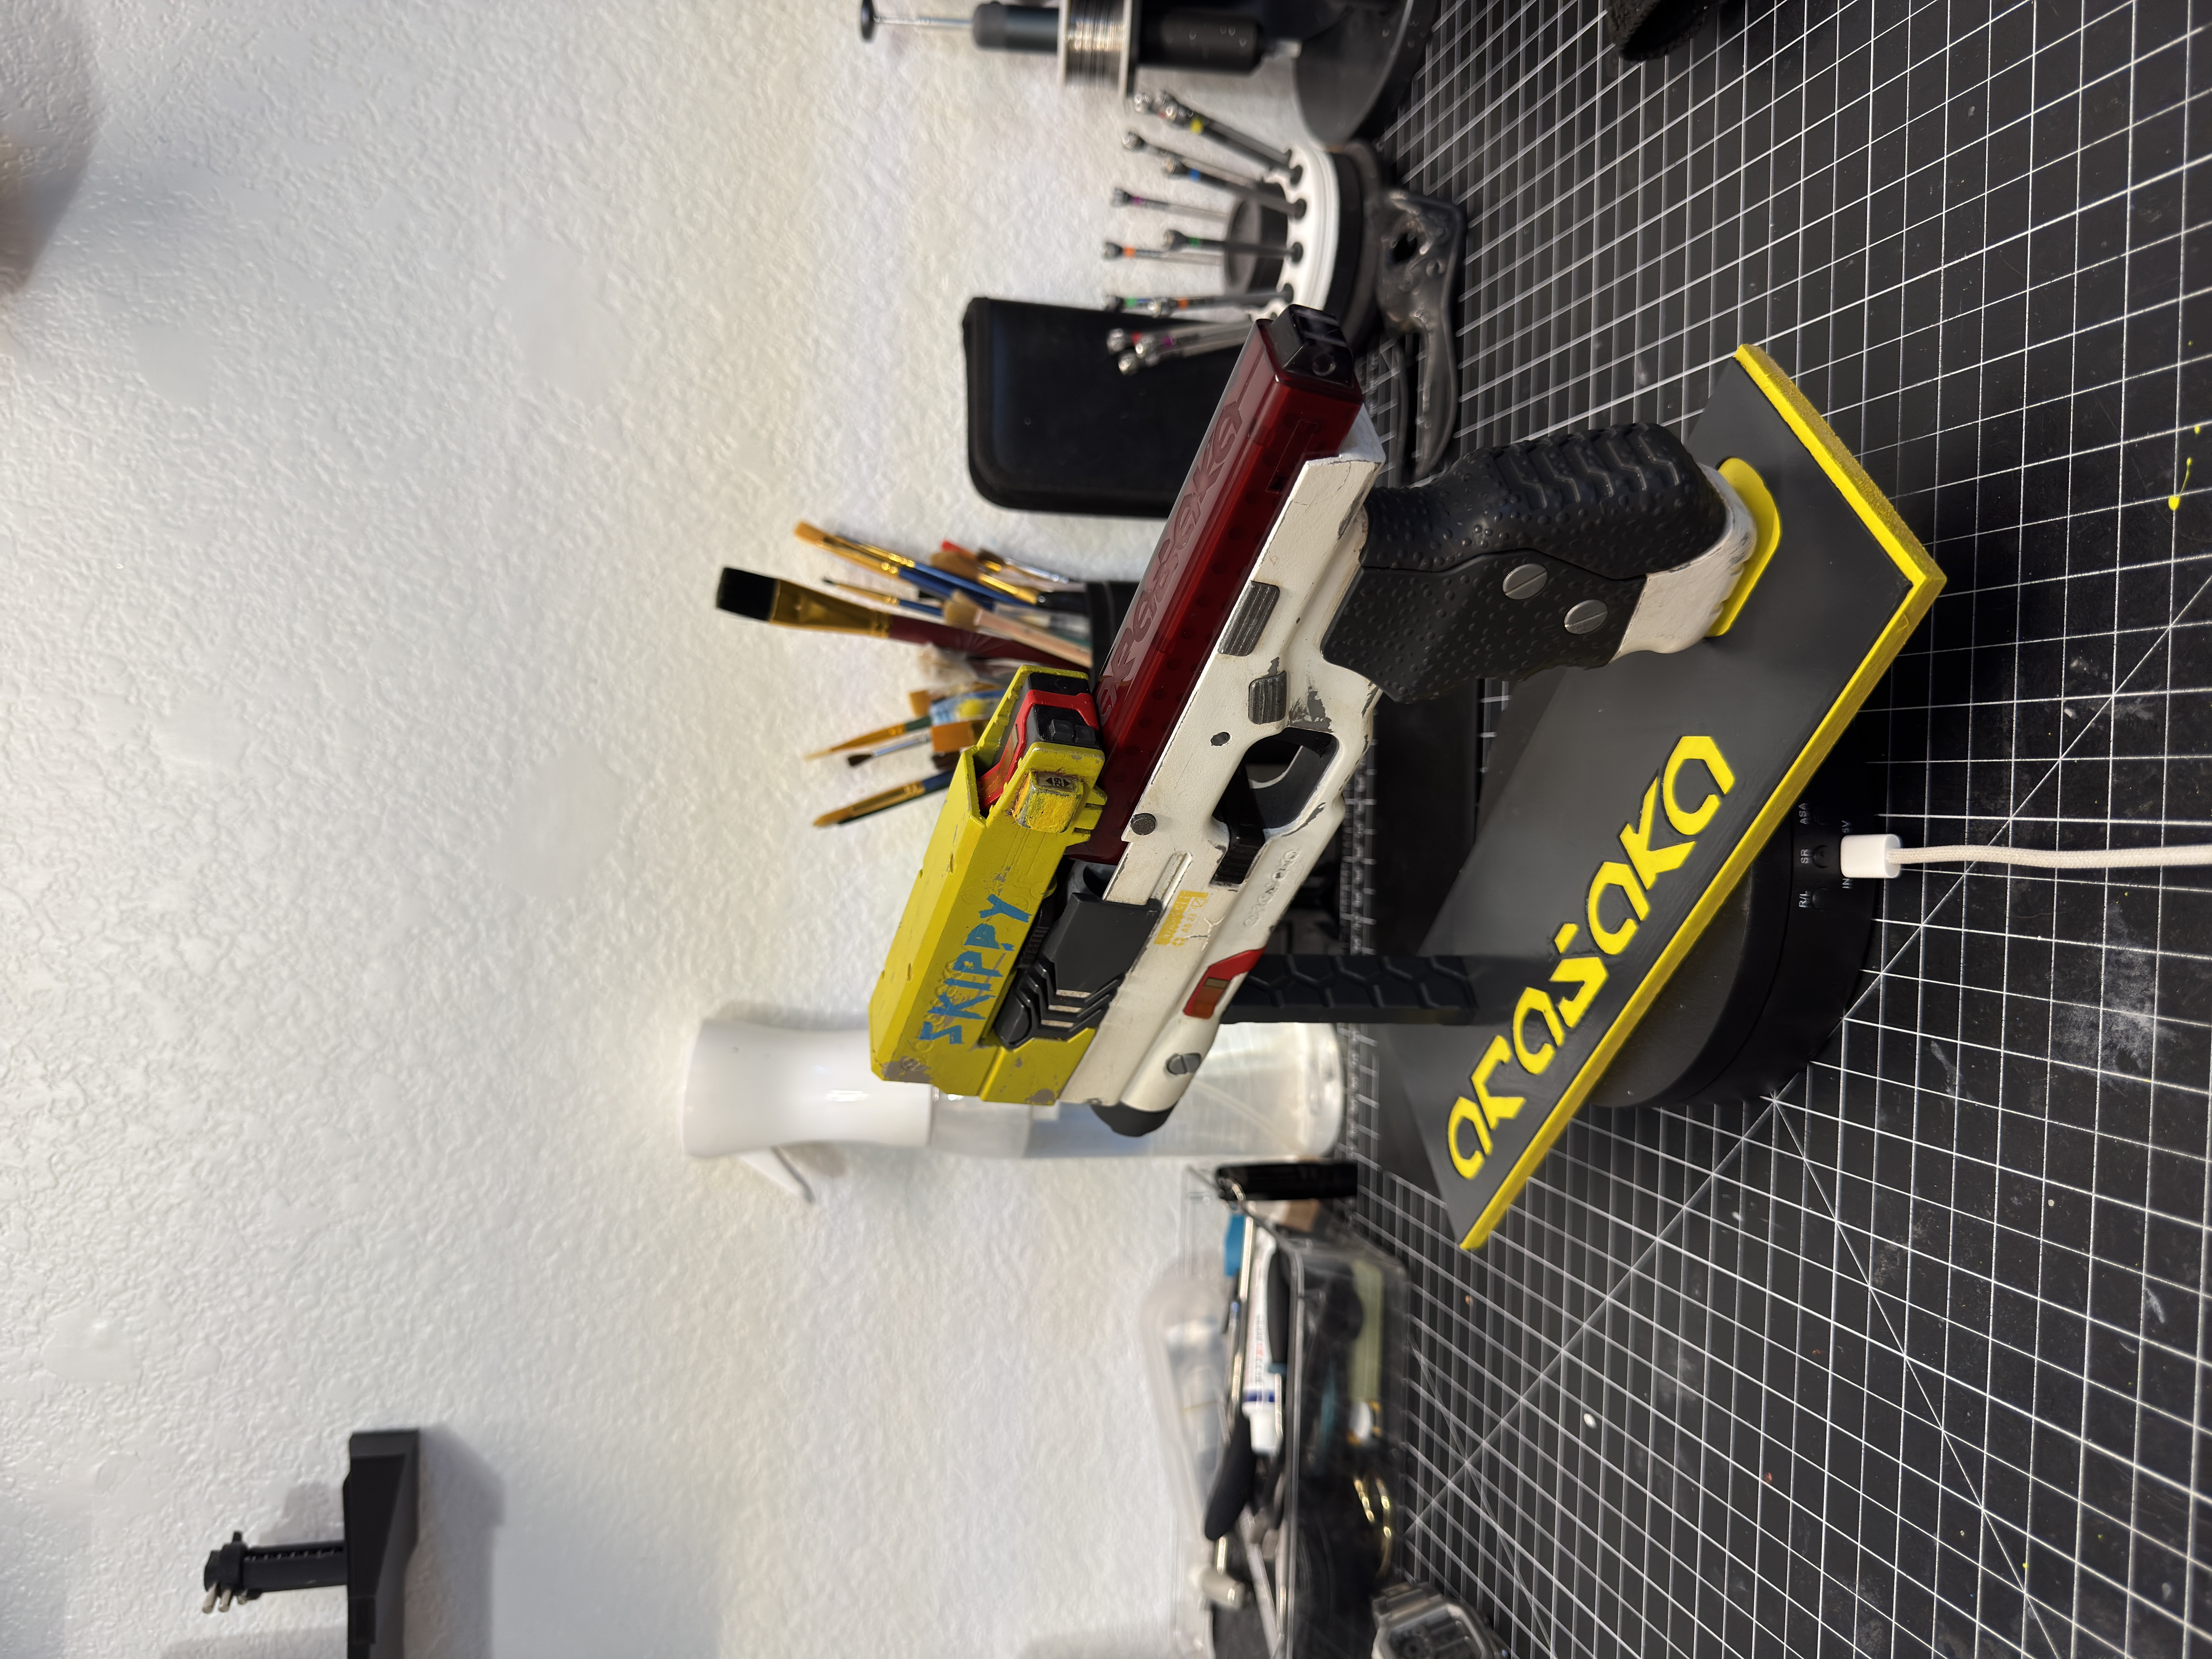
When you look closely, there are painted surfaces, textured rubber, polished transparent resin, glossy decals, exposed wiring, metallic weathering, and carbon fiber all working together. Those are the little details I obsess over.
Building the Display Stand
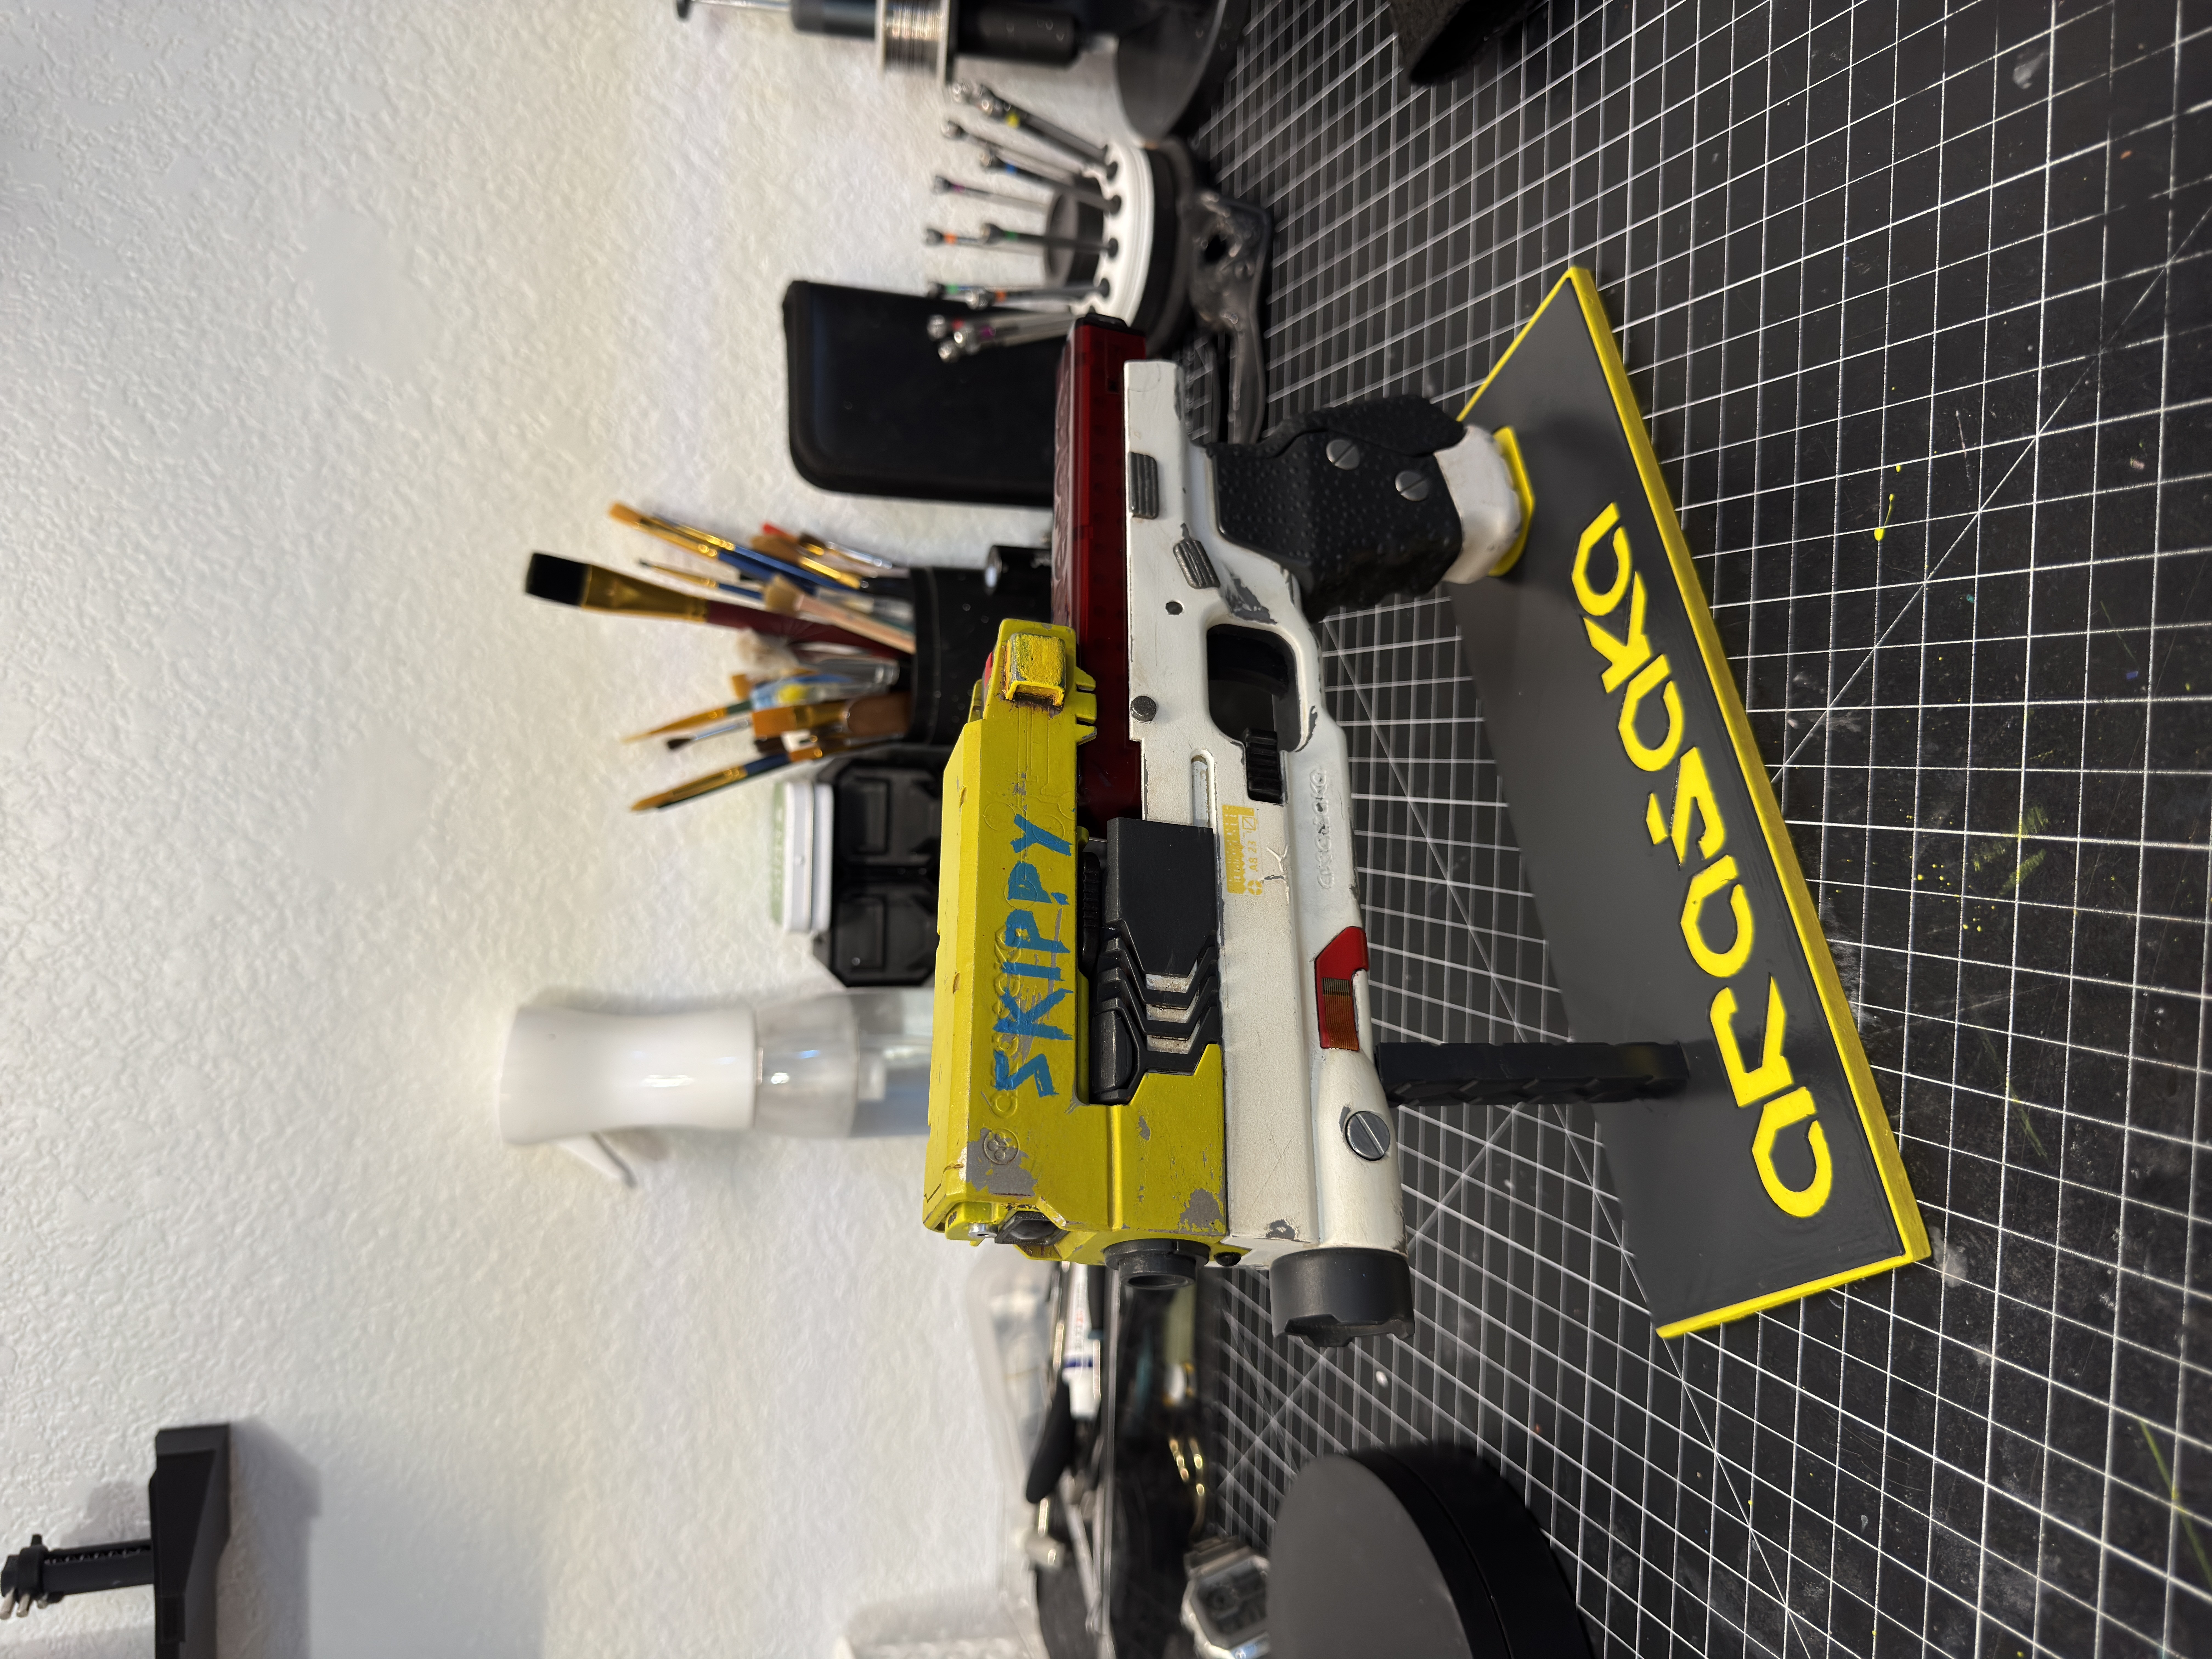
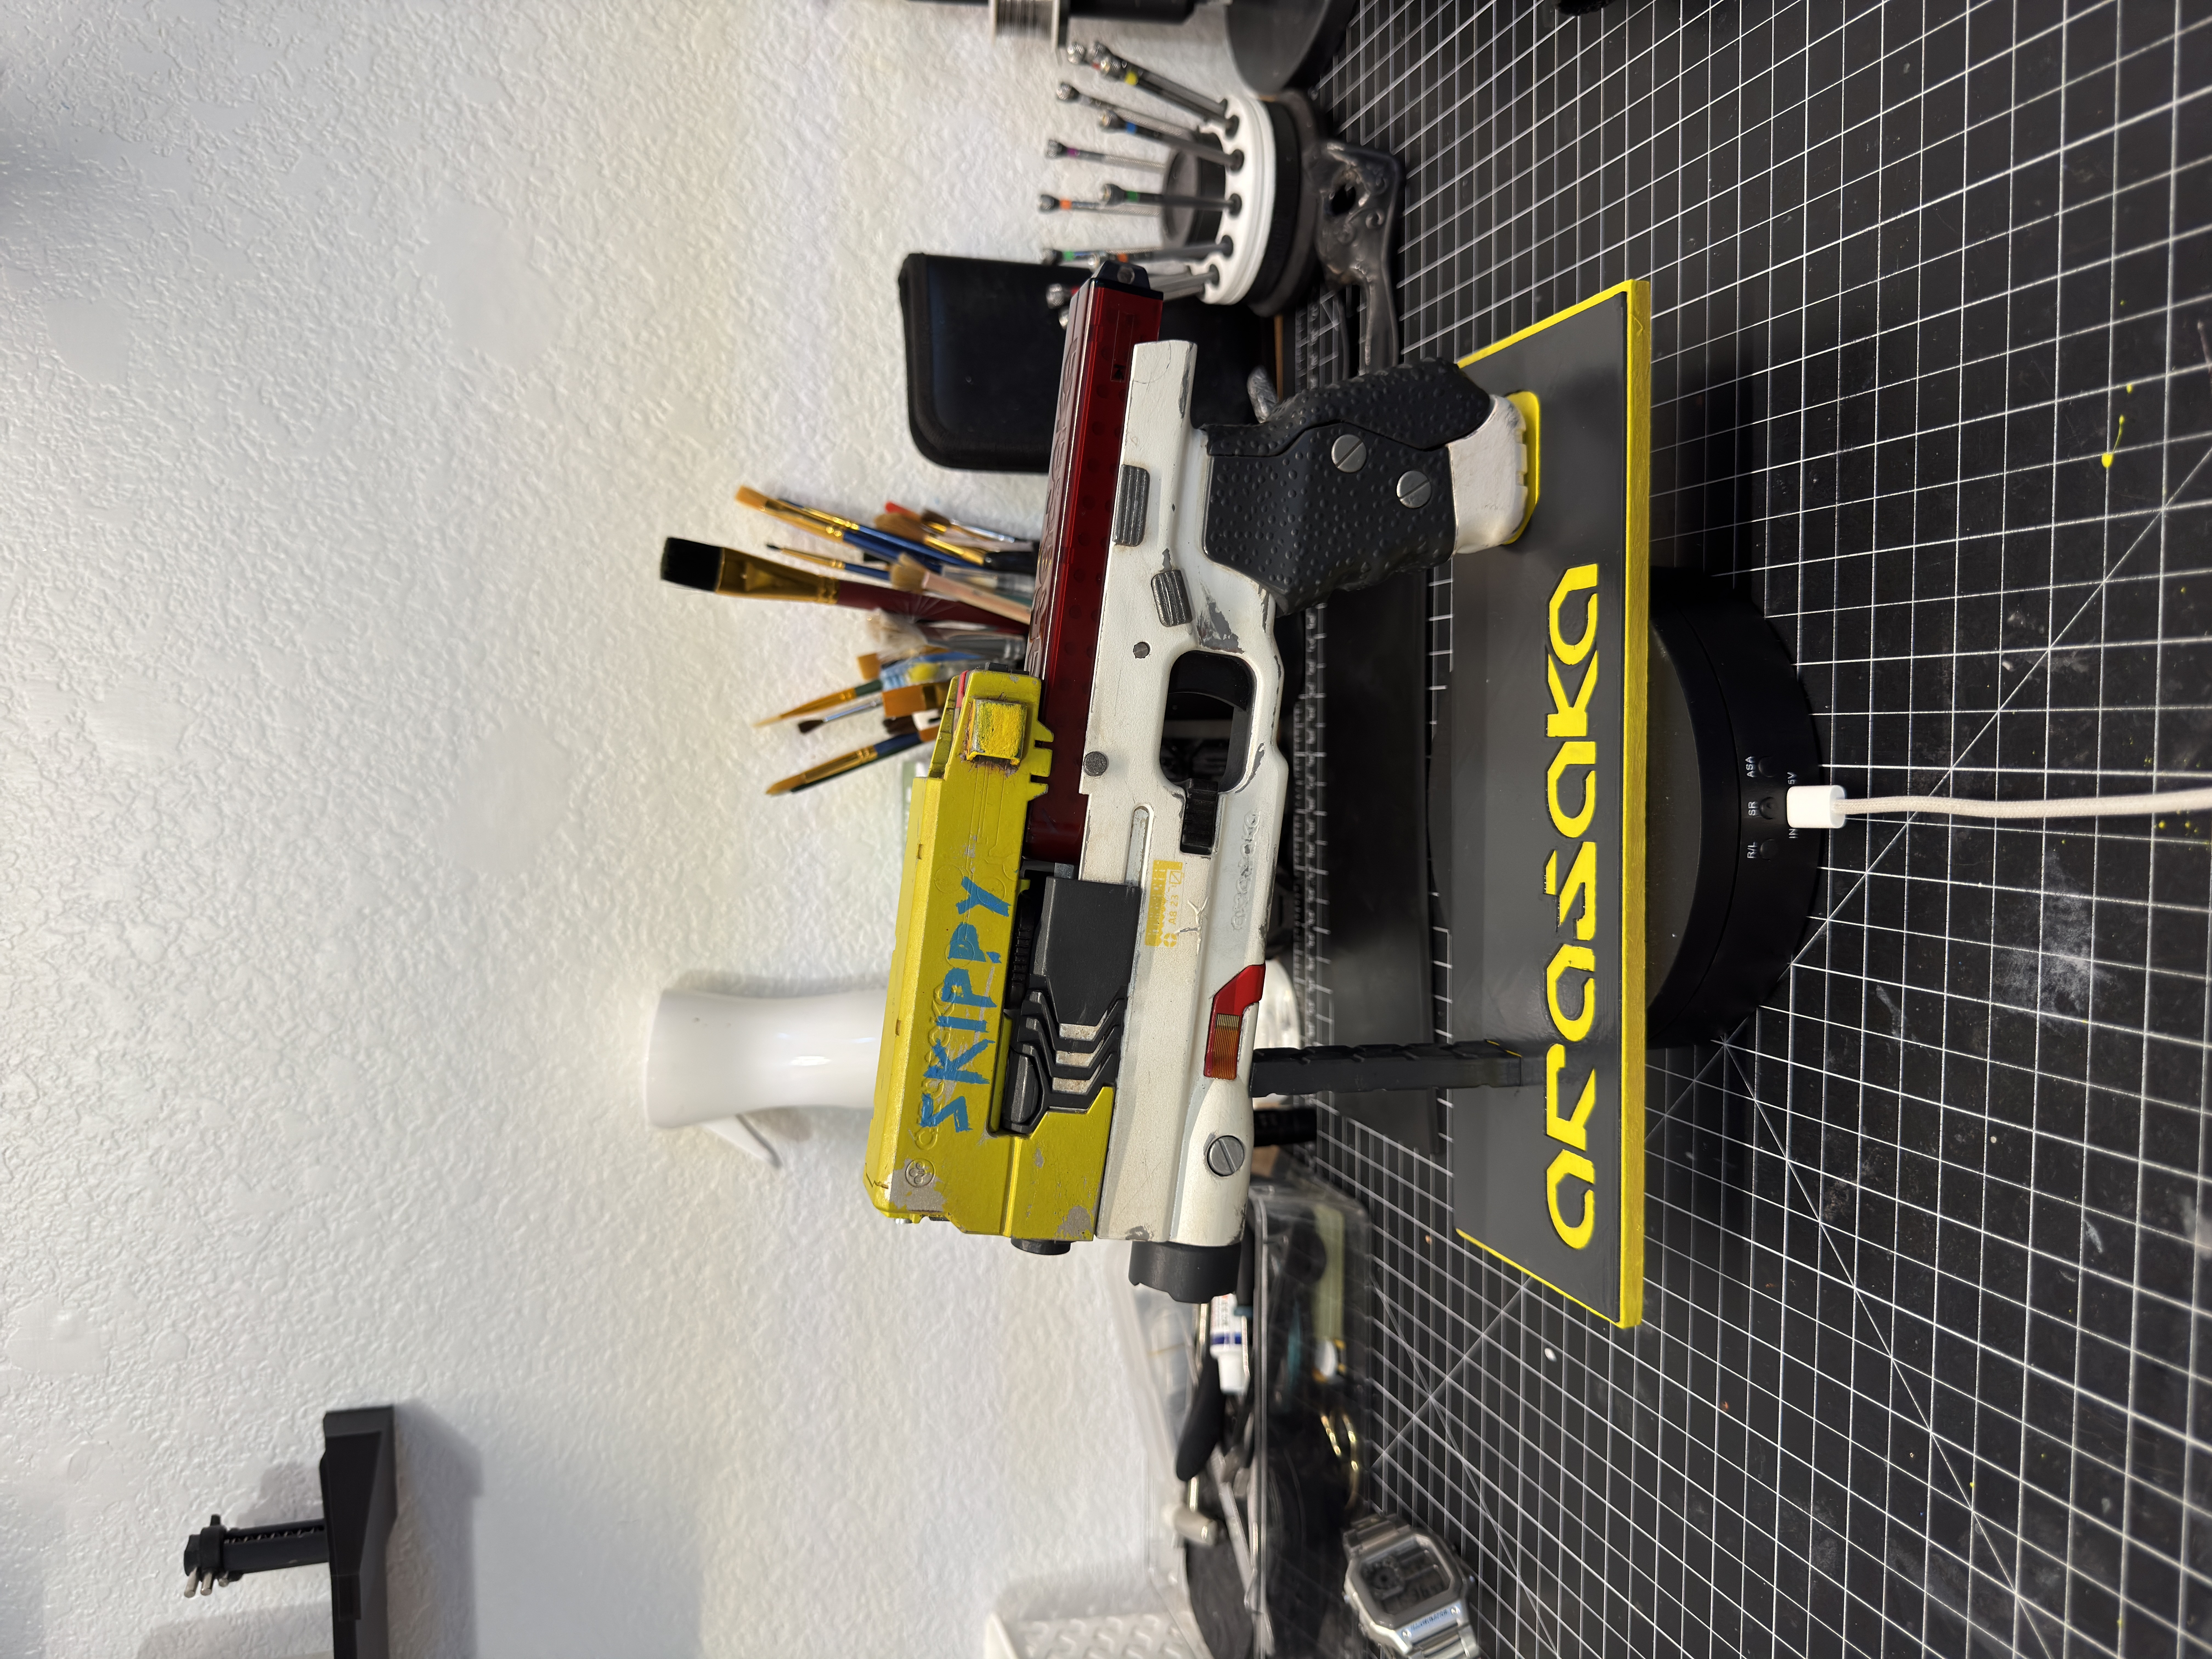
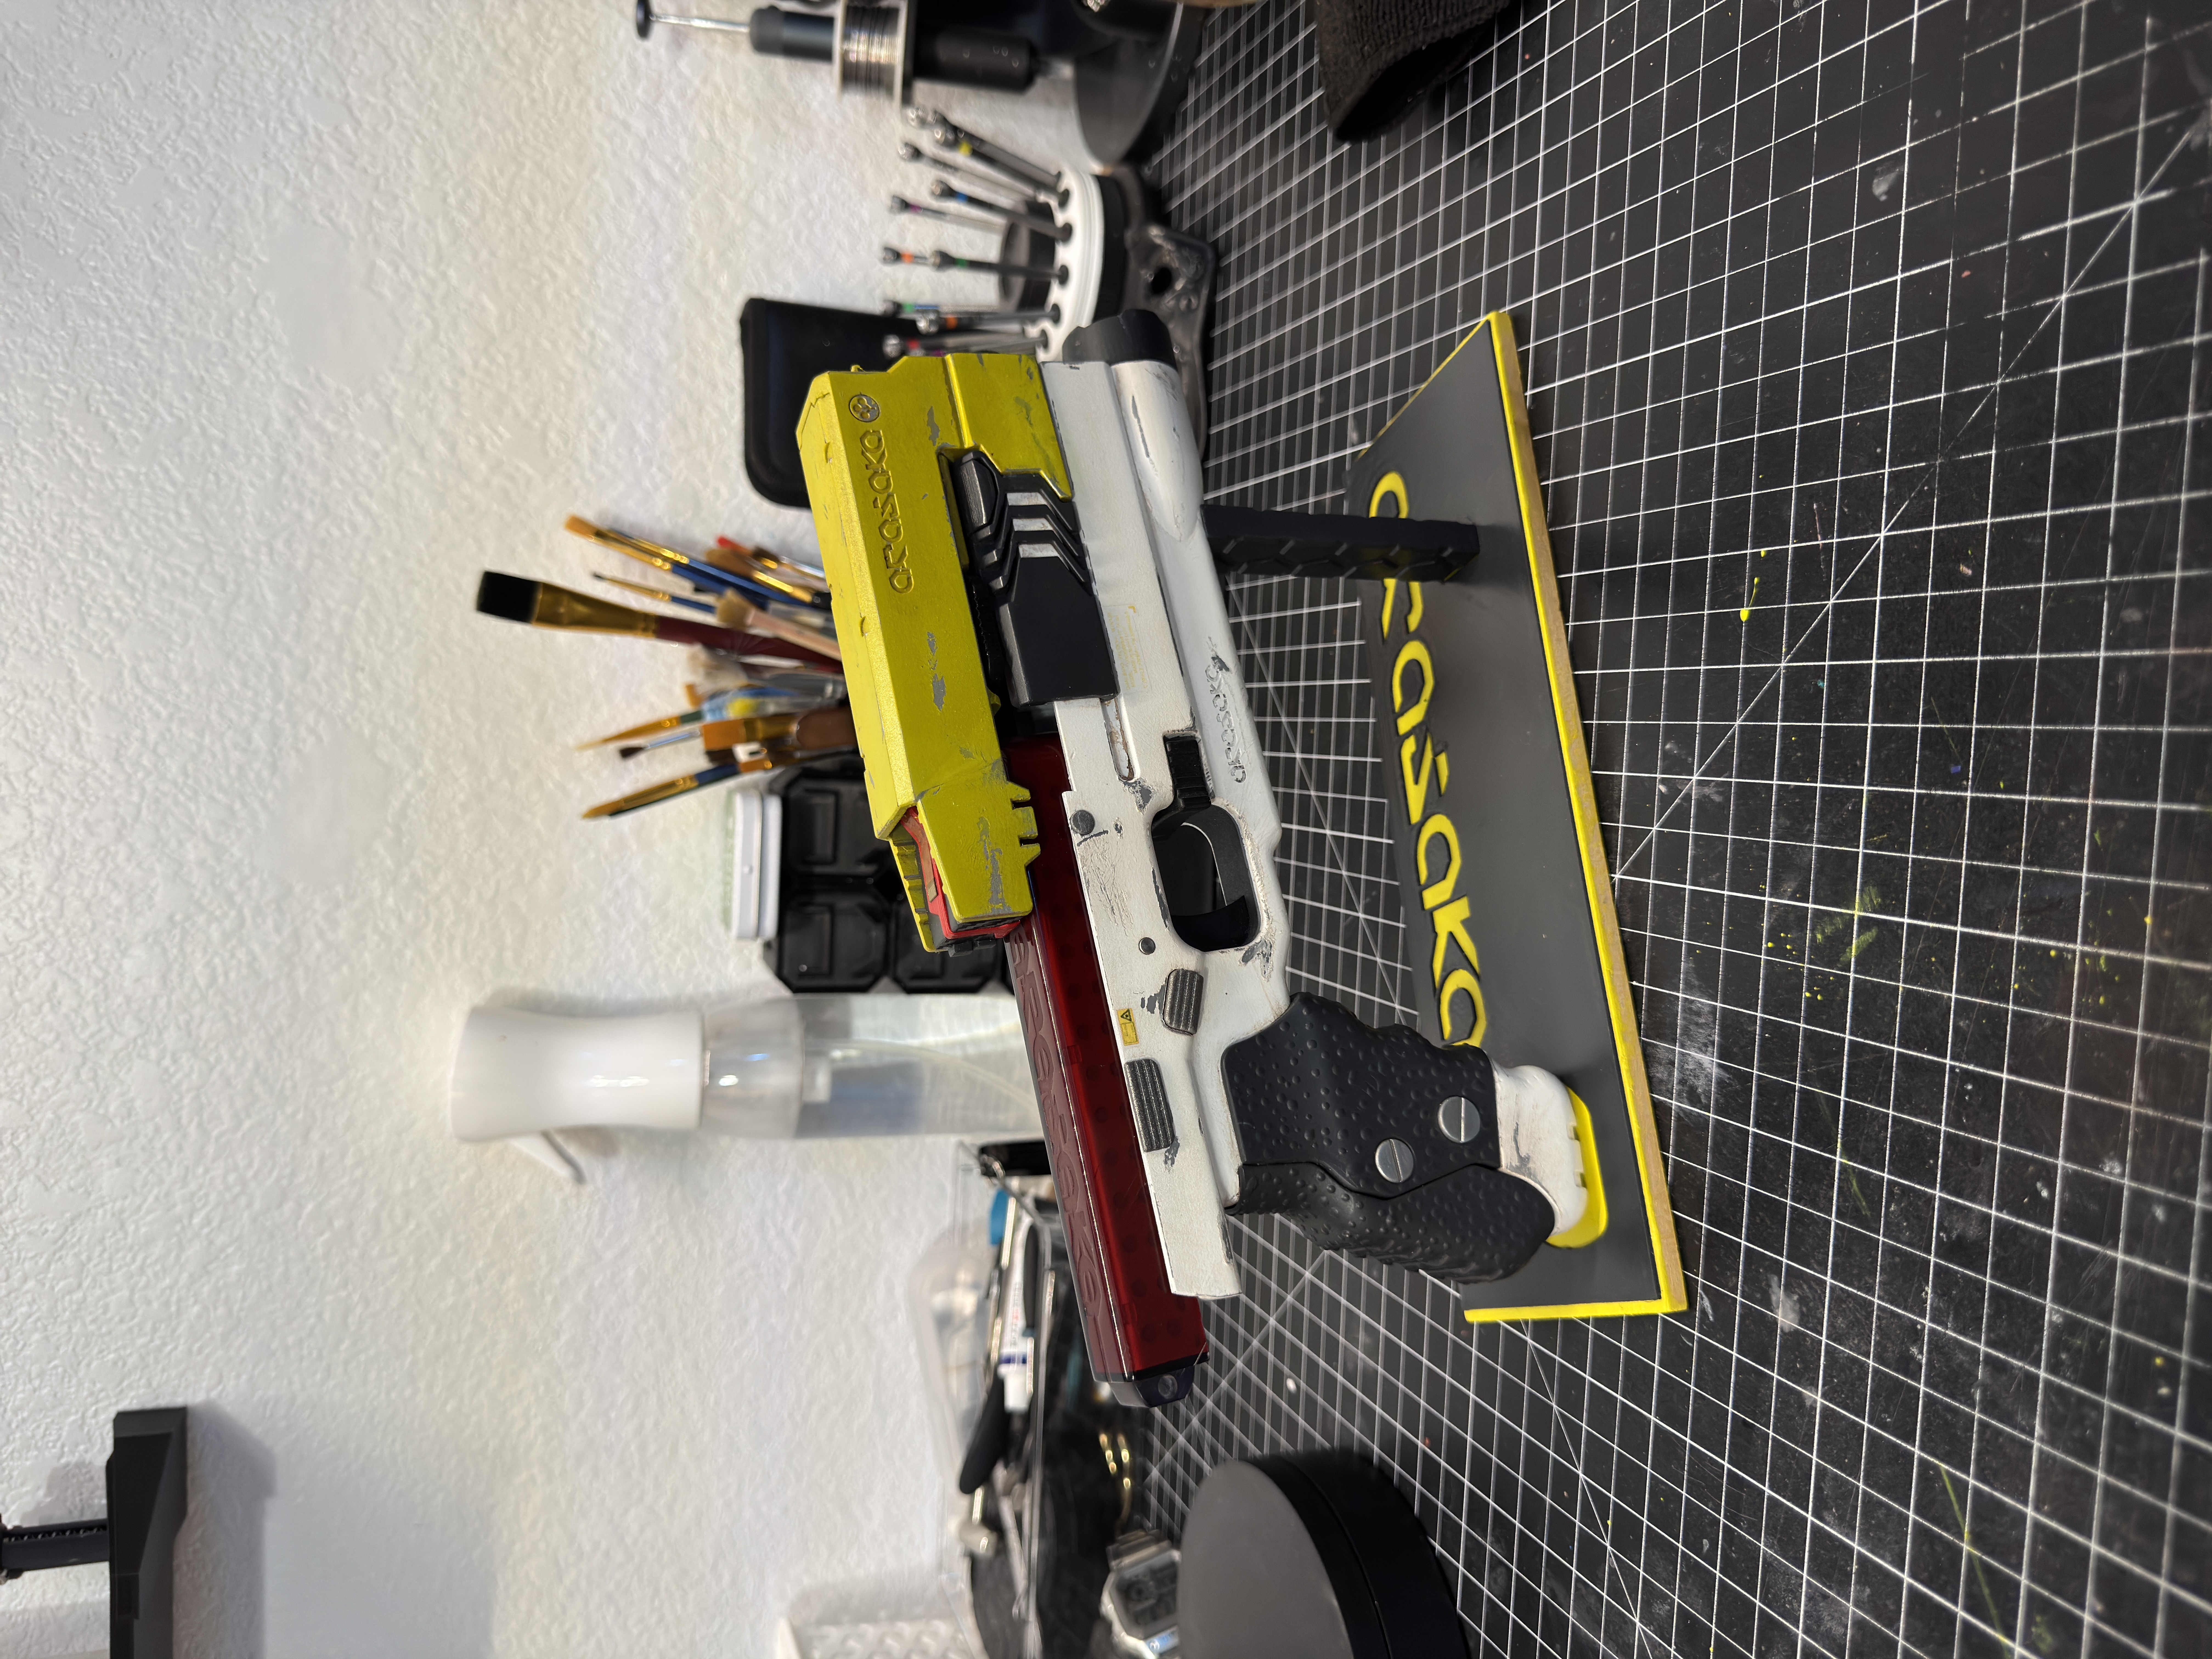
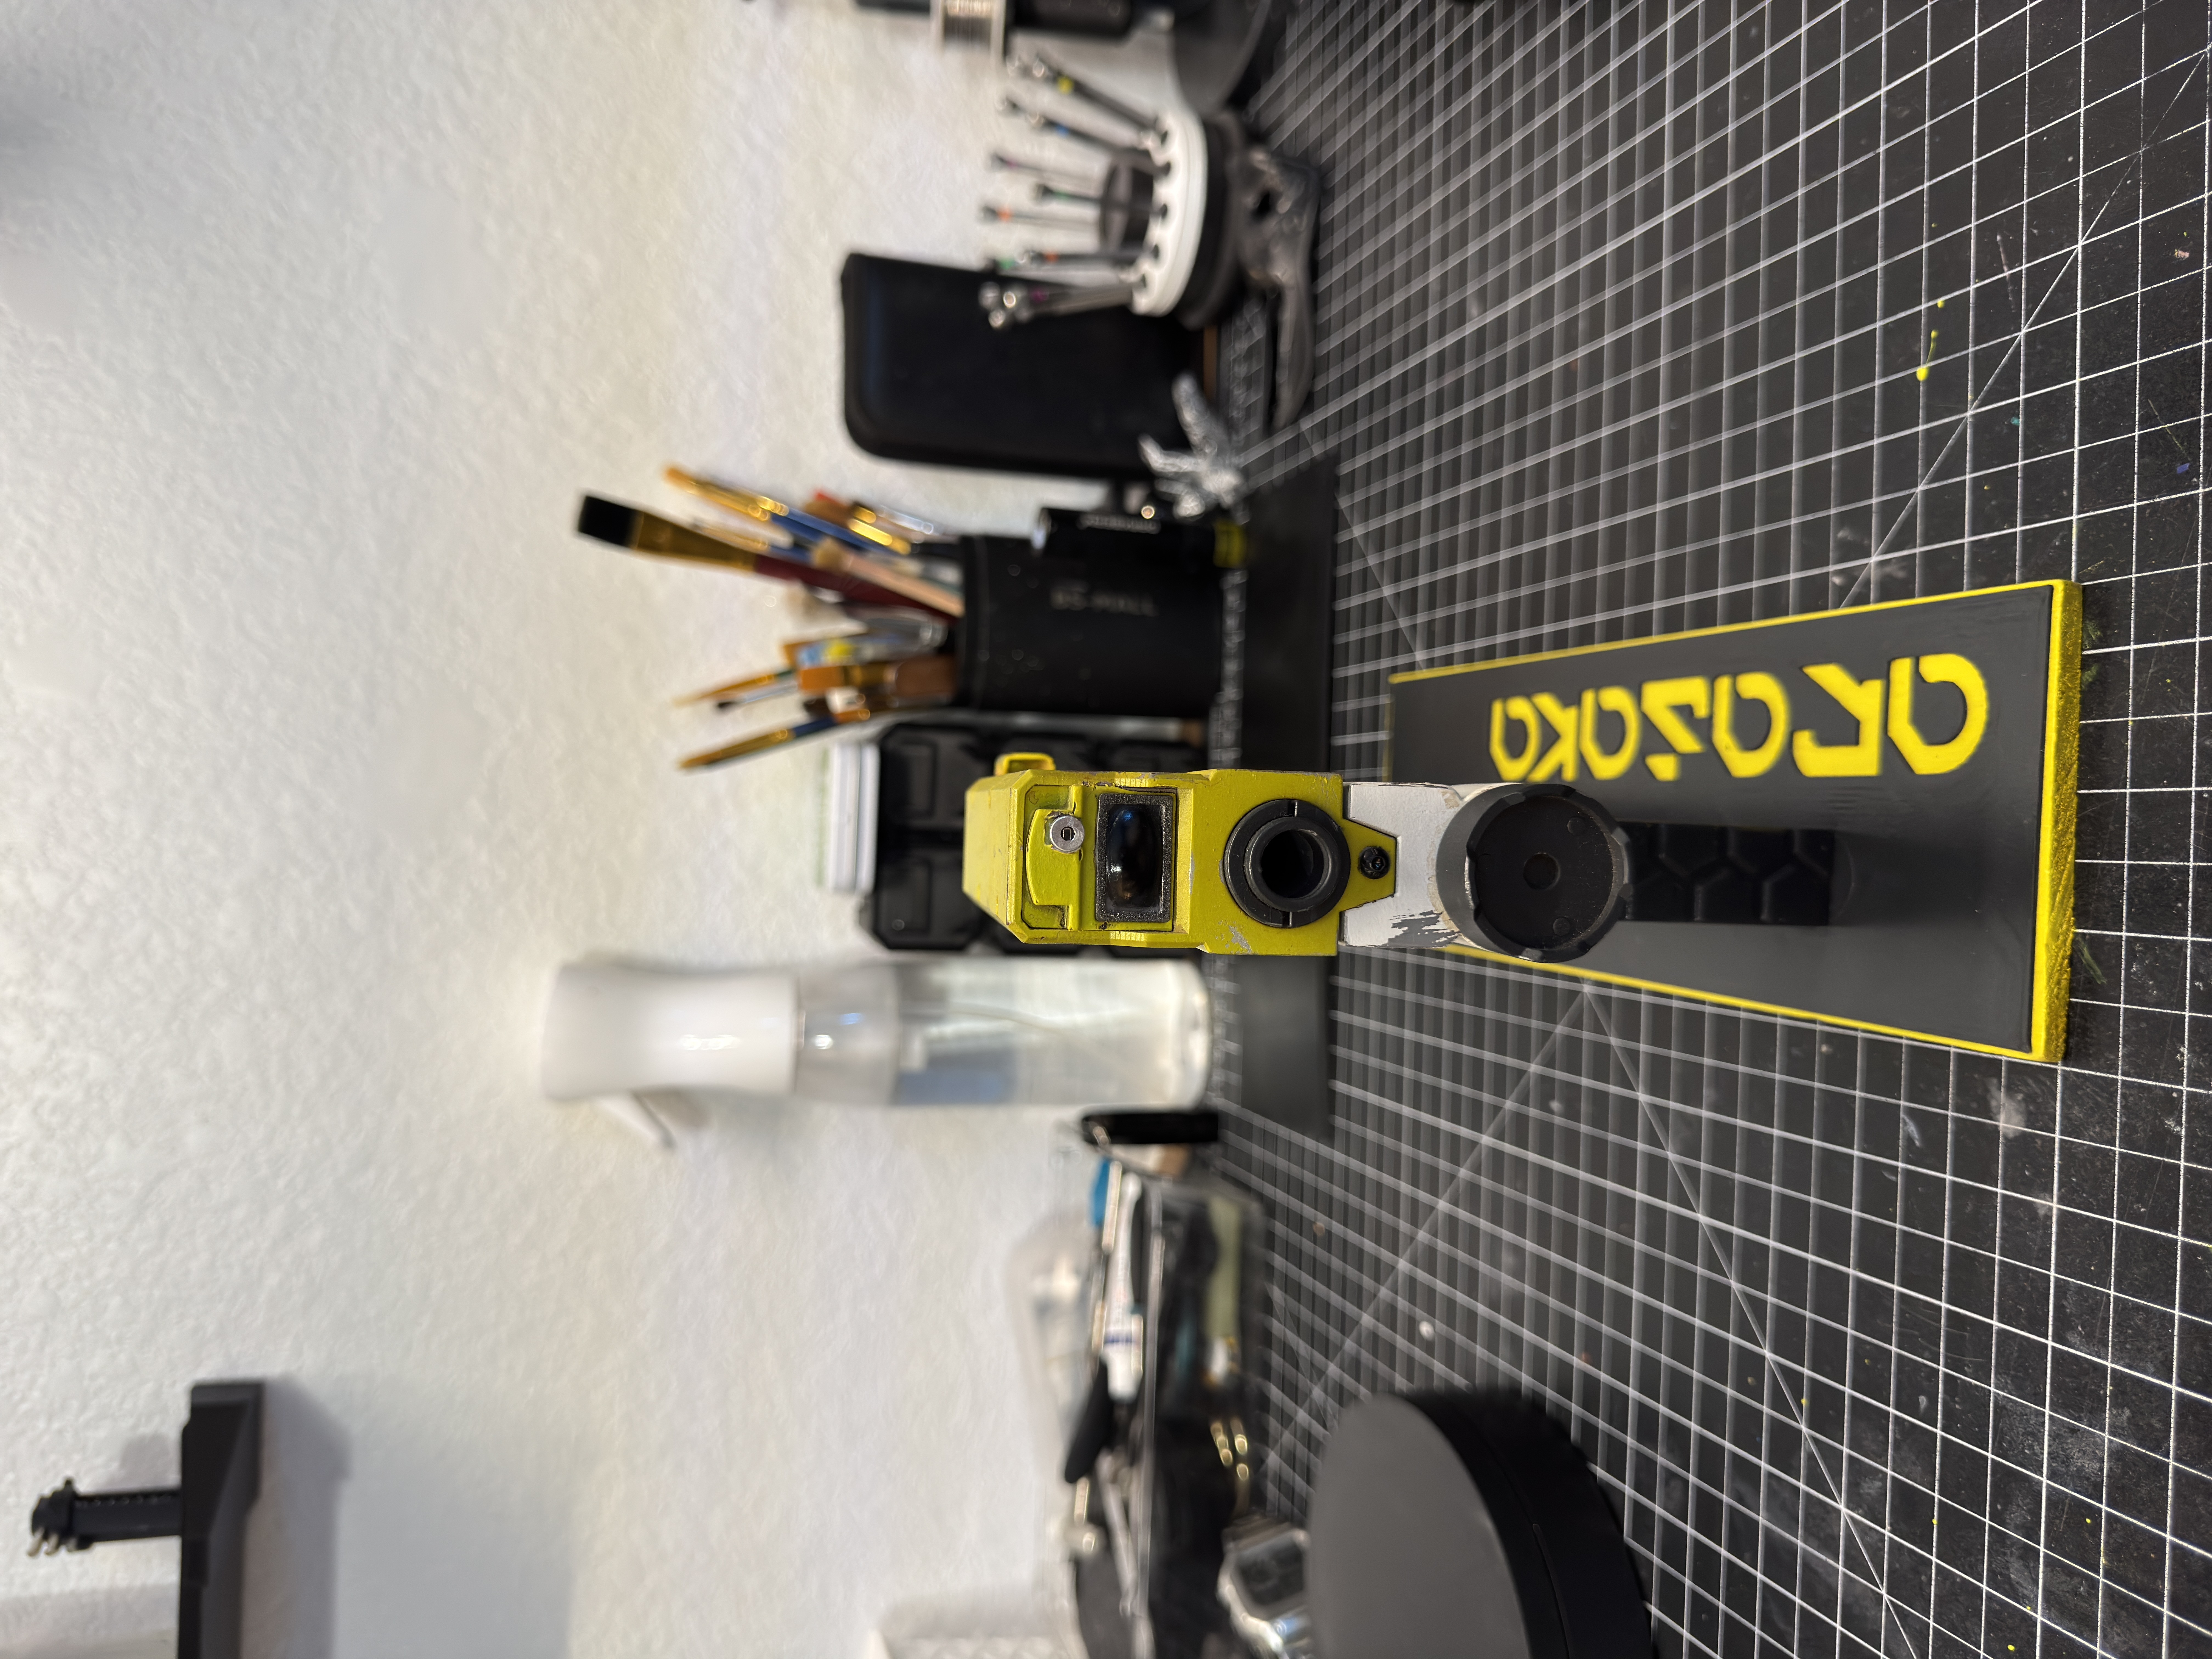
Every prop deserves a nice place to live. I printed a simple display stand for Skippy, but I wasn't completely happy with the printed base. Instead, I replaced it with a real block of wood. It made the stand heavier, sturdier, and honestly just looked a lot nicer sitting on the shelf. Sometimes the stand is just as important as the prop.
Final Thoughts
This build took way longer than I expected. Between repairing print defects, adding custom electronics, designing a battery holder, recreating the grip texture, polishing the magazine, embedding magnets, weathering the paint, and chasing every little detail I could find in the game references, this project turned into something much bigger than I originally planned.
Huge thanks to M1LITECH for trusting me with the files and for working with me throughout the build. Being able to bounce ideas back and forth with the original designer made this project even more fun, and the updated parts they sent over helped push the final replica even closer to the game.
At the end of the day, this is why I love making props. Anyone can hit print. The fun starts after the printer finishes. That's where you get to solve problems, try new techniques, obsess over tiny details that nobody else will notice, and slowly turn a pile of gray resin parts into something that feels like it actually belongs in the world it came from.
Looking at the finished Skippy sitting on the shelf now, it's honestly hard to believe it all started as a bottle of resin and a folder full of STL files. I couldn't be happier with how it turned out, and I have a feeling this one is going to be staying in my collection for a long time.
Complete Build Gallery
All documentation photos from the build process.
Project Status
100%Complete
Techniques
Materials
Standard Gray Resin, Transparent Resin, LEDs, Magnets, Carbon Fiber Vinyl, Spray Paints